
Create and Manage Billing Line Item Descriptions
Last updated on Sep 19, 2026
The Billing Line Item Description Library keeps the billing descriptions for your Items consistent. Each description is a reusable preset of Invoice text, optionally containing placeholder fields that Maxio fills in from Transaction data, so the wording customers see on an Invoice stays standard across Items.
Who can use the library
Working with the library requires Admin permissions. Selecting an existing description while editing an Item requires only Editor permissions. The library is not available on Analytics-only accounts.
Add a description
A description has three parts: the Name you select it by, the Contents that reach the Invoice, and Notes for your own reference.
To add a billing line item description
-
Click Billing Line Item Description Library in the Invoicing section of the Admin screen.
-
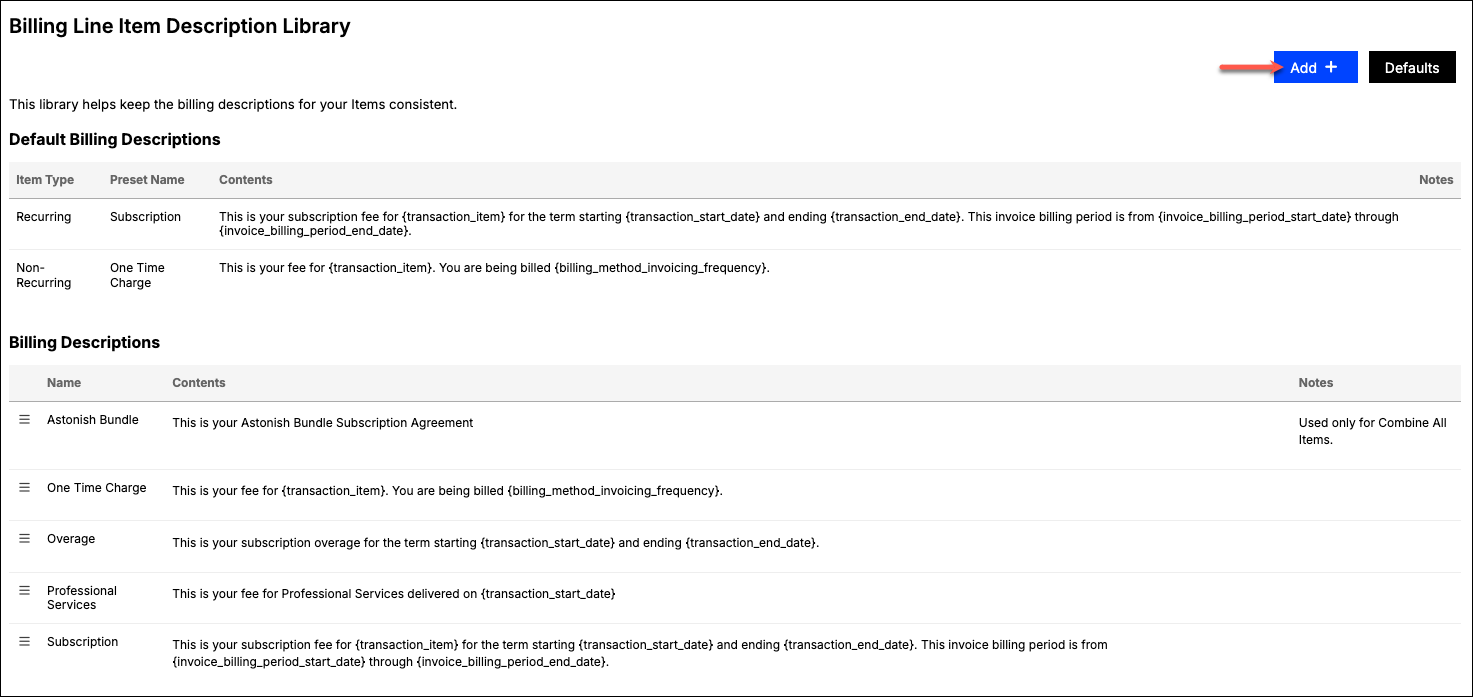
Click Add in the top-right corner.
-
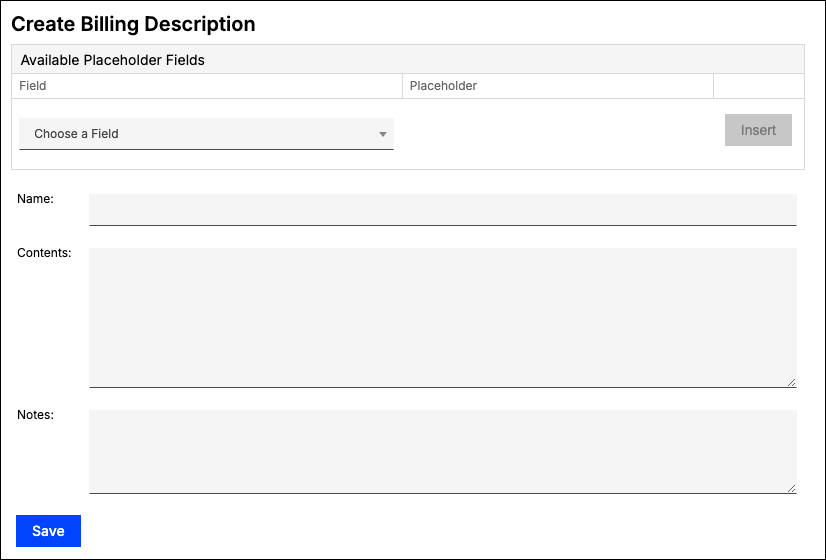
Complete the following fields:
- Name - The name that identifies this description elsewhere in Maxio.
- Contents - The text that appears on the Invoice. To add a placeholder field, choose it from the Choose a Field drop-down above the form and click Insert.
- Notes - Any details you want to record about the description. Notes never appear on an Invoice.
-
Click Save at the bottom of the screen.
You can then select this description when creating or editing an Item.
Placeholder fields available in the picker
The Choose a Field drop-down groups the available placeholders by the record they draw from: Transaction, Item, Contract, and Billing Method. Each Transaction custom field on your account also appears in the Transaction group, listed by its Display Name.
Two entries depend on your configuration. QuickBooks Default Item Description appears only when the QuickBooks integration is enabled, and custom field placeholders appear only for fields your account has set up. For the full list of placeholders and what each one inserts, see Reference Placeholder Fields.
Item description examples
These examples show wording that works well for common billing arrangements.
| Situation | Examples |
|---|---|
| Recurring Items |
|
| Annual subscription invoiced periodically, quarterly or monthly |
|
| Quarterly subscriptions billed in advance |
|
| Quarterly subscriptions billed monthly |
|
| Monthly subscription |
|
| Non-recurring |
|
Set default descriptions
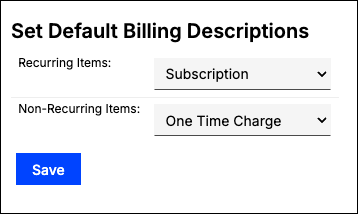
You can nominate one description as the default for recurring Items and another for non-recurring Items. When you create an Item, Maxio fills in the matching default according to the Item's recurrence setting.
To set the default descriptions
-
Click Defaults in the top-right corner of the Billing Line Item Description Library screen.
-
Select a description from the Recurring Items and Non-Recurring Items drop-down menus.
-
Click Save.
Your selections then appear in a Default Billing Descriptions table at the top of the library screen, showing each one's Item Type, Preset Name, Contents, and Notes.
If an Item has no Billing Description of its own, Maxio falls back to the Item's QuickBooks description, and leaves the line blank if there is none.
Edit, clone, or delete a description
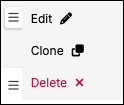
Use the menu icon next to a description in the library to reach these options.
WARNING: Deleting a description cannot be undone, and if that description is set as your recurring or non-recurring default, the default is cleared at the same time. Items already created with the description keep their wording, because the description's text is copied onto the Item rather than linked to it.
- Edit - Change the description's name, contents, or notes.
- Clone - Copy an existing description as the basis for a new one. This opens the Clone Billing Description screen with the original's values already filled in.
- Delete - Remove the description from the library.
Related information
For every placeholder you can insert and what each one produces, see the Reference Placeholder Fields help article.
Still need help?
Reach out and our support team will take it from here.