
Get Started with Maxio Metering
Last updated on Aug 28, 2026
Set up Maxio Metering in Advanced Billing to create a Stream, configure a Meter, and send a test usage event. After setup, you can confirm that Maxio receives usage data and calculates Meter results before connecting usage to billing.
Before you begin
Important: Metering must be activated for your US-hosted Advanced Billing site. Contact your Customer Success Manager or Maxio Support to request Metering activation.
Review these concepts before creating your first Stream and Meter:
- Stream: Defines the event structure Maxio accepts.
- Meter: Calculates usage from Stream events.
- Segment: Groups usage by a string property, such as region or customer tier.
Step 1: Configure Metering
Once Metering is activated, you can configure it for your site.
-
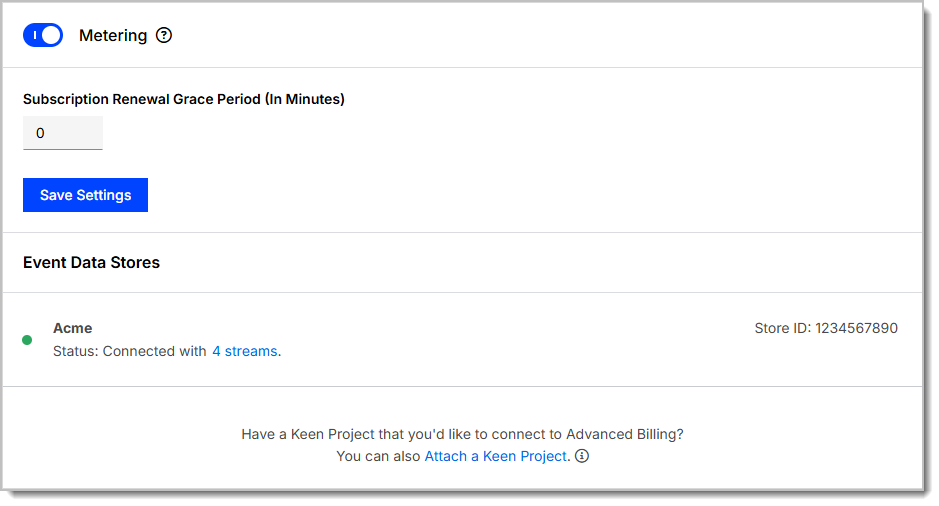
From Advanced Billing, go to Config > Settings > Metering.
-
Toggle on Metering.
-
(Optional) Enter a Subscription Renewal Grace Period (In Minutes) to give Maxio extra time to receive usage data before closing a billing period. Enter a value between 0 and 120.
-
Click Save Settings.
Step 2: Create a Stream
A Stream defines the structure of the usage events your system sends to Maxio.
-
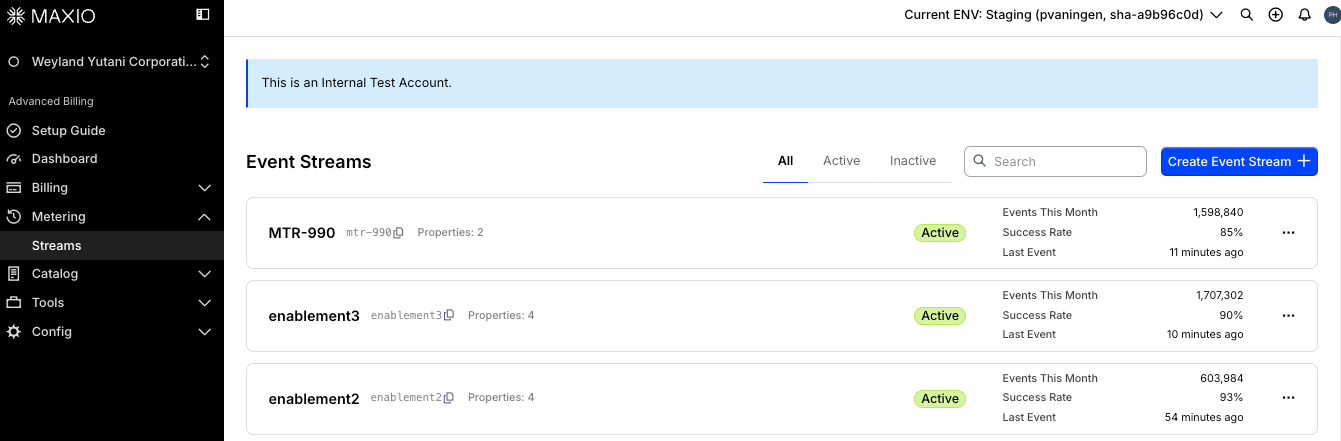
Go to Metering > Streams.
-
Click Create Event Stream.
-
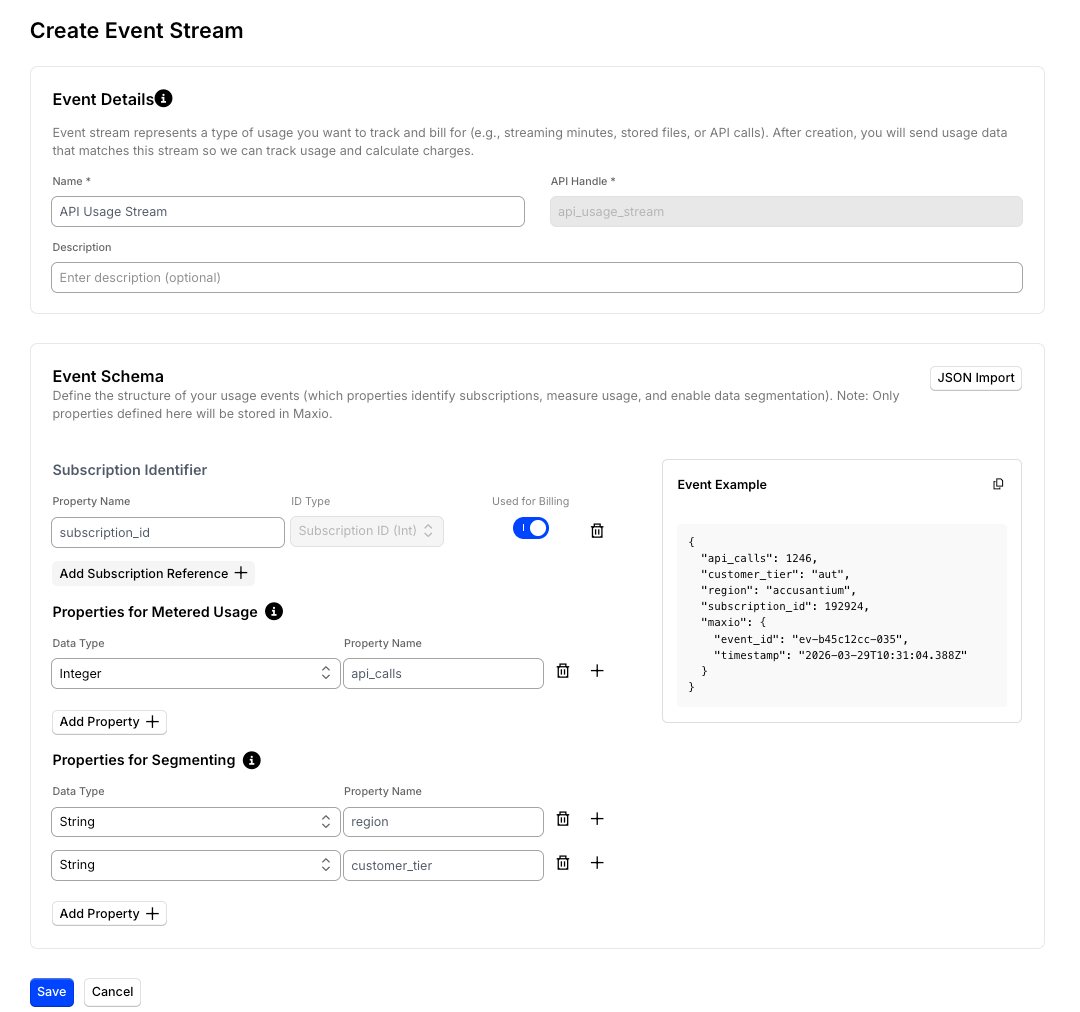
Under Event Details, for Name, enter a descriptive name, such as
API Usage Stream. -
Review the API Handle.
Maxio generates the API Handle from the Stream name and uses it in the events API endpoint.
-
In Description, enter optional context for your team.
-
Under Event Schema > Subscription Identifier, enter a Property Name and select an ID Type, such as
Subscription ID (Int). Click Add Subscription Reference if you also want to identify subscriptions by an external reference ID. -
Under Properties for Metered Usage, click Add Property for each numeric field your events include. Select a Data Type of Integer or Float, and enter a Property Name.
-
Under Properties for Segmenting, click Add Property for each field you want to group usage by. Select a Data Type (Integer, String, Float, or Boolean), and enter a Property Name.
Example setup:
Property name Section Data type api_callsProperties for Metered Usage Integer regionProperties for Segmenting String customer_tierProperties for Segmenting String -
Review the Event Example panel, which updates as you add properties.
-
Click Save.
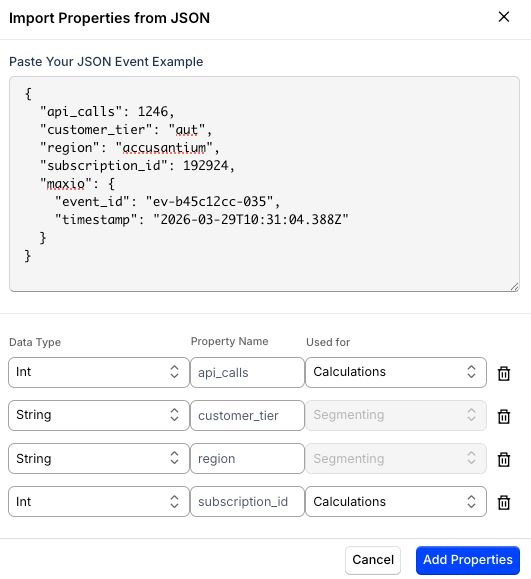
If you already have an event format, click JSON Import, paste a sample event, and Maxio detects the fields automatically. For each detected property, select a Data Type and whether it's used for Calculations or Segmenting, then click Add Properties.
Step 3: Create your first Meter
A Meter defines how Maxio calculates usage from Stream events.
-
Open the Stream you created.
-
Click the Meters tab.
-
Click Create Meter.
-
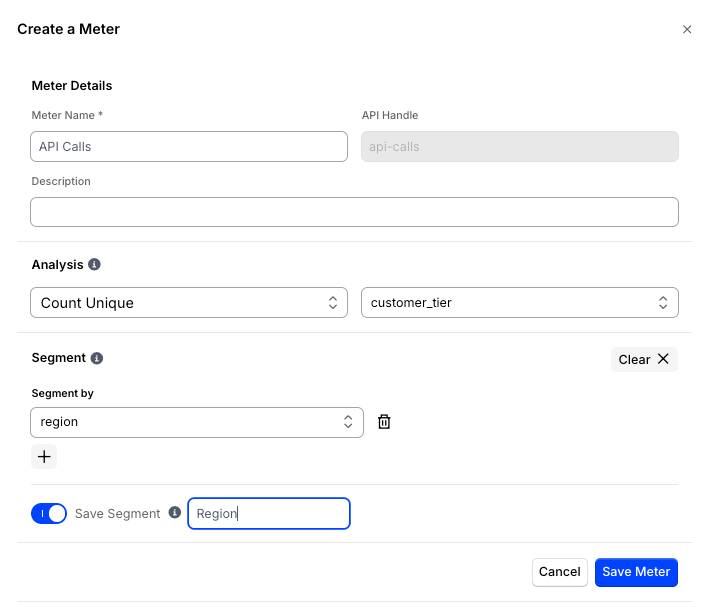
In Meter Name, enter a descriptive name, such as
API Calls. -
Under Analysis, select an analysis type:
- Count: Counts the total number of events.
- Count Unique: Counts distinct values for a selected property.
- Sum: Totals the values of a selected numeric property.
- Average: Averages the values of a selected numeric property.
- Minimum: Returns the lowest value for a selected numeric property.
- Maximum: Returns the highest value for a selected numeric property.
-
For every analysis type except Count, select the property to aggregate.
-
Under Segment, select an existing segment from the Select Segment dropdown, or select New Segment and choose a property under Segment by.
-
(Optional) Turn on Save Segment and enter a Segment Name to make the segment reusable.
-
Click Save Meter.
Step 4: Send a test event
After the Stream and Meter are configured, send a test event that matches the Stream schema.
-
Go to Metering > Streams and open the Stream.
-
On the Stream's detail page, click the Copy icon next to the API Handle to copy the stream URL (also known as the API endpoint URL) to the clipboard.
-
Send a POST request with a JSON payload that matches your Stream schema.
Include:
- Your subscription identifier (matching the type selected on the Stream)
- The event properties you defined
A successful request returns a 2xx response.
Step 5: Confirm the event and Meter result
After sending the event:
- Go to Metering > Streams and open the Stream.
- Click the Events tab.
- Confirm that the event appears.
- Check the success rate stat to confirm no validation errors occurred.
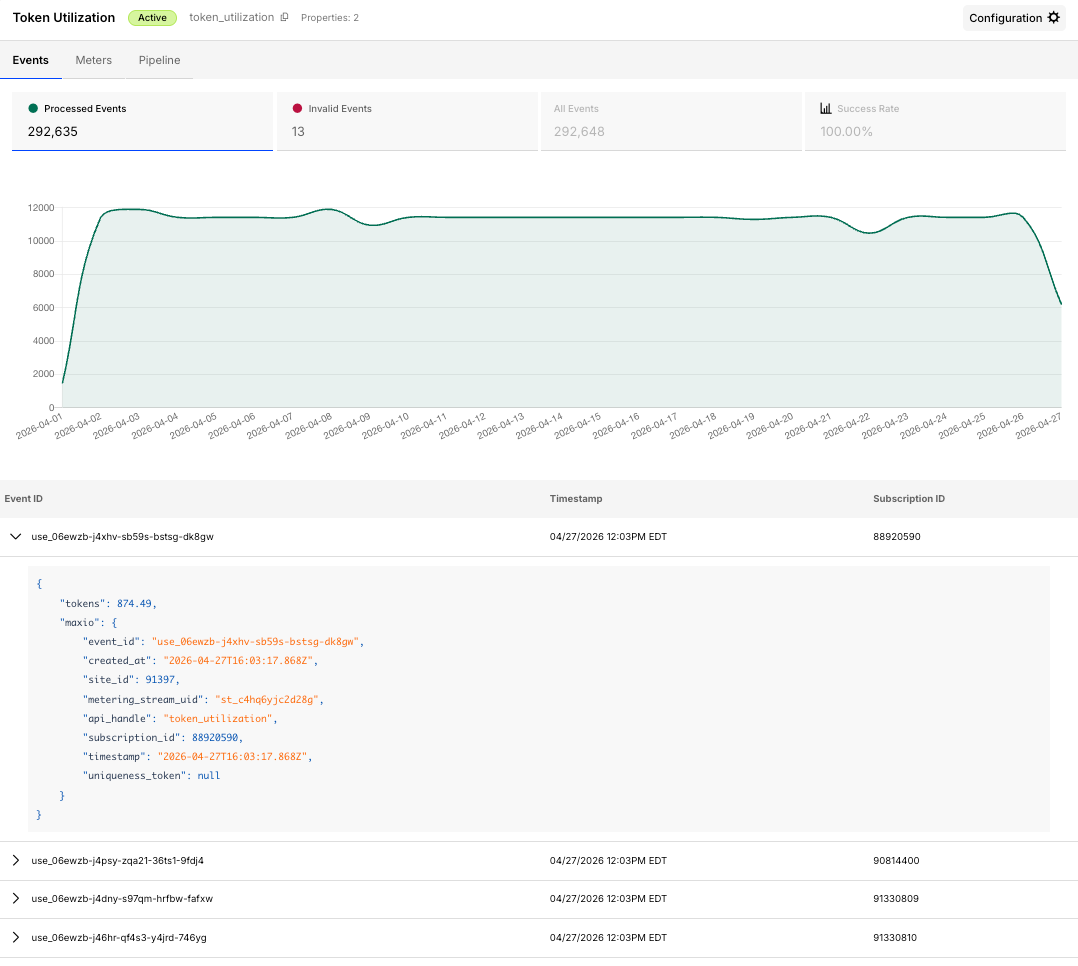
If the event does not appear or displays as invalid, review Troubleshoot Maxio Metering Issues.
Next steps
Once your Stream and Meter are working, connect the Meter to a billing product in your Product Catalog. See Design Your Catalog: Use Metering with Products.
Related information
For a full explanation of the core Metering objects, see Understand Streams, Meters, and Segments.
For details about identifiers, data types, and JSON import, see Configure Maxio Metering.
For help choosing an aggregation type, see Choose the Right Aggregation Type.
Still need help?
Reach out and our support team will take it from here.