
Configure the Maxio MCP Connector
Last updated on Sep 19, 2026
Connecting the Maxio MCP connector lets an AI client read and act on your Maxio data under a role you choose. You enable it in Advanced Billing, then finish the connection in the client itself.
Before you start
Three conditions have to be true before Maxio MCP appears under Integrations. If the option is missing, one of them is not met.
- Maxio Support has enabled the MCP feature for your Site.
- Your Site is linked to a Maxio organization. Support handles this.
- Single sign-on is enabled on your account.
Review the Maxio MCP Security, Access, and Governance FAQ before you enable the connector, for access controls, data exposure, governance recommendations, and AI client considerations.
Choose a role
The role decides what the AI client can reach, so pick the narrowest one that does the job. You select it partway through the setup wizard.
- Analyst - Read-only access to subscription billing. Views and exports reports on customer data, subscription metrics, and financial analytics, including MRR, ARR, churn rates, and transaction history.
- Bookkeeper - Access across Advanced Billing and Maxio Core. Creates and manages product catalogs, customer records, subscriptions, sales orders, and business reporting, but does not process payments.
Choose an MCP client
What each client supports differs, so this choice also affects which tools you can actually use.
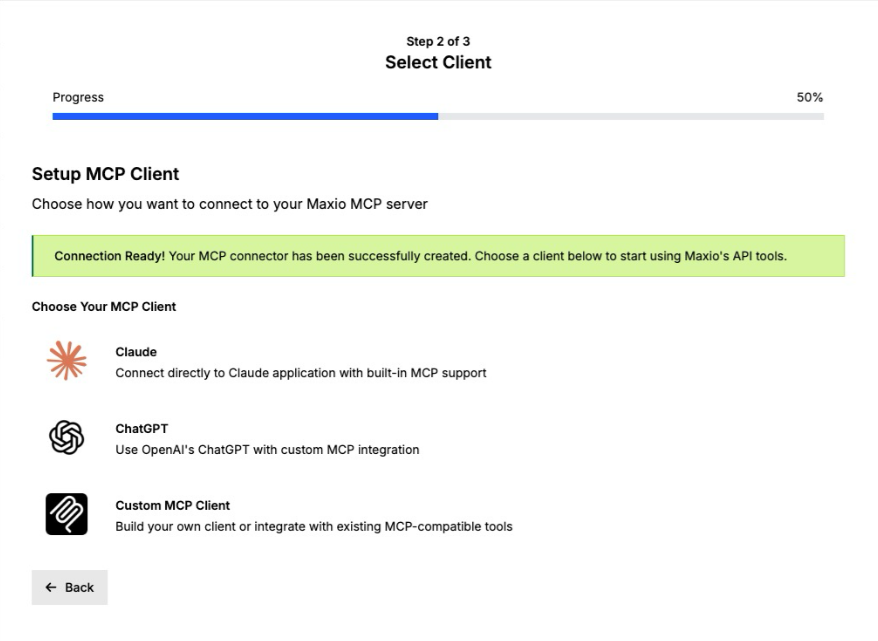
- Claude - The most capable client, with access to every tool Maxio has built.
- ChatGPT - More limited, with restrictions around tools that perform create actions.
- Custom MCP Client - Build your own client, or integrate an existing MCP-compatible tool.
Set up the connector
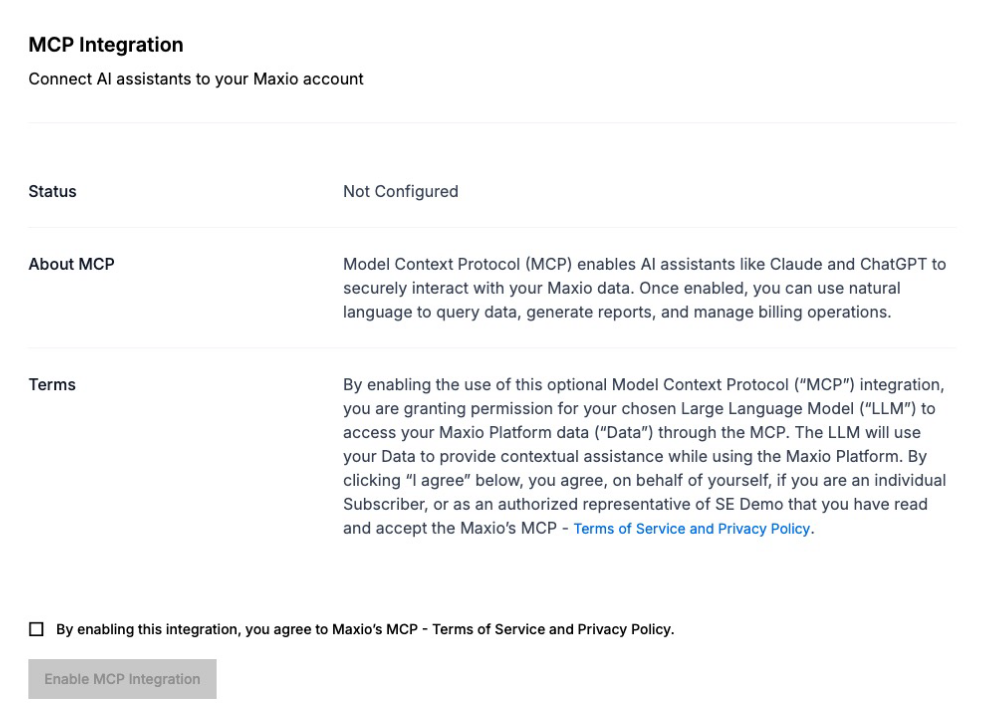
Accepting the Terms is what unlocks the setup wizard, so nothing happens until you do.
To set up the connector
-
In Advanced Billing, as an admin user, select Integrations in the left-hand navigation.
-
Select Maxio MCP.
-
Review the About MCP section and the Terms, then accept the Terms.
-
Select Setup Connector.
-
Under Select Role, choose the role for your AI assistant.
-
Under Select Client, choose where you want to use the connector tools.
-
Follow the setup instructions shown for the client you chose.
Finish setup in your AI client
The remaining steps happen in the client, not in Maxio, so they differ by client. Claude is shown here as an example.
To connect from Claude
- Open claude.ai on a Pro, Max, Team, or Enterprise plan.
- Go to Settings > Connectors.
- Select Add custom connector and paste your Maxio MCP Server URL.
- Complete the OAuth authentication to authorize access.
- Test the connection in a new conversation by asking about your Maxio data.
What to expect
A Connection Ready! message confirms the connector was created, and Maxio shows a summary of its capabilities for the role you chose.
You can then open a new conversation in your AI client and use natural language to run the tools your role allows.
To change or revoke access later, return to Integrations > Maxio MCP and adjust the connector settings.
Related information
For the full set of tools each role can reach, see the Review Maxio MCP Supported Tools help article.
For prompts that exercise those tools, see the Review Example Prompts for Maxio MCP Tools help article.
For access controls and governance before you enable it, see the Maxio MCP Security, Access, and Governance FAQ help article.
Still need help?
Reach out and our support team will take it from here.