
Migrate Data to Maxio
Last updated on Sep 19, 2026
Moving to Maxio means bringing your existing Customers, subscriptions, catalog, and Invoice history with you. You can import basic subscriptions yourself from a CSV file, or hand the work to the Onboarding team, which covers every object type and every subscription shape the self-serve tool cannot handle. Start by deciding which of the two fits the data you are moving.
Choose a migration method
Your import volume and the complexity of your subscriptions determine which method to use.
| Method | When to choose it |
|---|---|
| Migrate subscriptions yourself | Your import is roughly 200 subscriptions or fewer per file and contains only basic subscriptions. See Migrate subscriptions yourself for the full criteria. |
| Use an onboarding-assisted migration | Anything else, including Customer hierarchies, subscription groups, custom pricing, catalog objects, Invoices, service credits, and prepayments. |
Migrate subscriptions yourself
You can import basic subscriptions into Advanced Billing from a CSV file without involving the Onboarding team.
Important: The subscription import tool only creates new subscriptions. It cannot update subscriptions that already exist in Advanced Billing.
Choose this method only if your import meets every one of the following criteria.
Your import is:
- Approximately 200 subscriptions or fewer, per import file
- Basic subscriptions only
Your import does not include:
- Customer hierarchies
- Subscription groups
- A subscription for an existing Customer that needs to specify an existing Payment Profile
- Multiple coupon codes per subscription
- Custom pricing
- Component handles
- Feature
- Data Migration
- You Need
- Access to your data
- Experience mapping data in CSV files
- Basic experience importing data into software
- Experience debugging errors
- Code
- No
- Difficulty
- ◉◉◎◎◎
For the import steps, the full field reference, and downloadable sample files, see Import Subscriptions from a CSV.
Use an onboarding-assisted migration
The Onboarding team runs the import for you. This method handles every migration type below, and which ones you can use depends on your Onboarding package.
- Feature
- Data Migration
- You Need
- Access to your data
- Experience mapping data in CSV files, but no import or scripting experience
- A qualified Onboarding plan or service package
- Code
- No
- Difficulty
- ◉◎◎◎◎
Types of onboarding-assisted migrations
Check with your Implementation Consultant to confirm a particular migration type is included in your Onboarding package.
Customer and subscription migration types
| Migration method | What it creates |
|---|---|
| Create Standard Subscriptions | One normal Customer, with one subscription and one optional Payment Profile. |
| Create Customers | Any Customer type (normal, child, or parent), then optionally one Payment Profile for that Customer. |
| Create Advanced Subscriptions | Any subscription type (normal or grouped), paid by any Customer type (normal, child, or parent), associated with the existing Customer. |
| Create Customer Payment Profiles | Any type of Payment Profile, associated with the existing Customer record. |
Catalog migration types
| Migration method | What it creates |
|---|---|
| Create Products | Products and their price points. |
| Create Components | Components and their price points. |
| Create Coupons | Coupons, including their discount and duration settings. |
| Create Product Families | Product Families to group your Products under. |
Open balance migrations need templates that are not published with the others. Ask your Implementation Consultant for them, and note that availability depends on your Onboarding package.
Open balance migration types
| Migration method | What it creates |
|---|---|
| Open Invoices | Open ad hoc Invoices for an existing subscription. |
| Service Credits | A service credit balance for an existing subscription. |
| Prepayments | A prepayment balance for an existing subscription. |
Run an onboarding-assisted migration
An onboarding-assisted Customer and subscription migration runs in five stages, and stages three and four repeat until the data imports cleanly.
Important: Fill out your template in Google Drive, not in Excel. Filling it out in Excel breaks the template.
To run an onboarding-assisted migration
- Get your smart template. Open the Customer & Subscription Smart Templates, then click File > Make a copy to clone them into your own Google account.
- Fill in your data. See the samples for guidance on the expected values.
- Onboarding performs the imports in test mode. The Onboarding team runs the import for you.
- You confirm the results. Fix any errors in your template, then repeat steps 3 and 4 until the import is clean.
- Onboarding performs the imports in live mode.
If any questions arise during the process, ask your Implementation Consultant.
Import previously paid invoices for the Billing Portal
Your business is moving to Maxio, but your Customers have Invoices from a previous billing system. Import those Invoices so your Customers see their complete Invoice history when they view their Billing Portal.
Important: Some Maxio plans include fees based on recorded payments. Check with your Implementation Consultant before importing any paid Invoices into your production environment.
To import previously paid Invoices
- Open the Invoices V2 import template.
- Clone the template into your own Google Drive account.
- Enter your data in the CSV file.
- Onboarding imports your Invoices.
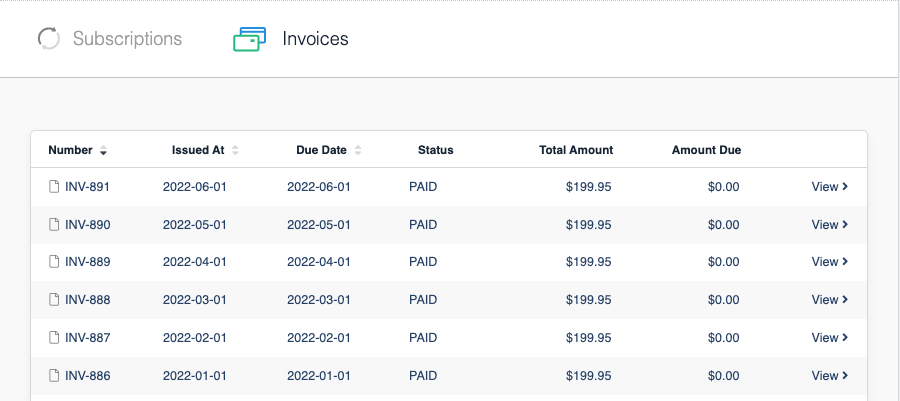
Example of six monthly 2022 invoices
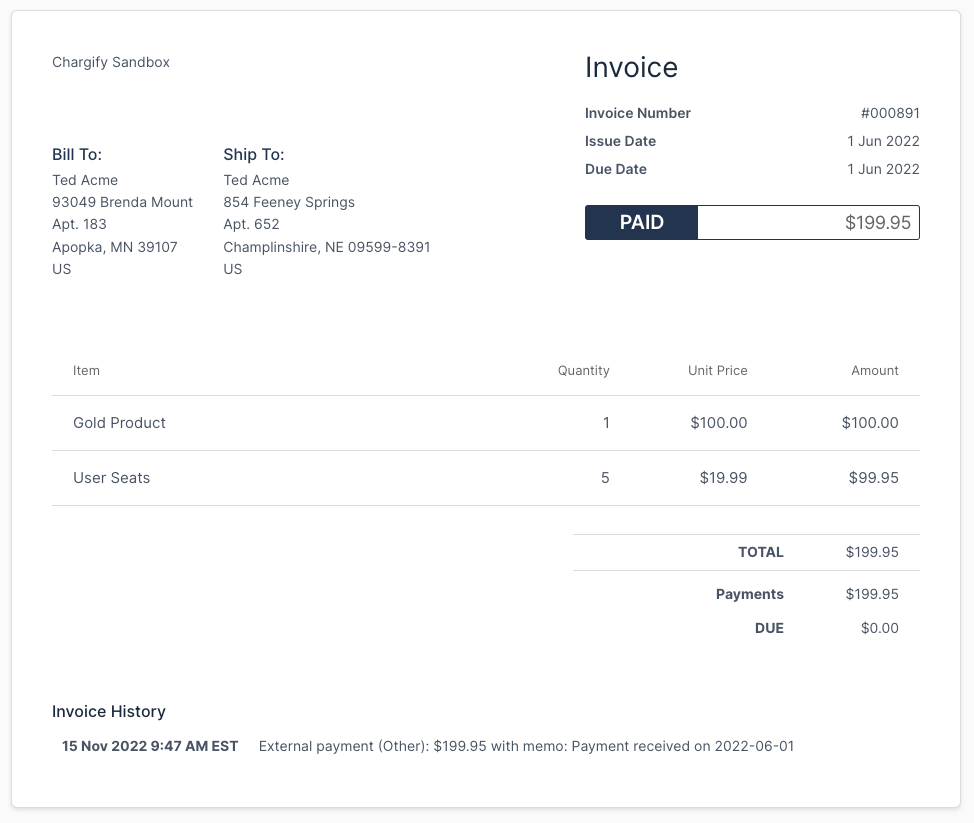
This example imports six Invoices from the first half of 2022, one for each month. Each Invoice contains 1 Gold Product and 5 User Seats, and each Invoice was issued, due, and paid on the first of the month. The service period is the full calendar month.

Using the top row, the values are:
issue_date= 2022-01-01due_date= 2022-01-01payment_received_on= 2022-01-01start_date= 2022-01-01end_date= 2022-02-01
After the import, the Customer sees the full set of historical Invoices in the Billing Portal.
Each imported Invoice opens with its addresses, line items, and payment history intact.
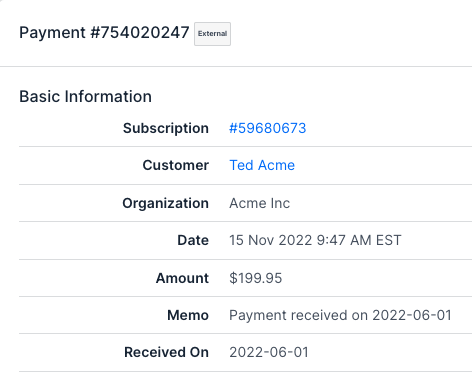
In Advanced Billing, each imported payment carries an External badge to distinguish it from a payment Maxio collected.
Hide the invoice history
At the bottom of each Invoice, the Invoice History shows the date the Invoice was created, which for a migrated Invoice is the date you imported it rather than the date it was originally issued. To hide the Invoice History from all Invoices, go to Config > Invoicing > Invoices, then select Hide History in the Invoice Customization section.
Decide whether to sync imported invoices
When you import Invoices only so your Customers can see their history in the Billing Portal, the typical approach is to not sync those Invoices to Maxio Core. Whether backported Invoices sync is controlled by Maxio rather than in your own settings, so ask your Implementation Consultant to confirm how your Site is configured before you import.
Related information
To see which import types are available and what each one changes, see Understand Imports.
Before you build any import file by hand, see Format a CSV File for Import for the formatting the importer expects.
Still need help?
Reach out and our support team will take it from here.