
Add Invoices
Last updated on Aug 26, 2026
The recommended approach to creating invoices is to create transactions and let Maxio automatically generate the appropriate invoices, which can then sync to the general ledger. This process generally results in balanced contracts. Manually adding invoices in Maxio or a GL may lead to an out-of-balance condition.
Add an invoice directly
-
Navigate to the Contract for which you want to add an invoice.
-
Select the Invoices drop-down menu.
-
Click Add Invoices.
-
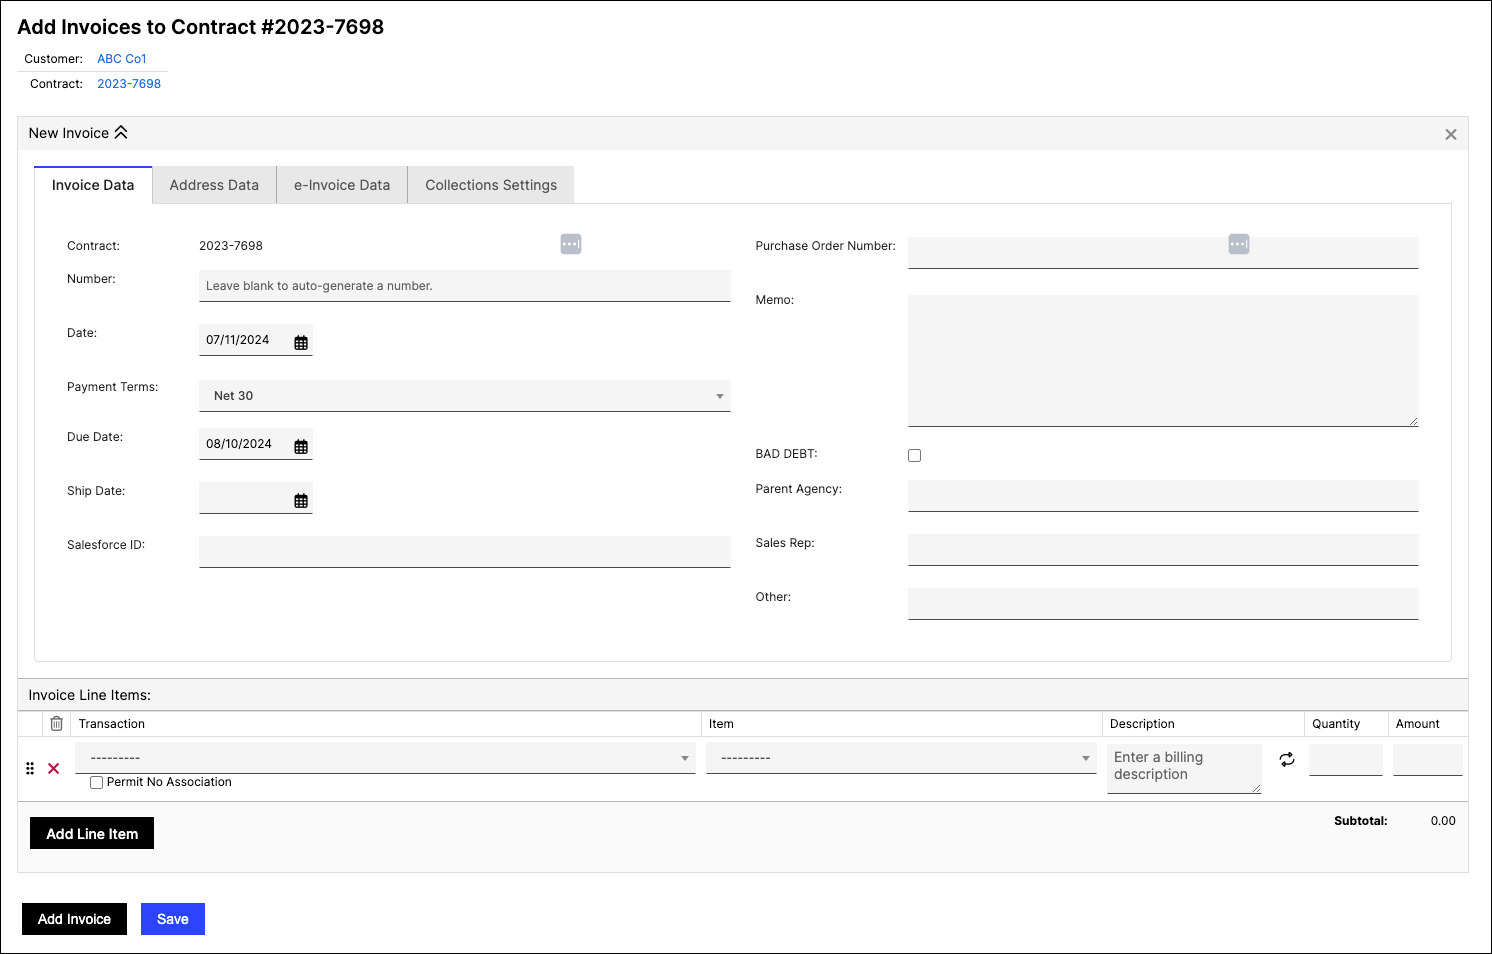
Enter the necessary information, including:
- Date: The date the invoice is issued.
- Due Date: (Optional) The payment due date.
- Number: (Optional) Leave blank to auto-generate a number.
-
To add a line item:
- Click Add Line Item.
- Select the Item being billed.
- Select a Transaction to associate the line item with, or check Permit No Association to save it without one.
- Enter a Description, Quantity, and Amount.
-
Review the invoice details for accuracy.
-
Click Save to finalize and create the invoice.
(Optional) From a Customer's detail page, you can alternatively select Invoices > Add Invoice, then choose the Contract for the new Invoice.
Associating line items with transactions
Each Invoice Line Item you add here should generally be associated with a Transaction. If you leave a line item without one and do not check Permit No Association, the Contract can be flagged as out-of-balance, since Maxio's revenue reporting expects every Invoice Line Item to have a matching Transaction. Check Permit No Association only when a line item is intentionally not linked to a Transaction, to avoid this flag. See Resolve Invoice Line Items without Transactions for details.
Still need help?
Reach out and our support team will take it from here.