
Set Up Multi-Currency for the NetSuite Integration
Last updated on Aug 24, 2026
Set up multi-currency support when syncing NetSuite with Maxio to ensure applied amounts and balances calculate correctly. This requires NetSuite custom fields and Maxio mapping updates. Complete these steps only if multi-currency is already enabled for your account.
Set up from NetSuite
Create two custom fields in NetSuite to support Maxio's Applied Amount and Balance calculations:
-
Go to Customization > Lists, Records, & Fields > Transaction Body Fields, then click New.
Next, create custom fields to represent the Applied Amount and the Balance.
-
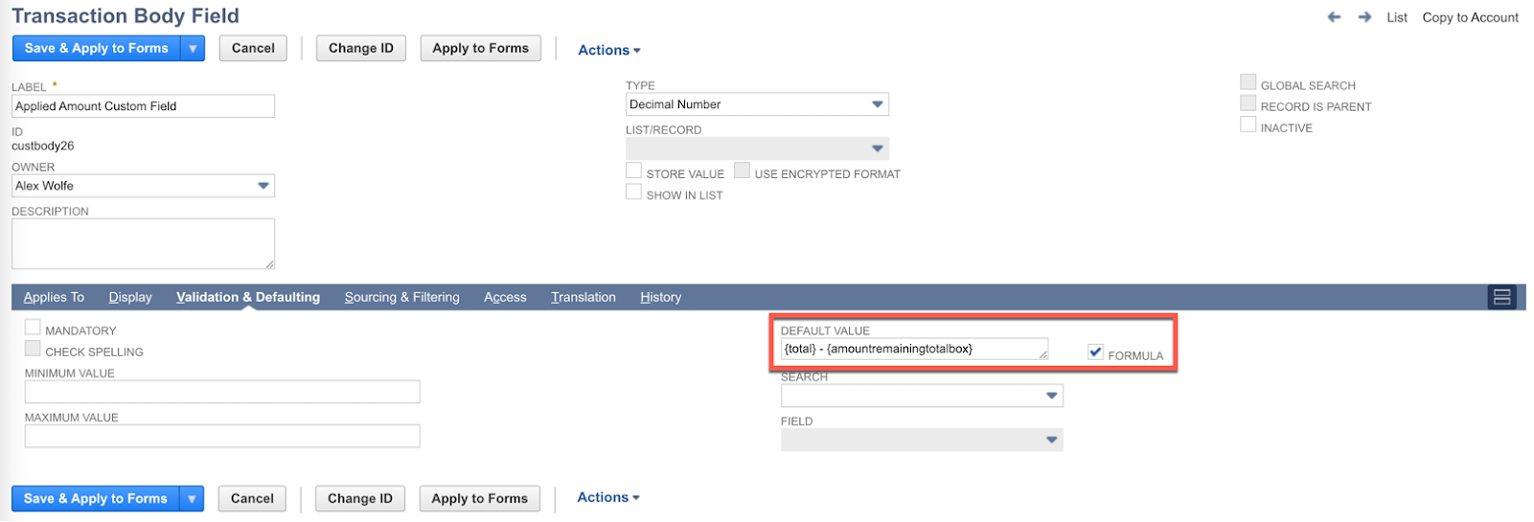
On the upper part of the custom field setup page, for Label, enter Applied Amount Custom Field.
-
For Type, select Decimal Number.
-
On the lower part of the form, click the Validation & Defaulting subtab.
-
Set the Default Value to:
{total} - {amountremainingtotalbox}
-
Check the Formula box next to the Default Value field.
-
Click Save & Apply to Forms to save these settings to the form.
-
Repeat step 1 to create a new custom field for Balance.
-
For this next Label, enter Balance.
-
For Type, select Decimal Number.
-
Click the Validation & Defaulting subtab.
-
Set the Default Value to:
{amountremainingtotalbox} -
Again, check the Formula box next to the Default Value field.
-
Click Save & Apply to Forms.
Set up from Maxio Platform
Configure Maxio to use the custom fields you just created in NetSuite:
-
Enable Multi-Currency in Maxio Platform.
-
Navigate to the NetSuite Integration screen.
-
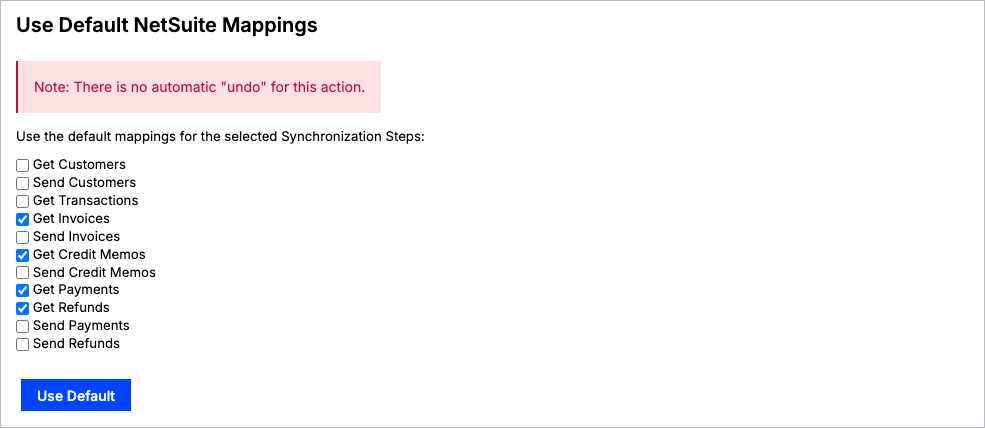
From the actions located on the top right, click Use Default Mappings.

-
Check the following mappings:
- Get Invoices
- Get Credit Memos
- Get Payments
- Get Refunds
-
Click Use Default.
Next, you will edit the Get Invoices mappings. -
From the NetSuite Integration screen, scroll down to Get Invoices under the Synchronization section.
-
Hover over the hamburger menu icon to the left of the Get Invoices sync step and click Settings.
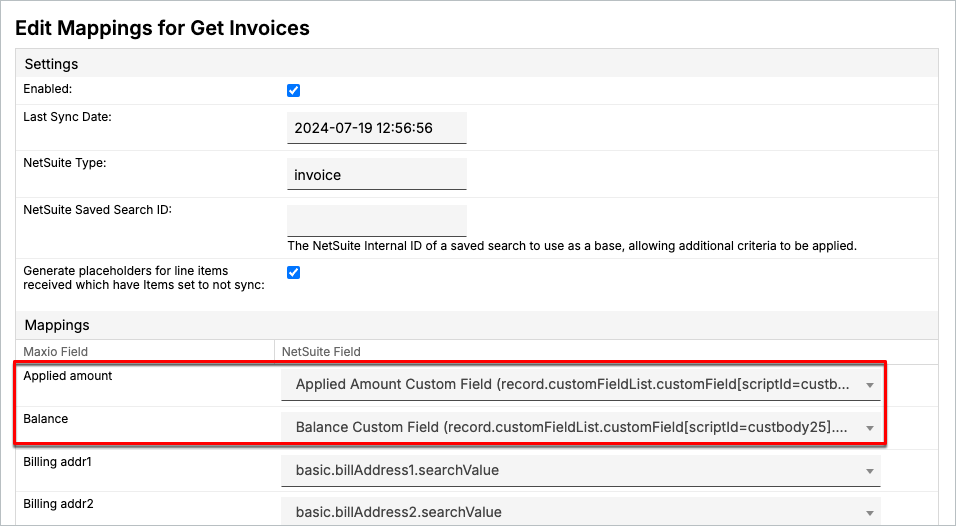
This opens the Edit Mappings for Get Invoices screen. -
Under Mappings, adjust the Applied Amount and Balance mappings to point to the record version of the custom mappings you created in NetSuite.
-
For Applied amount, click the down arrow and find the Applied Amount Custom Field mapping.
-
Select the mapping with the record parameter.
-
For Balance, find Balance Custom Field and select the mapping with the record parameter.
-
Scroll down to the bottom of the screen and click Save.
Related information
For common sync errors and how to resolve them, see Troubleshooting and FAQs.
Still need help?
Reach out and our support team will take it from here.