
Integrate Payment Gateways
Last updated on Sep 19, 2026
Connect one or more payment gateways to Advanced Billing so you can process real transactions. Work through the four steps below to add a gateway, authenticate it, decide which payment types route to it, and confirm it works before your Customers reach it.
Before you start
- Feature
- Understand Payment Gateways
- You Need
- A payment gateway account from the supported list.
- Code
- No
- Difficulty
- ◉◎◎◎◎
Connect a payment gateway
Go to Config > Payment Gateways to start. You can configure one gateway at a time or several at once, and the setup wizard walks through the same three stages either way: Add Gateways, Connect Gateways, then Route Payments.
Add a payment gateway
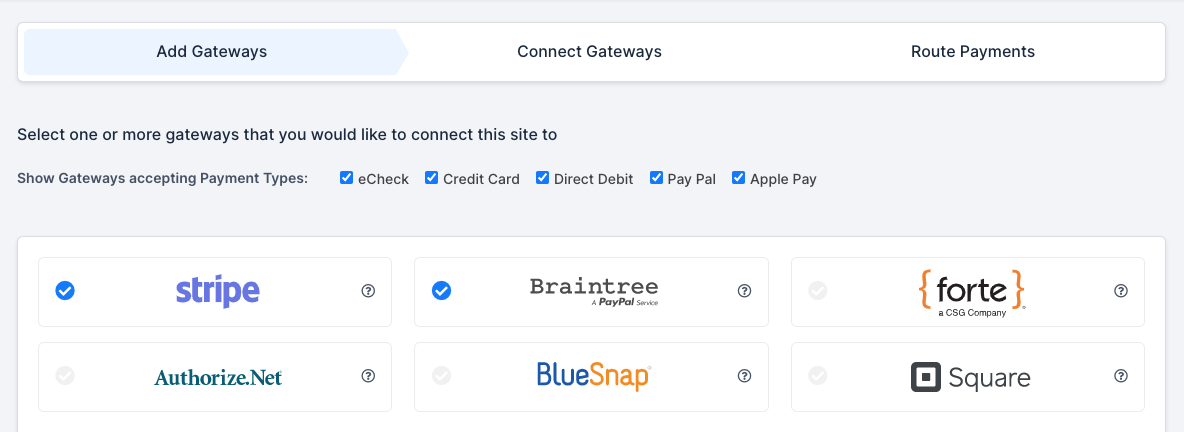
The first stage of the wizard is choosing which gateways to set up. You can select several at once and configure them together.
To add a payment gateway
-
In the top right corner of the Payment Gateways page, click Add Gateway.

-
Click each gateway you want to add. A blue checkmark appears on the ones you select. When you finish selecting, click Continue in the bottom right corner.
Authenticate with your credentials
This stage is where you enter your real gateway credentials.
To authenticate a gateway
-
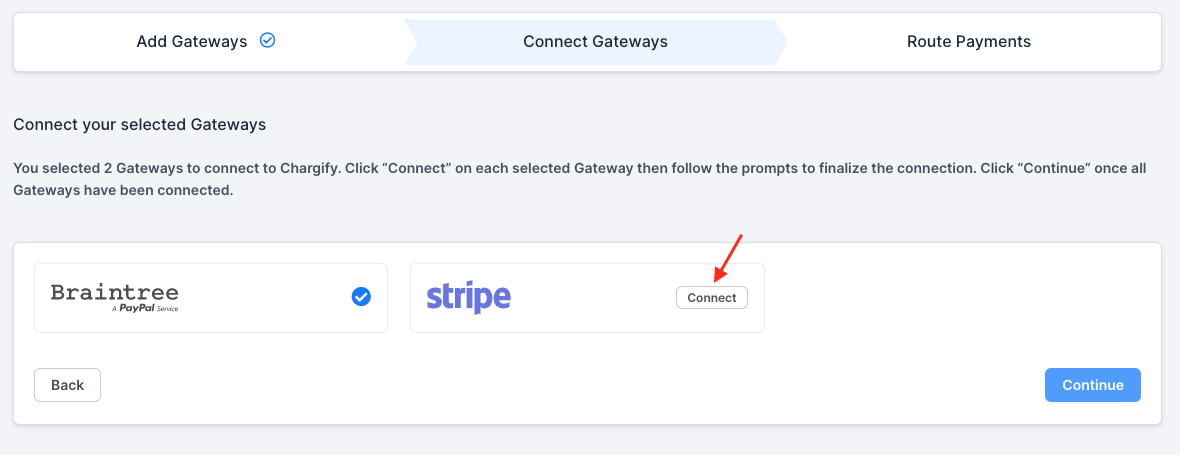
For each gateway you selected, click Connect. Each gateway has its own credential fields, and the wizard prompts you for the ones that gateway needs.
-
Enter your gateway credentials. If your gateway uses a single sign-on connector, you don't need credentials, so follow that gateway's prompts instead. For help locating your credentials, see Understand Payment Gateways.
-
Set your gateway handle. Name it after the gateway itself, so the Braintree gateway gets the handle
braintree, all lowercase. If you use more than one instance of the same gateway, number them:braintree-1,braintree-2.Important: If you build your own payment forms with Maxio.js, the handle determines which gateway a tokenized payment method is created against, so choose it deliberately before you write against it.
Route payment types
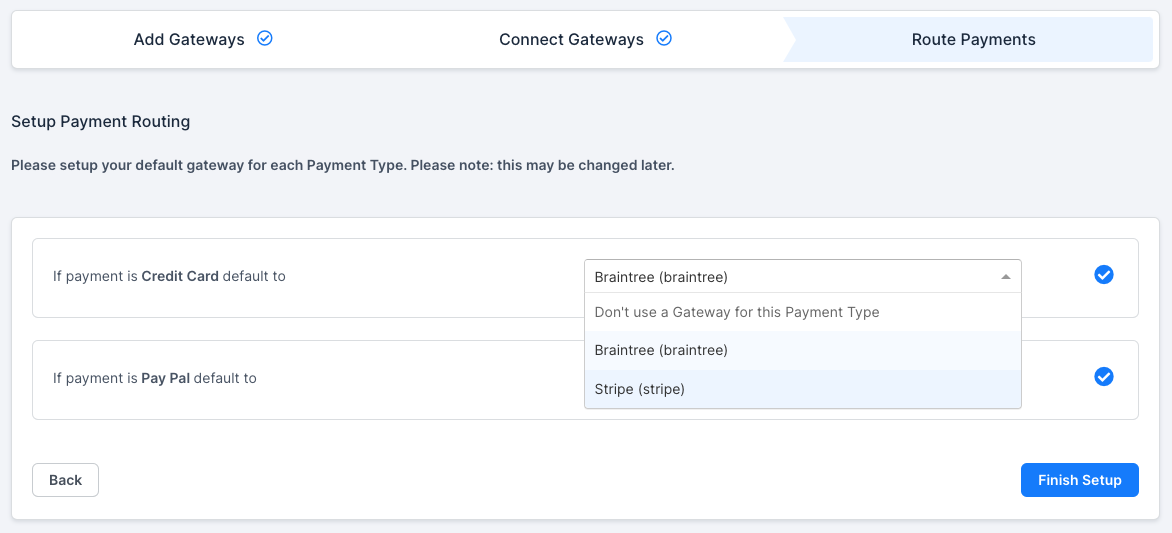
Routing sets the default gateway for each payment type, such as sending all credit card payments to one specific gateway.
To route payment types
-
For each gateway you selected, choose a routing option. Routing controls which Payment Profiles go to which gateway.
-
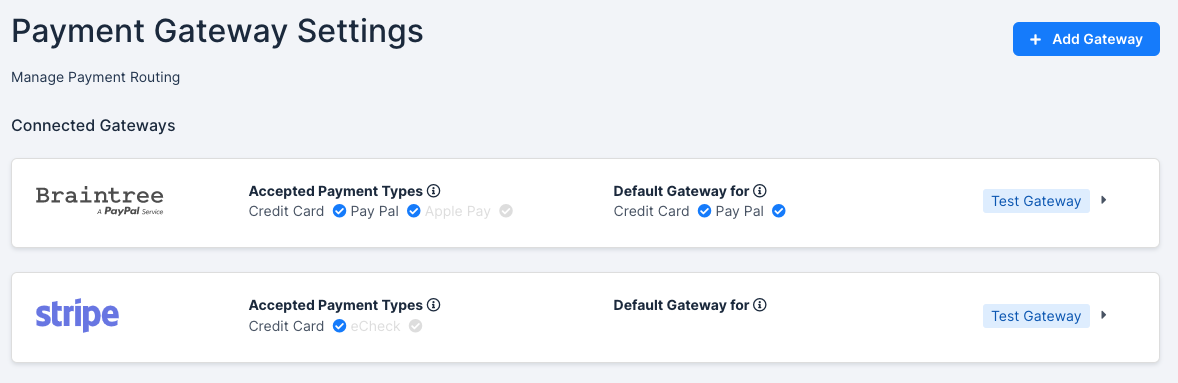
Review the results and confirm each gateway shows the payment types you expect. To change anything, see Edit a gateway connection.
Test the connection
Interact with every connected gateway before your Customers do. Connection errors are common, most often from incorrect credentials, and testing is how you catch them first.
Test Mode
If your Site is in Test Mode, use the test cards published by each gateway. See Gateway test cards below.
Live Mode
Use a real payment method and create a real subscription. Create a small product for $1 to test with, since most gateways require a minimum between $0.50 and $1.00, and check whether the payment succeeds. If it fails, Advanced Billing displays the error message returned by the payment gateway. If that message isn't clear, search for it verbatim in quotes, or contact Maxio Support.
Optional configuration
None of the following is required to process payments. Add them where your risk or compliance requirements call for it.
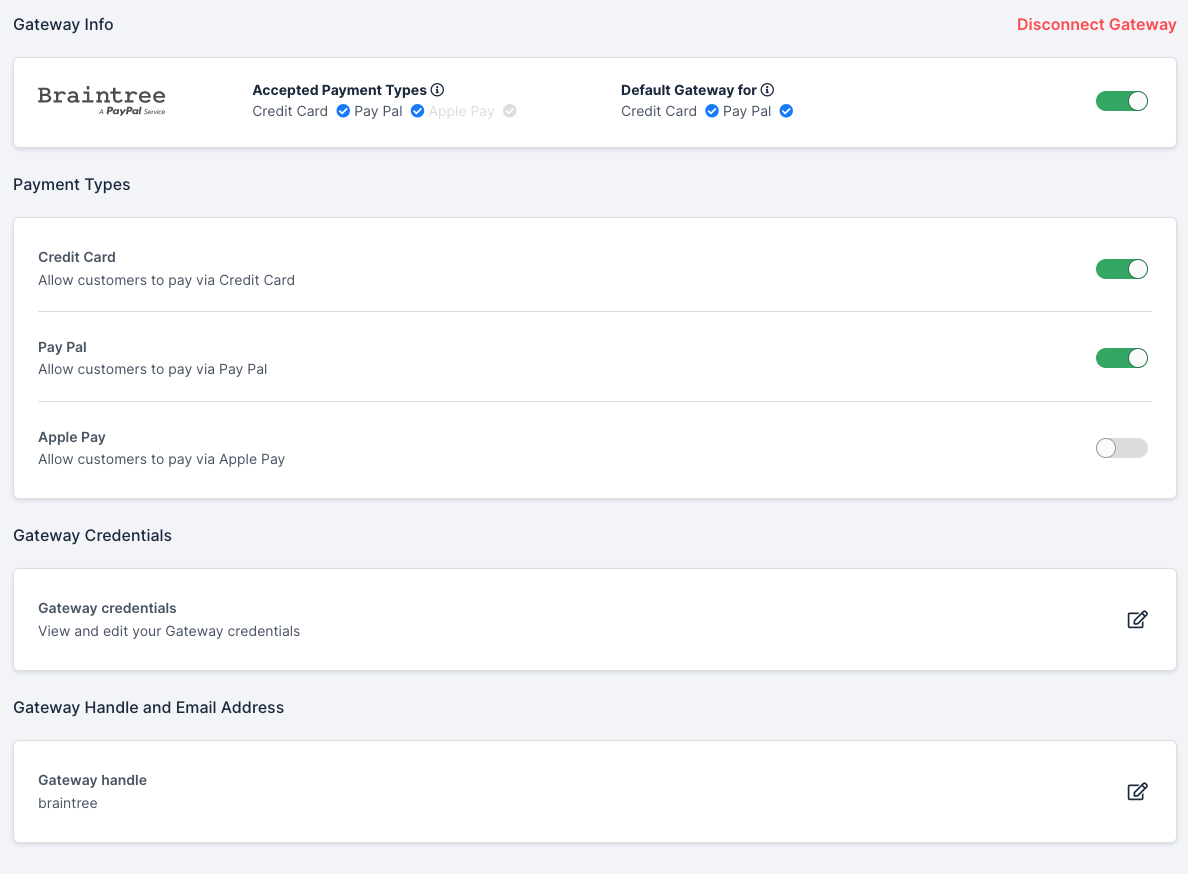
Edit a gateway connection
Change a gateway's payment types, credentials, or handle after setup, or disconnect it entirely.
To edit a gateway connection
-
Click the edit arrow beside the gateway, then click Gateway Settings.

-
Change what you need, then save. You can edit Payment Types, Gateway Credentials, and Gateway Handle, edit the Email Address for single sign-on connections only, or disconnect the gateway entirely.
Require CVV for credit cards
Go to Config > Settings > Fields and select the CVV Required checkbox. See CVV Required.
Configure AVS
Configure Address Verification Service at the gateway level rather than in Advanced Billing. On each payment attempt, Advanced Billing passes the address information to the gateway, the gateway performs the AVS check, and it returns a response to Advanced Billing.
Gateway test cards
Use these values only against a gateway's sandbox environment, never a live one. Each gateway publishes its own test cards, so use the linked reference for the full set.
Test card values by gateway
| Gateway | Resource | Common examples |
|---|---|---|
| Stripe | Stripe test cards |
|
| Braintree | Braintree test cards |
|
| Auth.net | Auth.net test cards |
|
| Cybersource | Cybersource test cards |
|
| First Data | Payeezy is discontinued, and no test-card documentation is published. |
|
| NMI | NMI test cards |
|
| GoCardless | GoCardless test accounts |
|
| BlueSnap | BlueSnap test cards |
|
Related information
To understand how gateways work in Advanced Billing before connecting one, see Understand Payment Gateways.
To build your own payment forms against a connected gateway, see Check Gateway Support.
Still need help?
Reach out and our support team will take it from here.