
Set Up and Collect eCheck (ACH/EFT) Payments
Last updated on Sep 19, 2026
Enable eCheck (ACH/EFT) as a payment option, verify individual customers for ACH, and collect their bank account information. See Understand eCheck (ACH/EFT) Payments for eligibility requirements, gateway-specific guides, and the compliance obligations that come with accepting ACH.
Enable eCheck (ACH/EFT)
In your Advanced Billing site settings, enable ACH as a payment option:
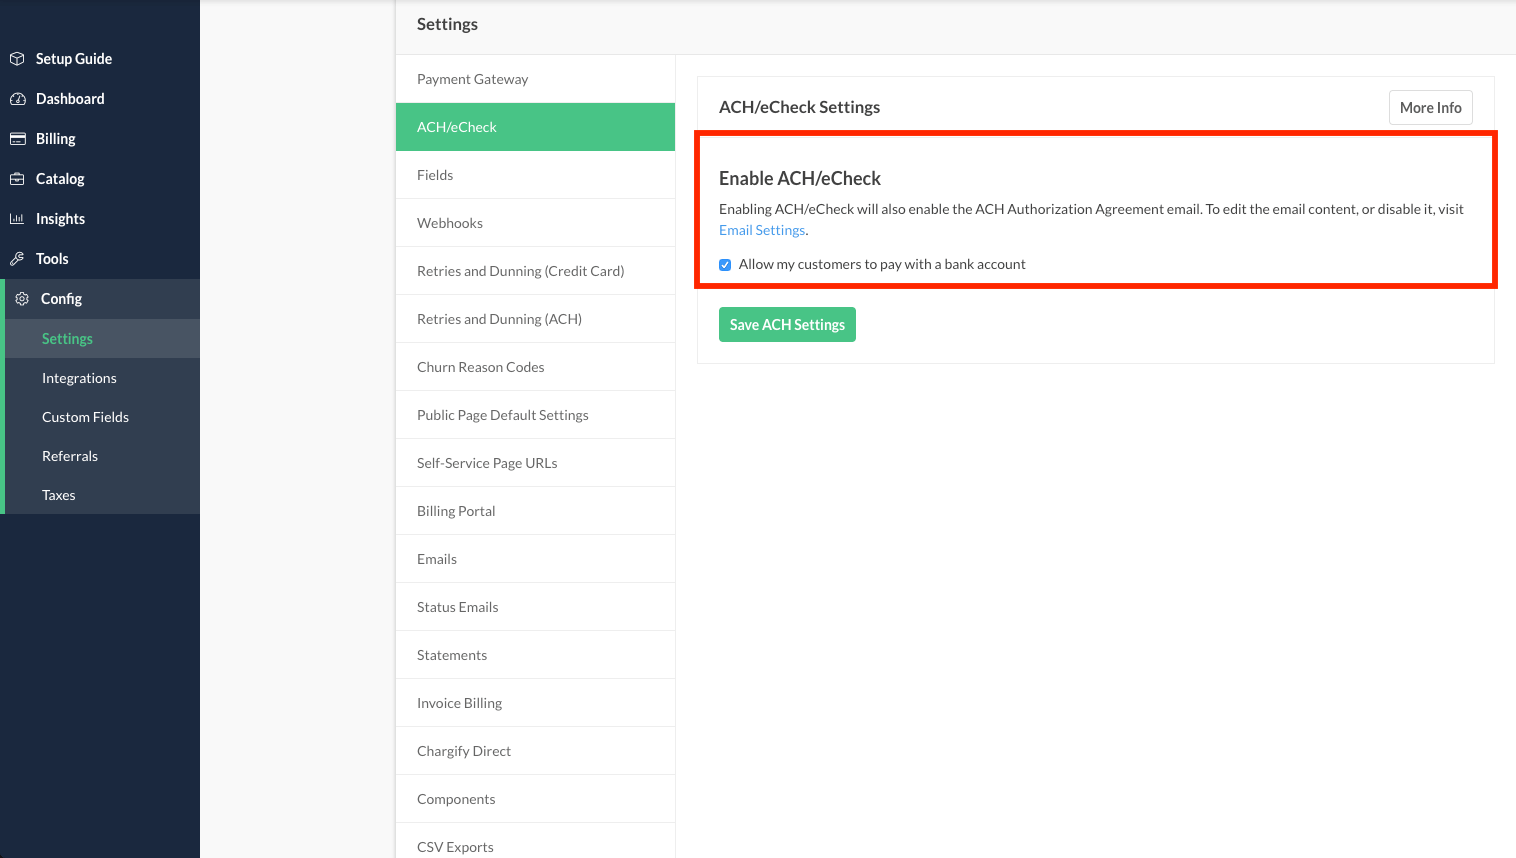
Enable ACH in your settings for your site
Enabling eCheck (ACH/EFT) also enables the ACH Authorization Agreement email. This email is triggered when bank account information is entered via a Self-Service Page.
Verify a customer for eCheck (ACH/EFT)
A subscriber must be marked as “Verified for ACH/eCheck Payments” before they can begin paying by ACH. Change their customer entry to reflect this.
- Find your customer in Advanced Billing.
- Enable ACH for your customer.
You can do this from either the subscription’s view or the customer’s own entry. Either method works, so use whichever you prefer.
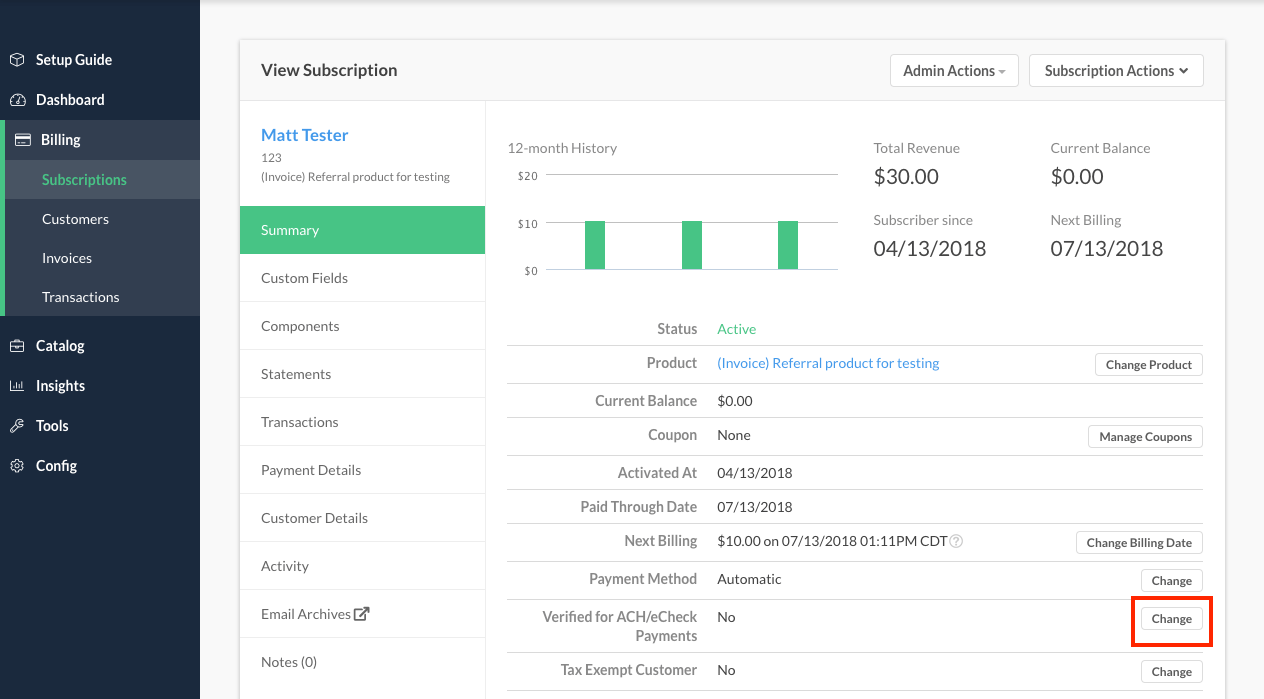
Enable an individual subscription to use ACH as a payment method
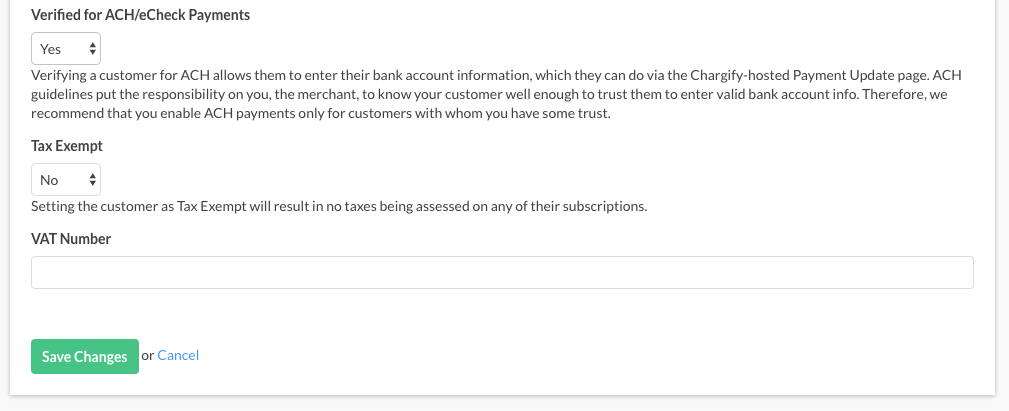
Enable the customer entry to allow ACH usage
eCheck (ACH/EFT) guidelines place the responsibility on you, the merchant, to reduce fraudulent or incorrect use of bank account info. It’s your duty to know your customer, and to gain enough trust in them to let them enter bank account info.
Collect eCheck (ACH/EFT) bank account information
The Billing Portal does not yet support eCheck (ACH/EFT), regardless of how customers were signed up in Advanced Billing.
You may have noticed that it’s not possible to add eCheck (ACH/EFT) information via a Public Signup Page. This lack of functionality is on purpose to protect you as the merchant. Each subscriber must be manually verified in Advanced Billing before they can enter bank account information.
So how do you get bank account information into your Advanced Billing account? Merchants use either of the basic paths below to get ACH information into subscriptions:
Public Signup Pages
This is the most common path for getting bank account information into a subscription:
- A subscriber signs up via a Public Signup Page.
- You approve them for eCheck (ACH/EFT).
- They enter their bank account info.
Maxio.js (formerly Chargify.js) + Advanced Billing API
This path skips the verification requirement by collecting bank account information directly at signup:
- A subscriber signs up via your own form.
- The signup information contains bank account information.
- This process bypasses the step required to verify the customer for ACH.
- Their bank account payment method is available for immediate use.
This process is easier for you and for your customers, but it assumes you have a closer relationship with your customers. We presume that you trust them to enter their bank account info.
Manually in the admin UI
If you have your subscriber’s bank account information, you may add it manually by selecting Add New Bank Account.
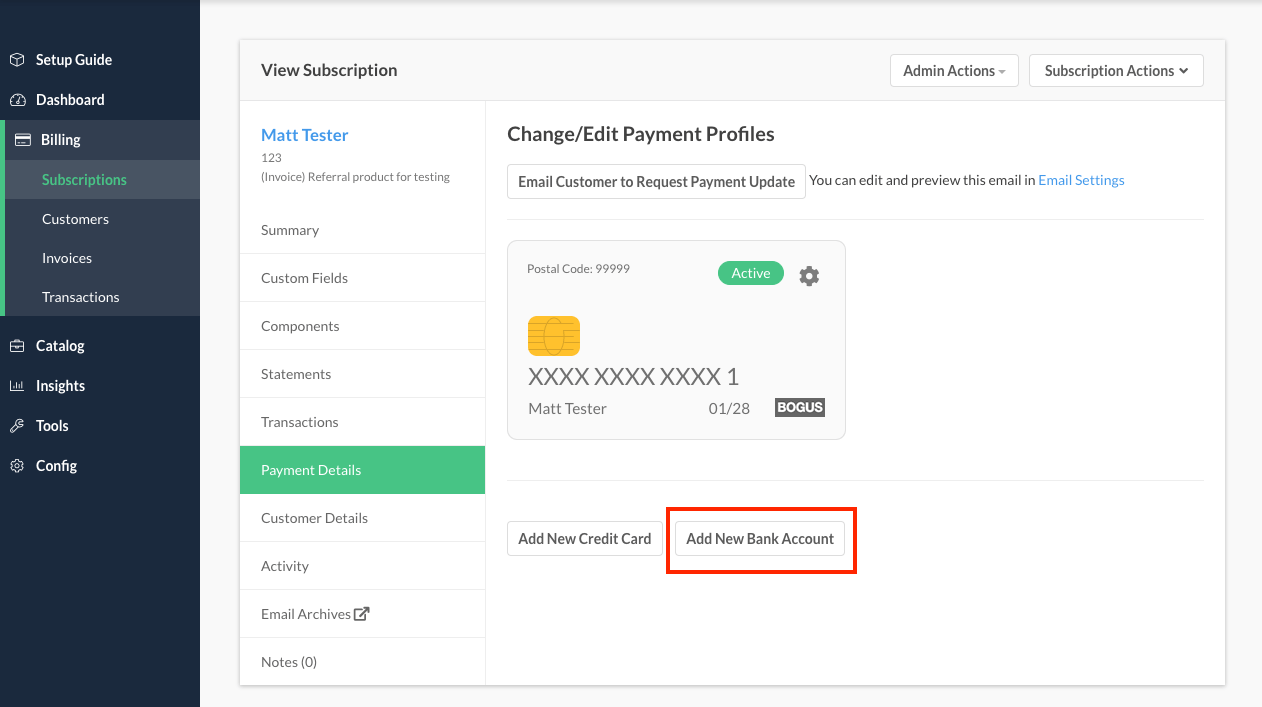
Add a new bank account to a customer entry
You then enter all of the data required for the customer’s future ACH payments. The following fields are required:
- First Name
- Last Name
- Bank Name
- Bank Account Holder Type
- Routing Number
- Account Number
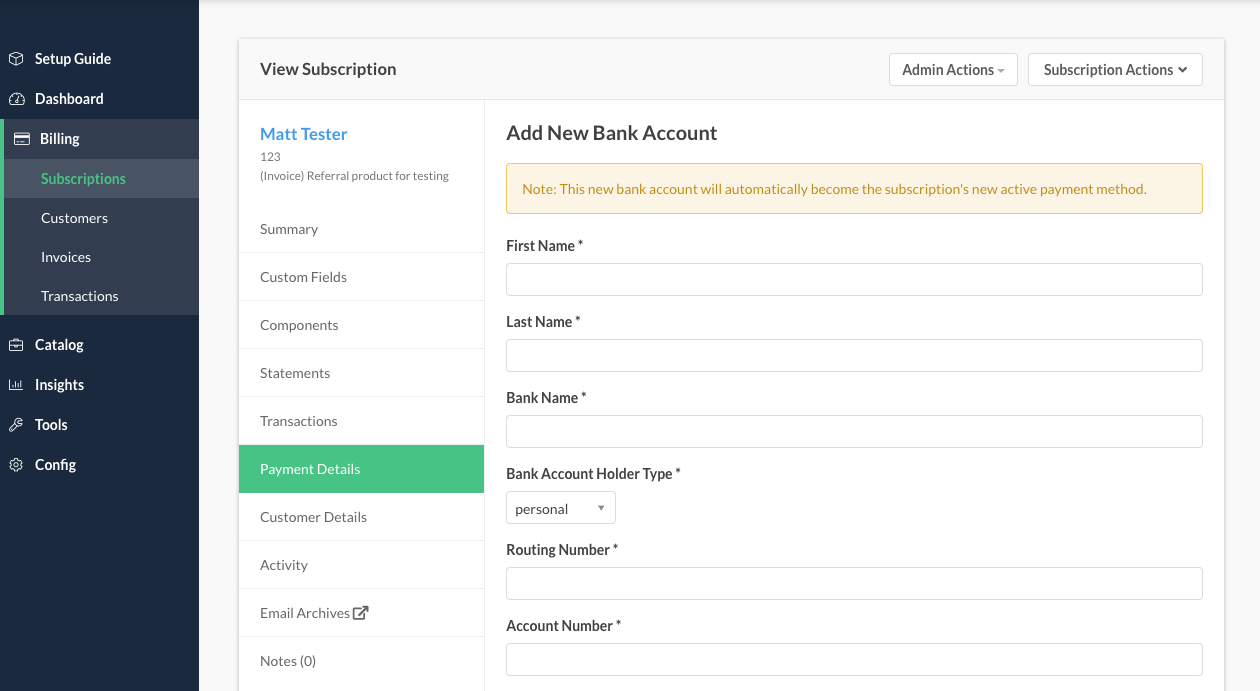
Enter complete bank account information for payment
Collecting eCheck (ACH/EFT) information via Self-Service Page
Select Email Customer to Request Payment Update to send your customer a link to update their payment information:
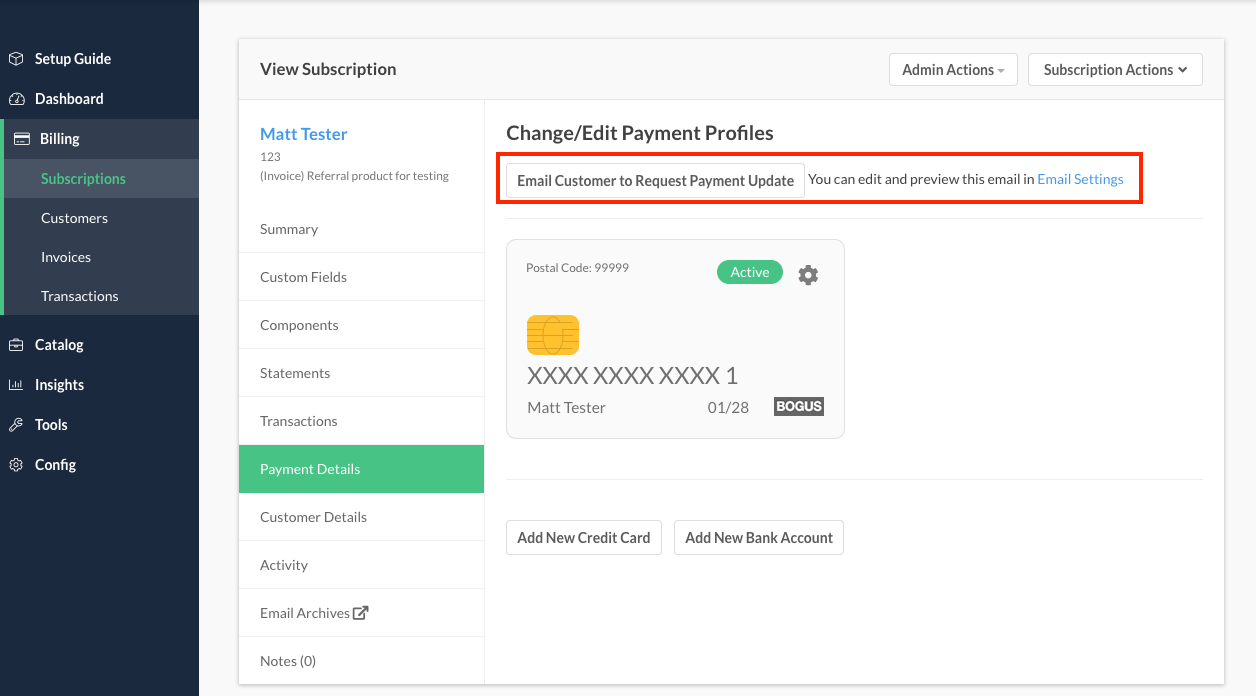
Email your customer directly with a link to a self-service page to update the payment method
Your customer receives the email/form, clicks “Change Payment Method” to switch the form to a bank account, and enters their bank account info here:
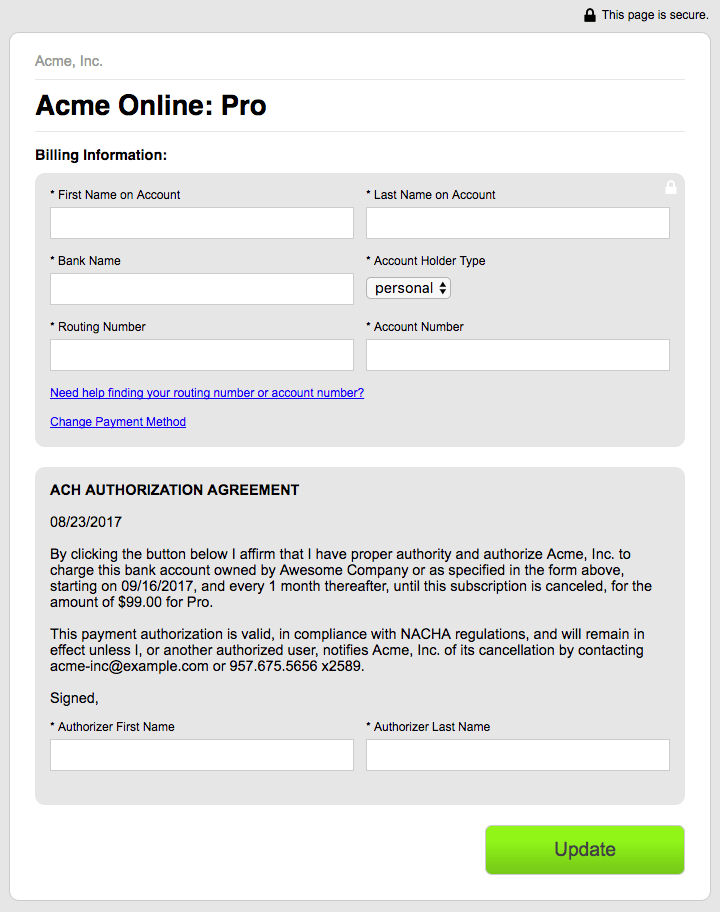
Self-service page: customers may enter bank account information
From that point forward, your customer pays you via eCheck (ACH/EFT). Remember that if there is any change to the amount or the payment schedule, you need to communicate with your customer to obtain their agreement to the new terms. This is an ACH requirement.
Related information
To learn more about collecting ACH information through your own signup form and the Advanced Billing API, see the Understand Maxio.js help article.
Still need help?
Reach out and our support team will take it from here.