
Configure Custom Offer Signup Pages
Last updated on Aug 29, 2026
A Custom Offer Signup Page is an externally available offer summary page you can share with a prospective Customer for secure self-signup, generated from an Opportunity's Subscription Preview. Configure this only if you want to offer self-service signup. It isn't required for the core integration to work.
Create a Force.com site
A Custom Offer Signup Page is hosted on a Force.com site, so you need one before you can build a template.
To create a Force.com site
-
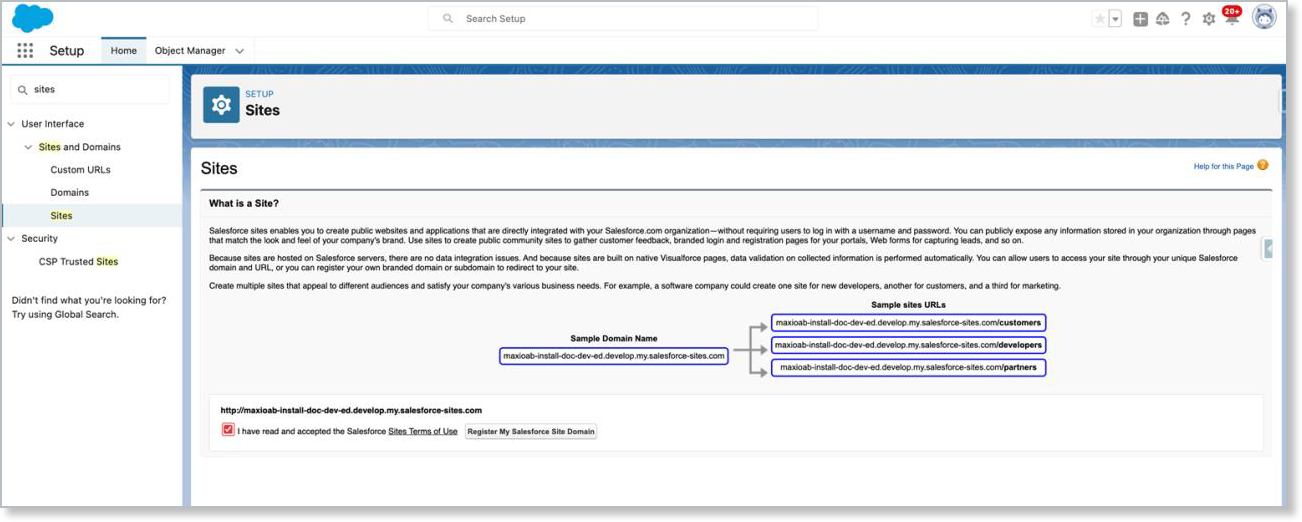
From Setup, go to Sites and register a custom Force.com domain for your organization.
-
Click New to create a site.

-
For the required Active Site Home Page field, choose a Visualforce page. You can use ChargifyPublicOfferSignupPage.
-
Click Save to create the site.
-
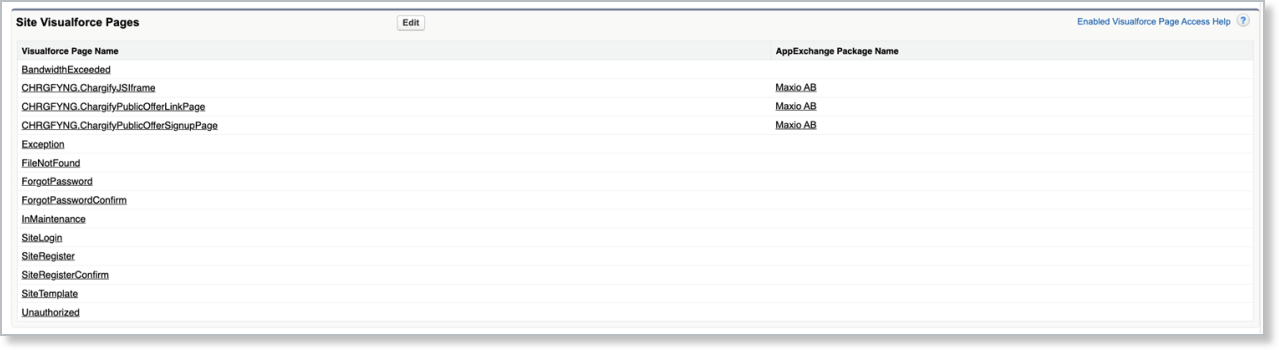
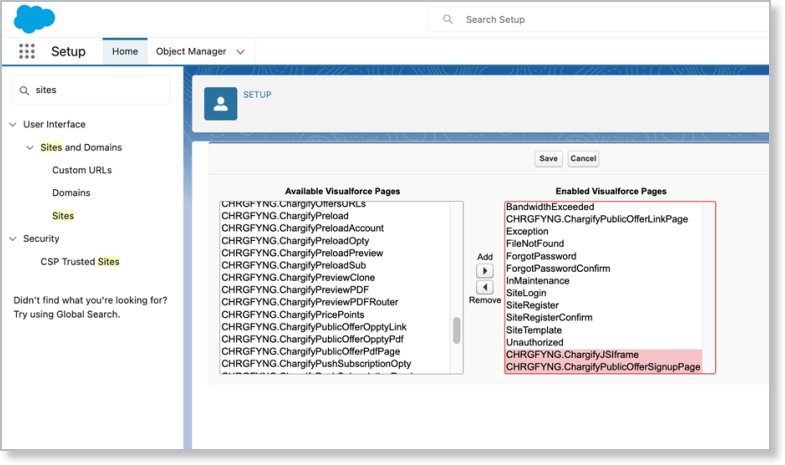
Scroll down on the newly created site and click Edit in the Visualforce Pages section. Enable these two pages:
- CHRGFYNG.ChargifyJSIframe
- CHRGFYNG.ChargifyPublicOfferSignupPage
-
Click Activate on the Site Details page.
Important: The site won't activate until you accept the Terms of Service and register your domain.
Create a Custom Offer template
A template controls what a prospective Customer sees on the signup page, and which Force.com site and Advanced Billing site it's tied to.
To create a Custom Offer Signup Page template
-
Go to the Maxio AB Signup Page tab and click New Maxio AB Signup Page.
-
Fill in these required fields:
- Maxio AB Signup Config Name - An internal reference name. The prospective Customer never sees this.
- Force.com Site URL - The full site URL (starting with
https://) from the site you created above. You can find it under Setup > Sites. - Advanced Billing Site Config - Leave blank if the offer applies to all sites, or set it if the offer applies to only one Advanced Billing site.
- Validity in Days - Overrides the default validity period of 14 days. You can override it again per individual Custom Offer.
-
(Optional) Set a Redirect URL to send the Customer to a branded confirmation page or onboarding workflow after a successful subscription, instead of the default signup page confirmation.
-
(Optional) Fill in the Page Content section.
-
(Optional) Fill in the Terms and Conditions field, if you want to show terms and conditions on the signup page.
Configure Maxio.js
Using a Custom Offer Signup Page requires a Maxio.js API Key configured in Advanced Billing.
To configure Maxio.js for Custom Offer Signup Pages
- Generate a Maxio.js API Key in Advanced Billing by navigating to Config > Integrations > API Keys.
- If your signup page template has Require securityToken in Maxio.js configuration enabled, copy the Private Key and enter it in Advanced Billing under Maxio AB Configuration > Advanced View > Your Site Configuration > Maxio JS: Maxio AB JS Private Key.
Related information
To generate and share a signup link from this template, see Generate and Share Custom Offer Signup Pages.
To install and connect the integration before configuring signup pages, see Setup the Salesforce Integration.
For more detail on Force.com Sites generally, see Salesforce's guide on creating and setting up Force.com Sites.
Still need help?
Reach out and our support team will take it from here.