
Create a Project
Last updated on Sep 19, 2026
To create a Project, you first create the Transactions that the Project builds out as its Milestones are completed over time. Projects build out Contracts gradually, for Sales Orders booked with elements that are incomplete or still to be determined.
Prerequisites
Before you create your individual Projects, you need to create one or more Project Templates for the new Projects to build on.
You also need the Transactions themselves. Create these through either the Add Transactions function or through Sales Order processing (available with a CRM integration). These are the only methods of Transaction creation that allow you to select a Project Template and create a Project around the new Transactions.
You must build the Transaction first, even though revenue or invoicing don't need to happen right away. Eventual Milestone completion overrides the selections you make on the Transaction creation screen.
Create a Project through Add Transactions
When to use this method: If you are not connected to a General Ledger and this is an existing customer, or there is no corresponding Sales Order from a connected CRM.
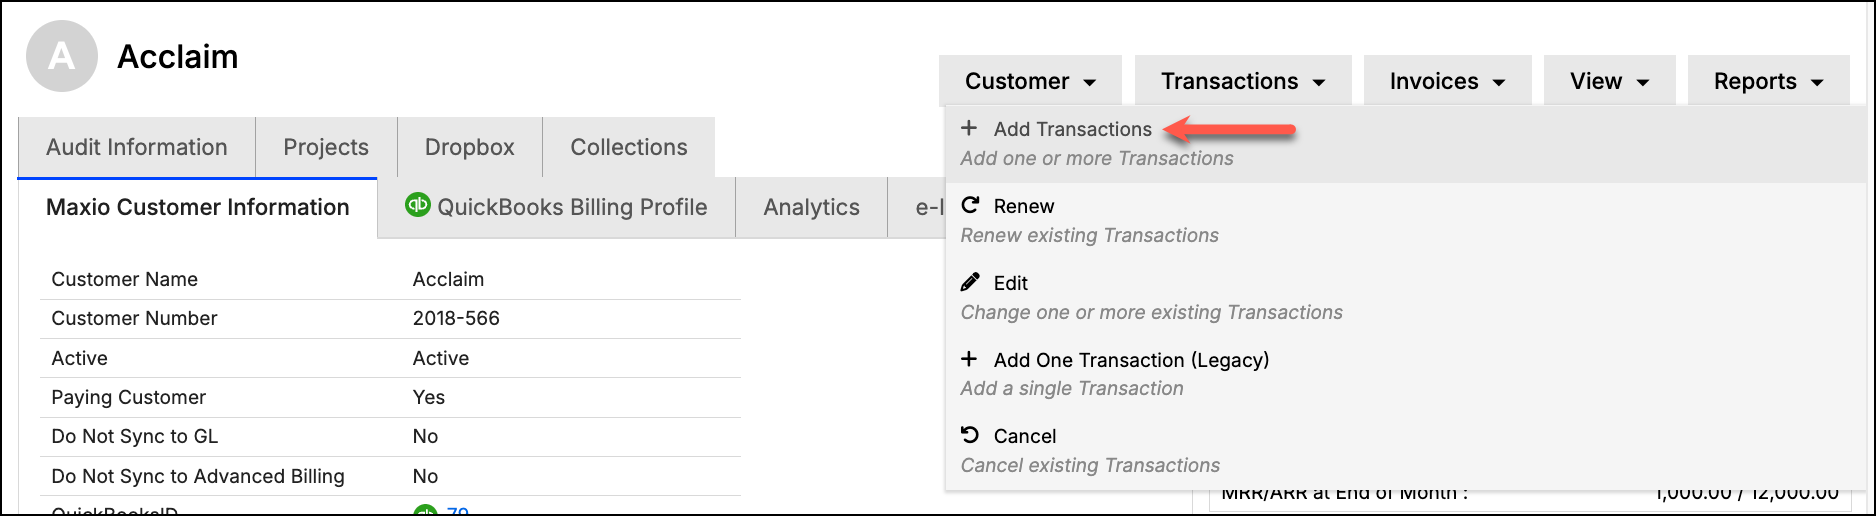
To create the Project
- Choose the Items to be used in the Project.
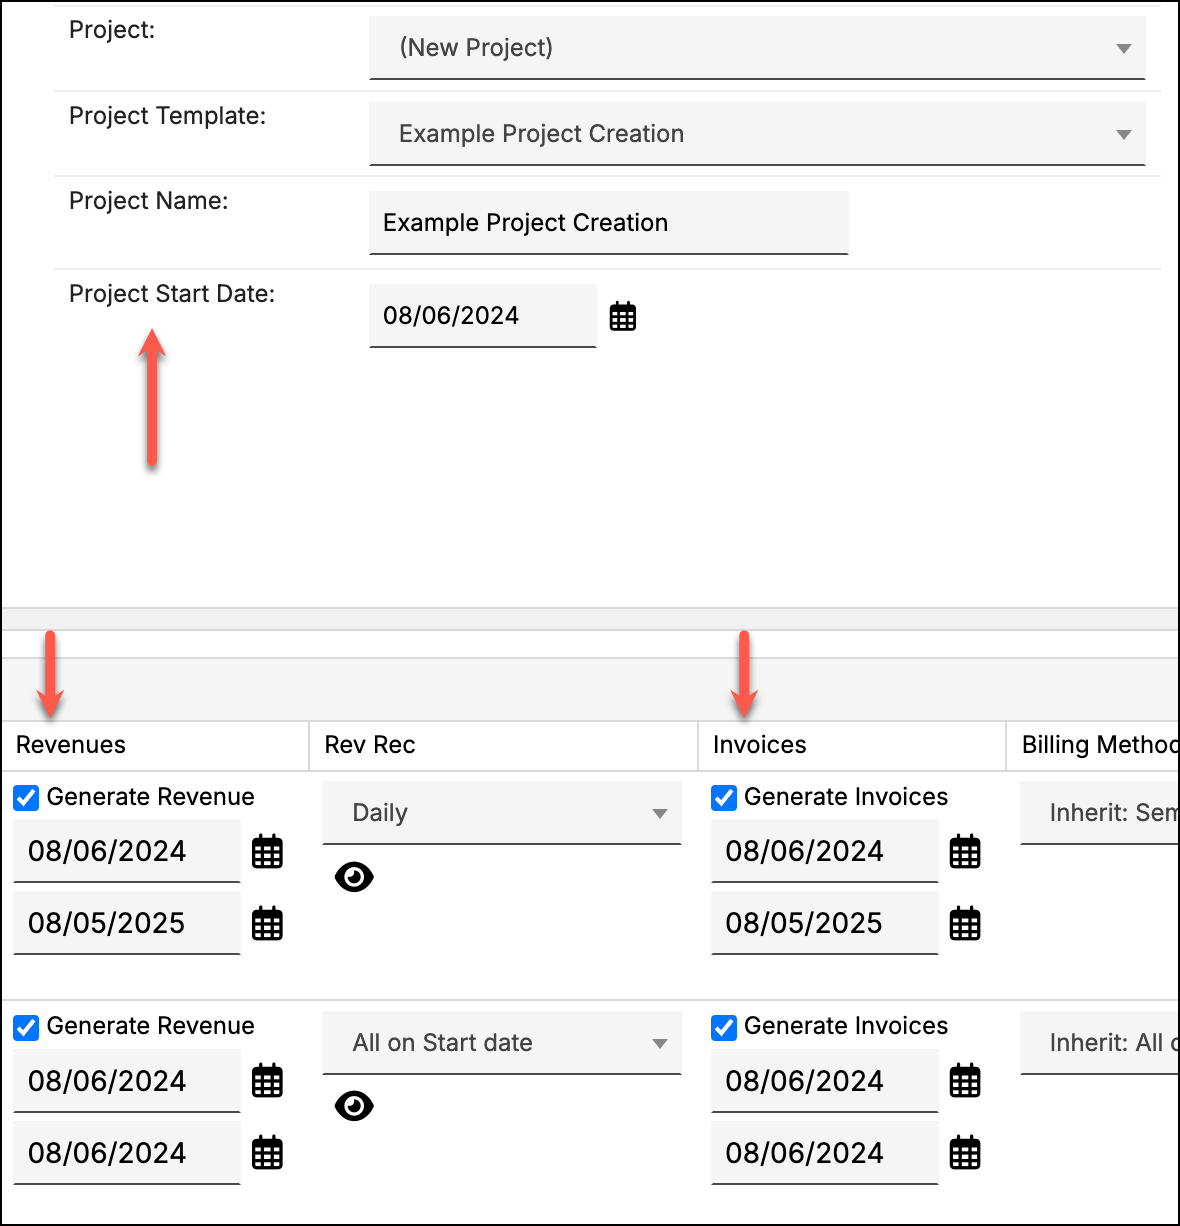
- Then, from the General tab next to Project, select (New Project).
- Choose a Project Template and enter a Project Name and a Project Start Date (which is used to determine Milestone Due Dates).
You can also enter a Project PO Number, which Maxio applies to Invoices generated for the Project unless an Invoice already has a PO Number of its own. - Next, create the Transactions as you normally would.
If you are using Project Milestones to create your Revenue Entries or Invoice Line Items, you may wish to uncheck the boxes marked Generate Revenue and Generate Invoices for some, or all, of your Transactions. (If your Milestones have clear revenue or Invoice Line Items at project creation, unchecking is unnecessary.)
If you don't see the Revenues and Invoices columns, check Show All Transaction Columns in the General tab. - Click Save to create the Transactions and the Project around them.
Create a Project through Process Orders
When to use this method: If you use a connected CRM.
When processing a Sales Order from a connected CRM, in the General tab of the Settings section, you can select an existing Project for the Transactions to be added to.
Create a new Project around Transactions
If none of your existing Projects fit, create a new one in the same flow.
To create the Project
-
For Project, select (New Project).
-
Select a Project Template (and optionally, a Project Name, Project PO Number, and Project Start Date).
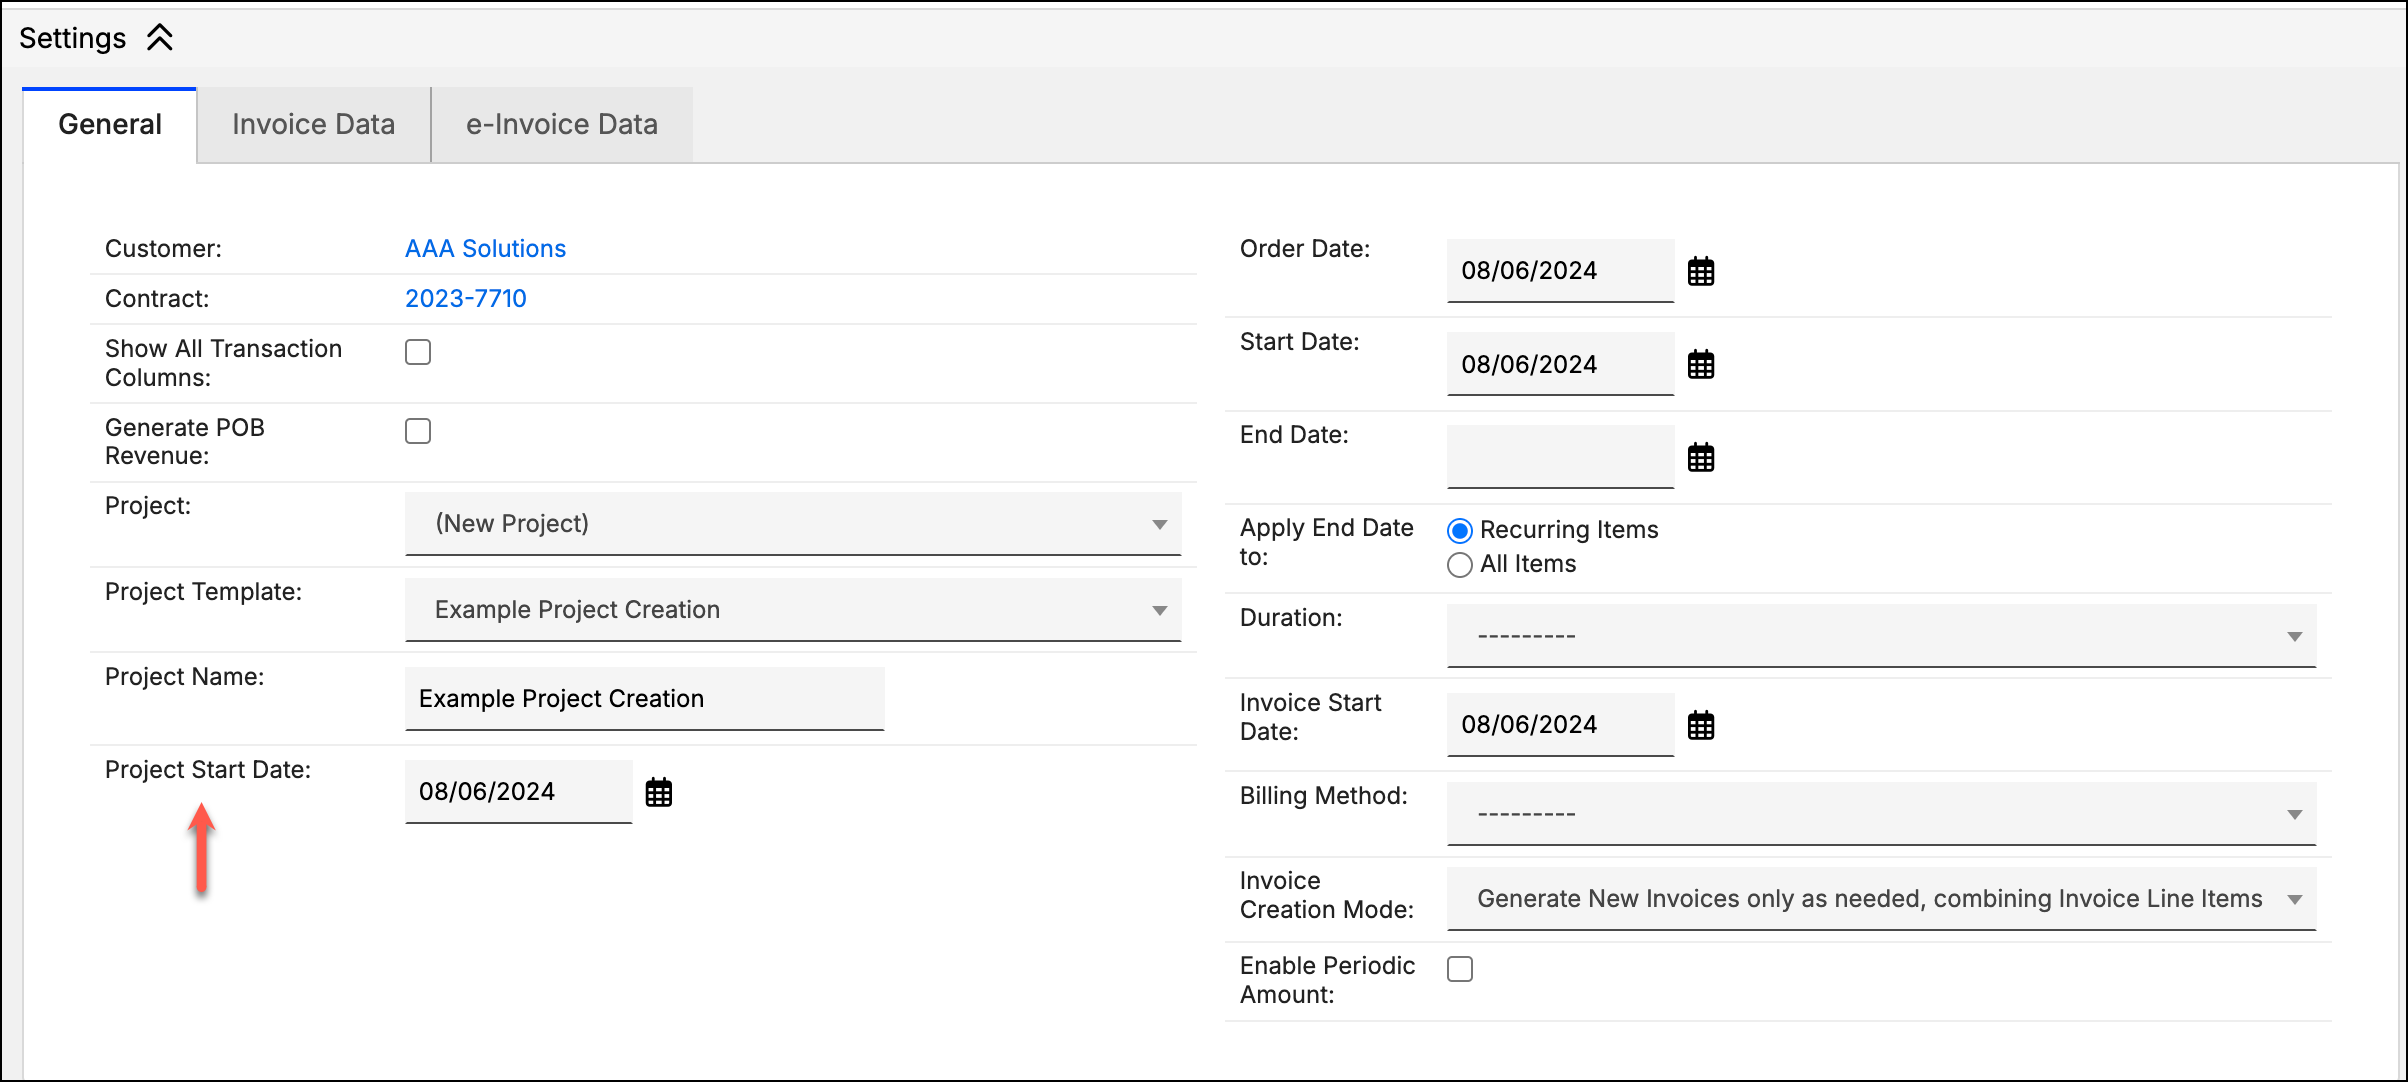
If your Salesforce, HubSpot, or Pipedrive integration has a Project PO Number field mapping configured on its Get Sales Orders field mappings, the field is pre-filled from the value staged on the Sales Order. You can still edit it before submitting, and the submitted value is what's saved to the Project. Maxio then applies that PO Number to Invoices generated for the Project, unless an Invoice already has a PO Number of its own — see Using Purchase Order Numbers.
-
Click Submit to create the new Transactions and Project.
Add a Transaction to an existing Project
If you forget to add one of the Transactions to the Project during the creation process, you can add the Transaction to the Project using the Project drop-down field of the Update Transactions page.
To add the Transaction
- From the Customer or Contract page, hover over Transactions in the top-right corner, and click Edit.
- Next, select the Transactions you want to add to a Project.
- From the resulting Update Transactions page, make sure the Project column is displayed (click Columns to add it if needed).
- For each Transaction, choose the existing Project from the Project drop-down menu, then click Submit.
Remove a Transaction from a Project
You can remove a Transaction from a Project if you added it by mistake or no longer want it tracked there.
To remove the Transaction
- Navigate to the Transaction you want to remove and click Edit.
- At the bottom of the Transaction Information section, select the blank value (dashed line) to remove the Transaction.
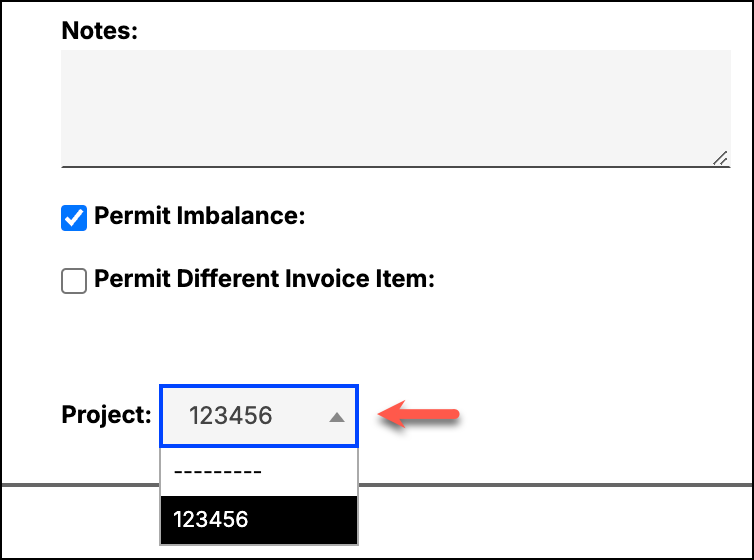
Removing a Transaction from a Project doesn't change the Transaction itself. Any Milestones that were already marked complete while the Transaction was part of the Project stay complete. Once the Transaction is removed, completing any remaining Milestones on the Project no longer affects that Transaction.
Related information
You can learn more about Projects in Understand Projects.
Still need help?
Reach out and our support team will take it from here.