
Add Multifrequency Billing to a Subscription
Last updated on Aug 27, 2026
Add a Product with its own Multifrequency billing interval to a Subscription, either when you create it or on an existing Subscription. You can combine Multifrequency with Custom Pricing to bill a custom Product amount off its own schedule instead of the Plan's.
Before you begin
The Product needs Multifrequency enabled on at least one of its price points. See Configure Multifrequency Billing for Products for that setup.
Add a multifrequency product to a new subscription
Add the Product with its own billing interval as part of creating the Subscription.
This flow describes the classic Subscription creation form, used on sites without Planless Subscriptions enabled. If your site uses the newer Product Catalog experience, see Create a Subscription instead to add a Product with its own billing interval directly from the Items section.
To add a multifrequency Product during Subscription creation
-
From Advanced Billing, go to Billing > Subscriptions and click Create Subscription.
-
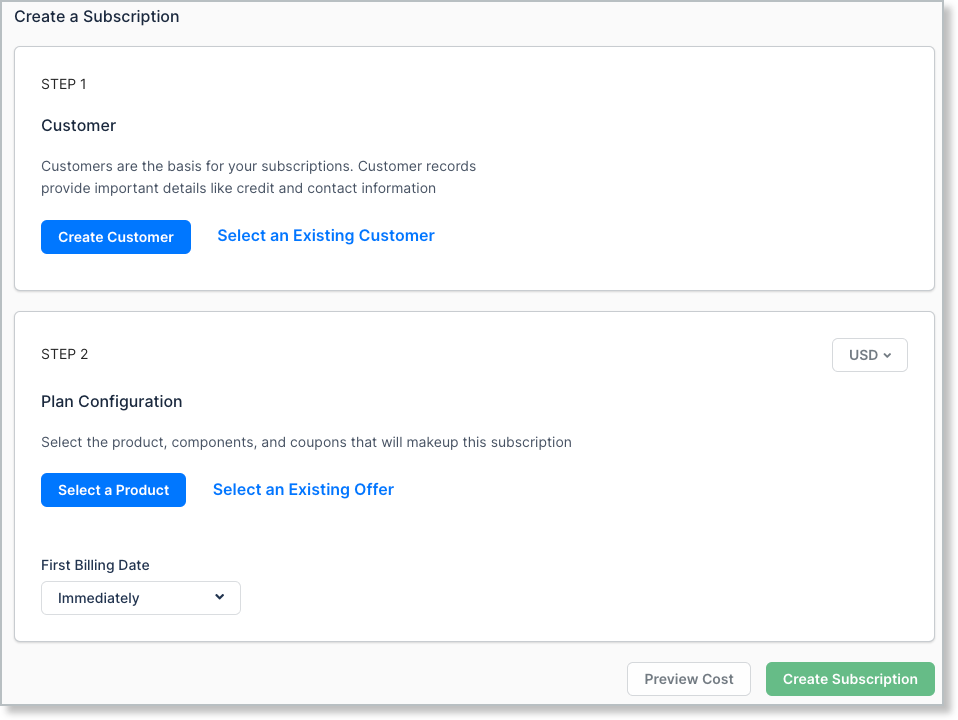
On Step 1: Customer, select Create Customer or Select Existing Customer.
-
If you're creating a Customer, select a Payment Method before continuing.
-
On Step 2: Configuration, click Select Product.
-
Select the Product.
-
Add the Component that has Multifrequency enabled.
-
If the Component doesn't have Multifrequency enabled, select Change pricing and add a Custom Price with its own billing interval instead.
-
Complete Step 3 with any additional schedule or term settings that apply to your site.
-
Set the First Billing Date. It defaults to Immediately.
-
Click Create Subscription.
Important: Multifrequency doesn't work with a One-Time Component.
Add multifrequency pricing to an existing subscription
Add or change a multifrequency Product on a Subscription that's already active.
To add multifrequency pricing to an existing Subscription
Important: Update Quantity only appears for quantity-based Products, requires Customer Support permissions, and doesn't apply to One-Time quantity Products.
-
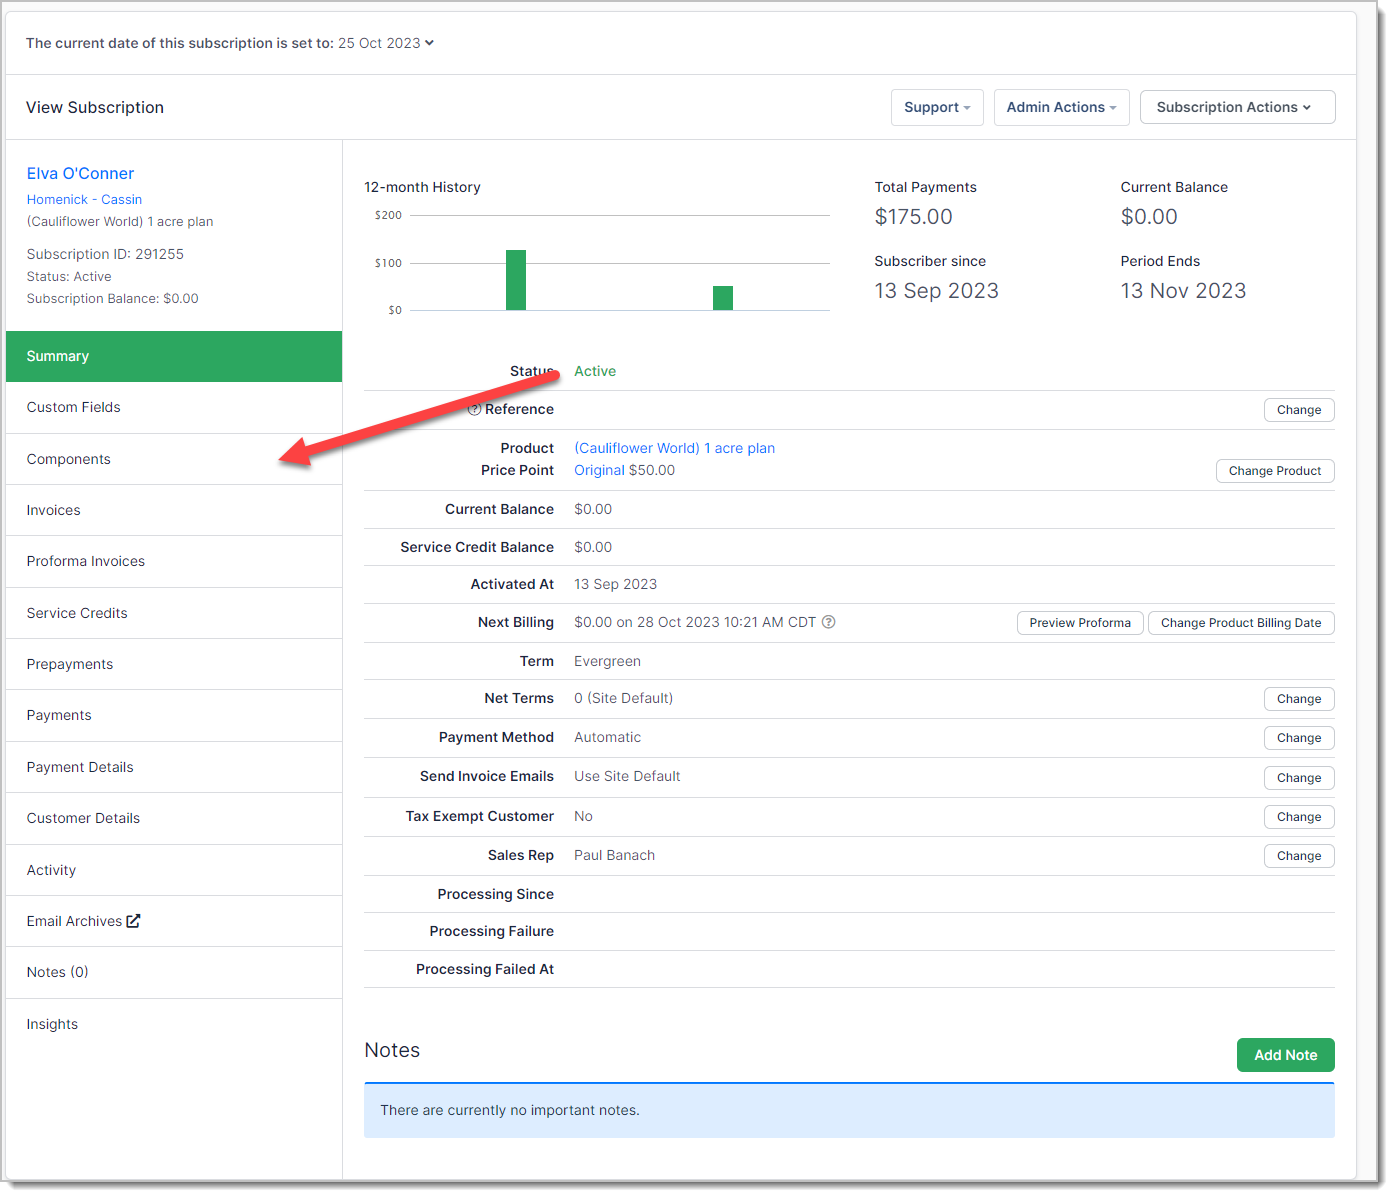
From the Subscription Summary, go to the Products tab (Components, if Planless Subscriptions isn't enabled for your site).
-
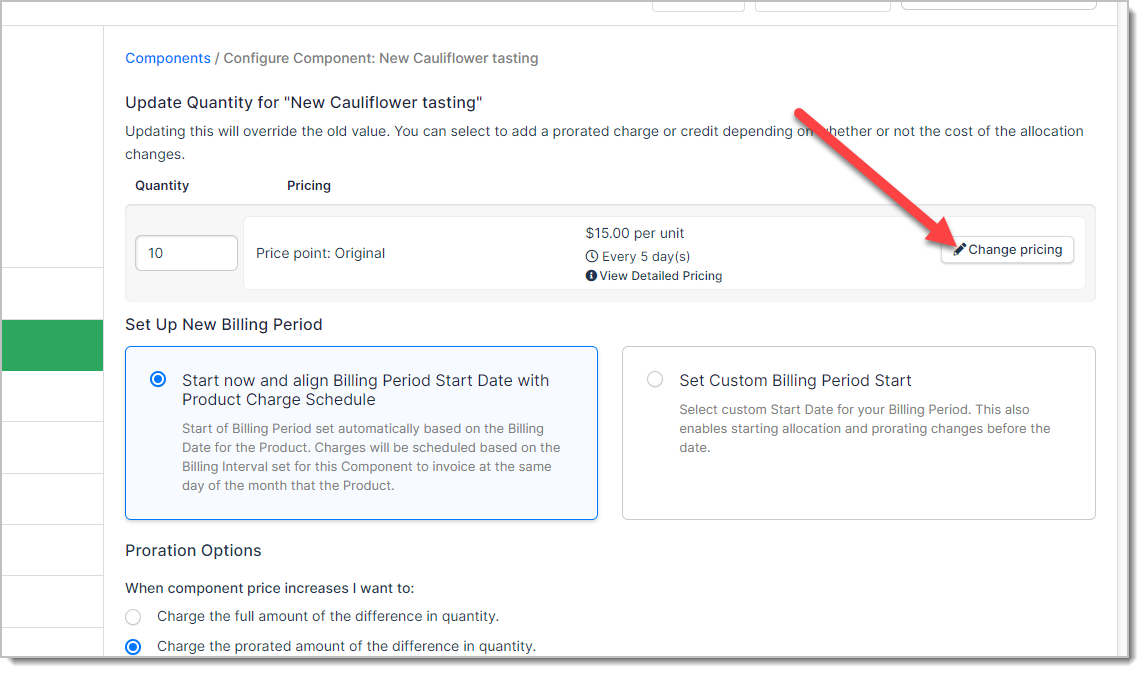
Select the three-dot menu next to the Product and select Update Quantity.
-
Select Change pricing next to the desired price point.
-
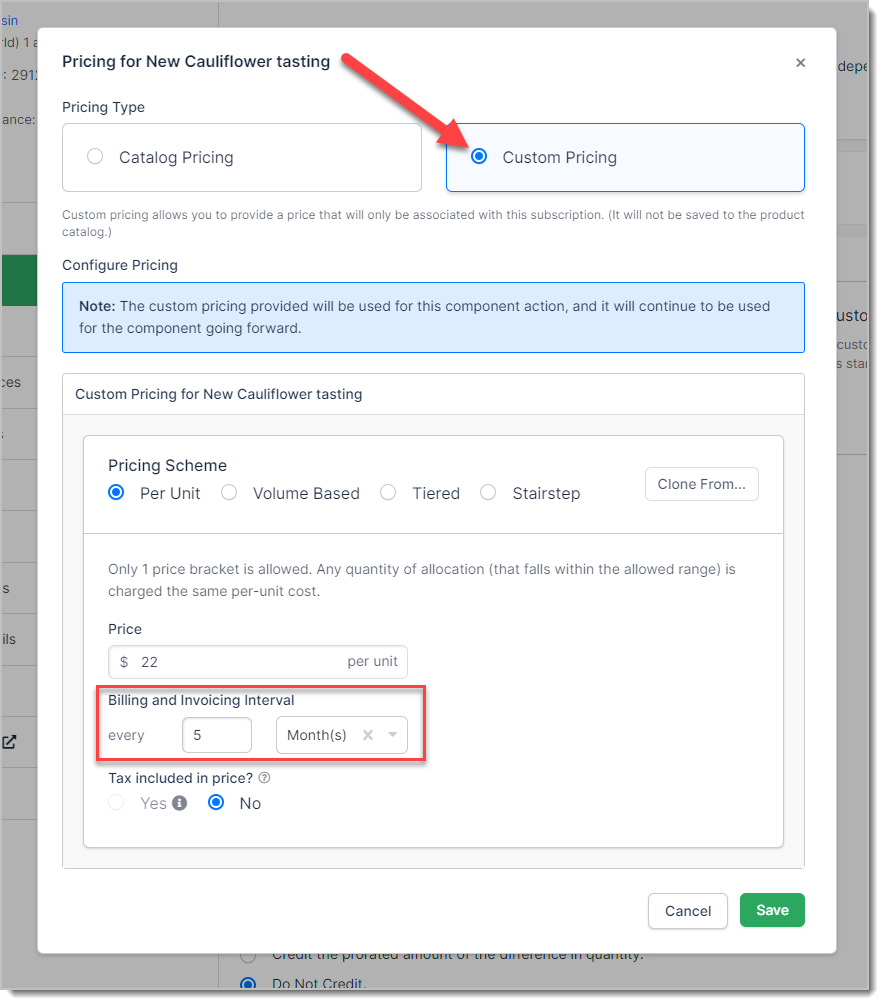
Under Pricing Type, select Custom Pricing. Enter the price, set the Billing and Invoicing Interval, and select Save.
-
Under Set Up New Billing Period, choose how the new billing period starts:
- Start now and align Billing Period Start Date with Plan Charge Schedule uses the usual proration options when changing a Product.
- Set Custom Billing Period Start reveals a second choice, Set Billing Period Start Date:
-
Set Custom Date sets a specific new billing date for this Product.
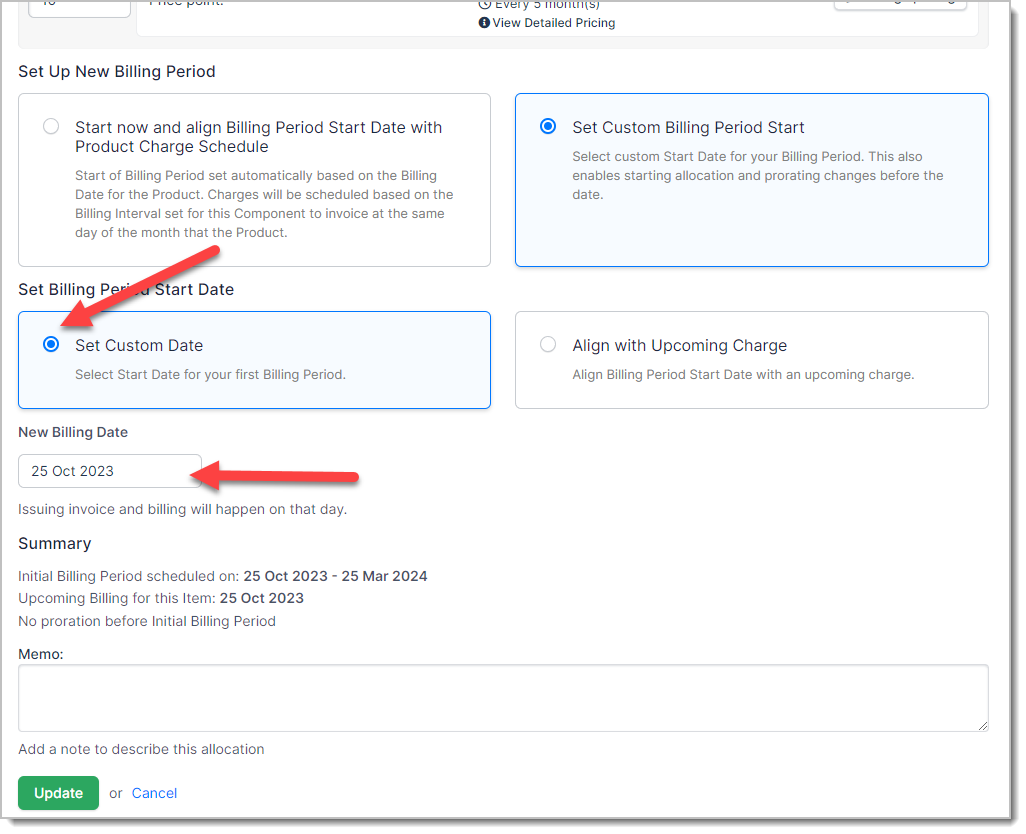
-
Align with Upcoming Charge aligns the new billing period with an existing upcoming charge on the Subscription, including other Products and Plans.
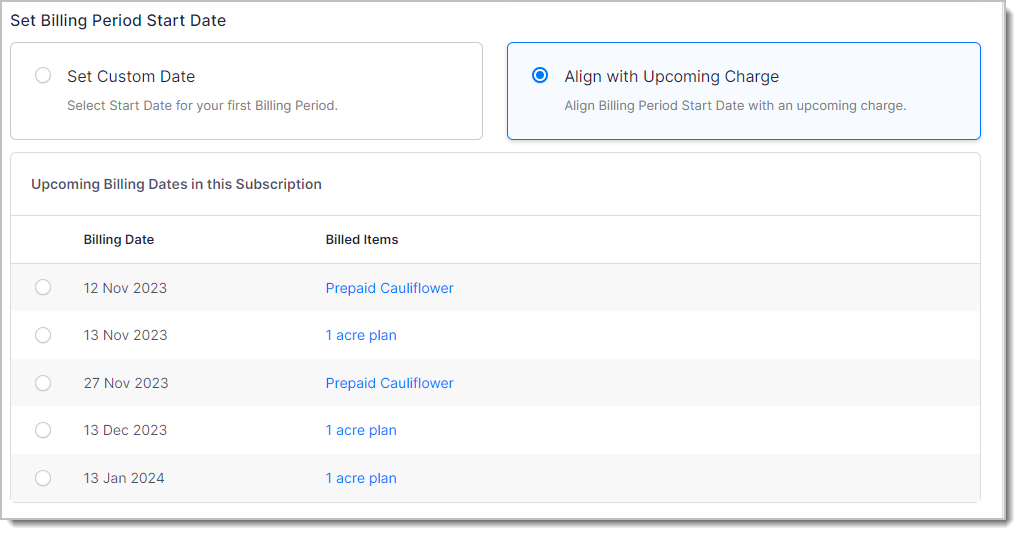
-
Related information
For how Custom Pricing works alongside Multifrequency, see Understand How Custom Pricing Works.
For the full custom-pricing procedure this article's second section builds on, see Configure Custom Pricing for Products.
Still need help?
Reach out and our support team will take it from here.