
Build HTML Email Layouts
Last updated on Sep 19, 2026
The HTML email editor lets you brand the messages Advanced Billing sends on your behalf, so a receipt or a renewal reminder looks like it came from you rather than from a generic billing system. You write the structure and CSS once as a layout, then assign that layout to as many templates as you like. Editing layouts and templates requires the account permission described as manages product catalog, settings, and integrations.
Layouts and templates
Two pieces combine to produce each email, and knowing which is which saves a lot of confusion:
- Layout - The container the email is sent in. This is where you define your CSS and the overall structure. One layout can serve many templates.
- Template - The body of the email, one per event. Each template carries its own content, and you set its Layout, From, and Subject. Dunning templates have no From field, since the dunning settings supply the sender.
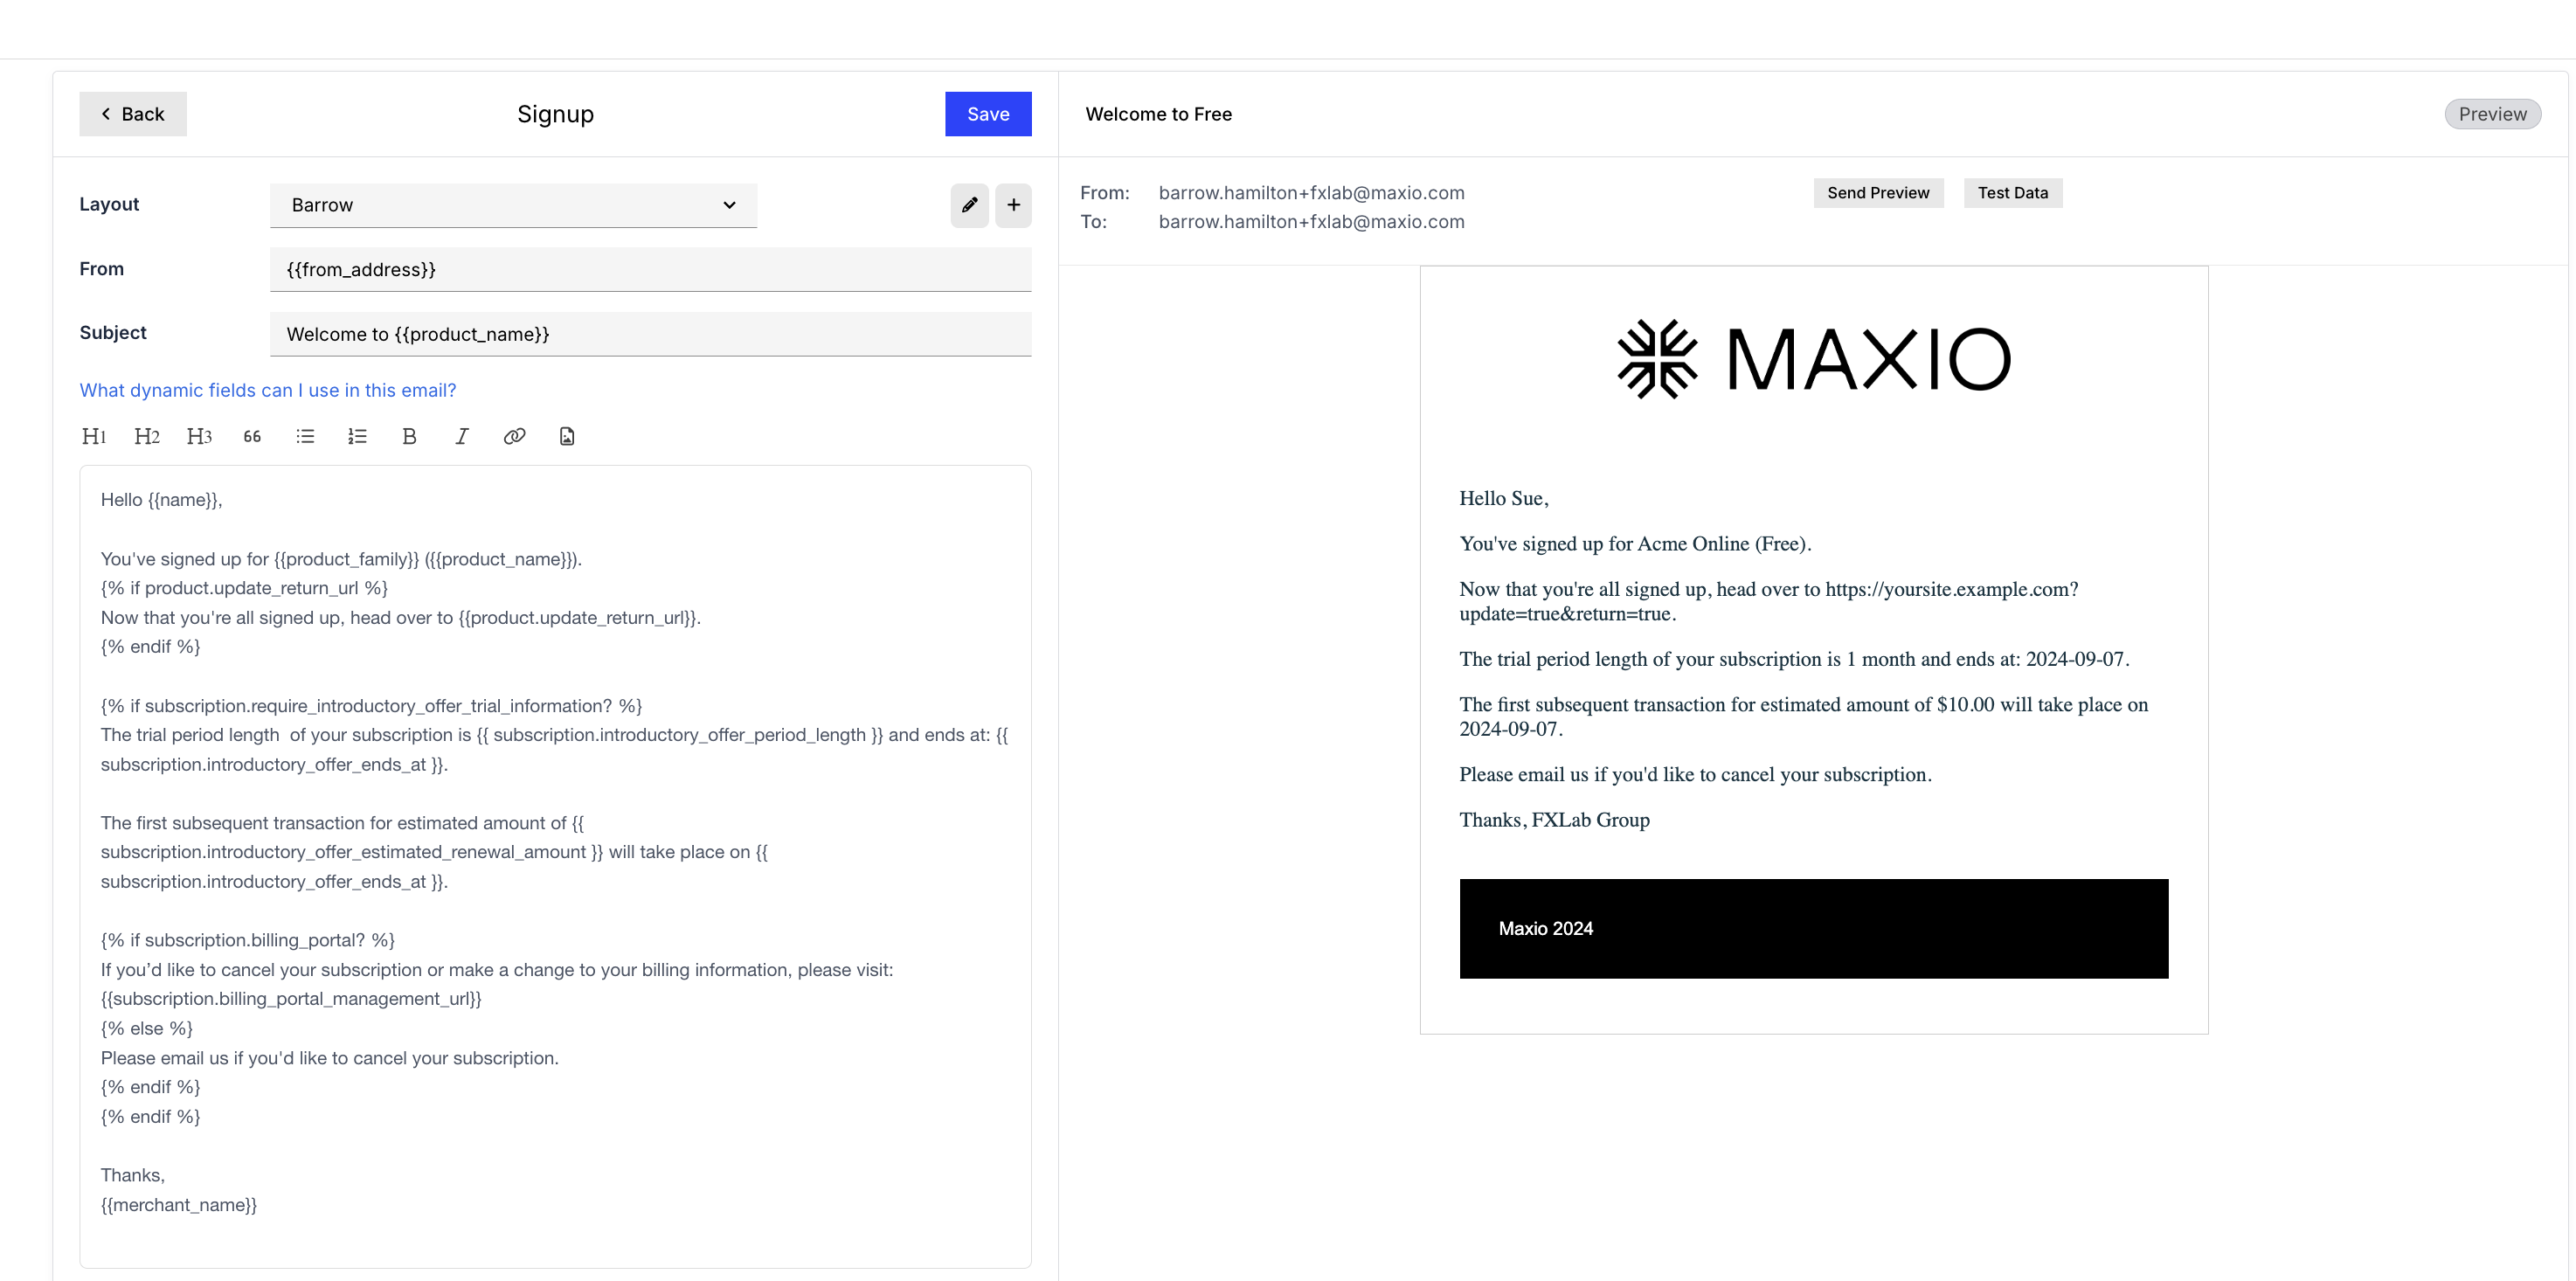
To edit either, you'll need a working knowledge of HTML. Advanced Billing also supports Markdown in the email body, which is an easier way to produce decent-looking content without writing the markup yourself.
Important: Existing emails keep sending exactly as they did until you assign a custom layout to their template.
Create a layout
Layouts aren't created from their own dedicated screen. Instead, you start one from inside any existing email's editor.
To create a layout
- Go to Config > Settings and find the Emails section.
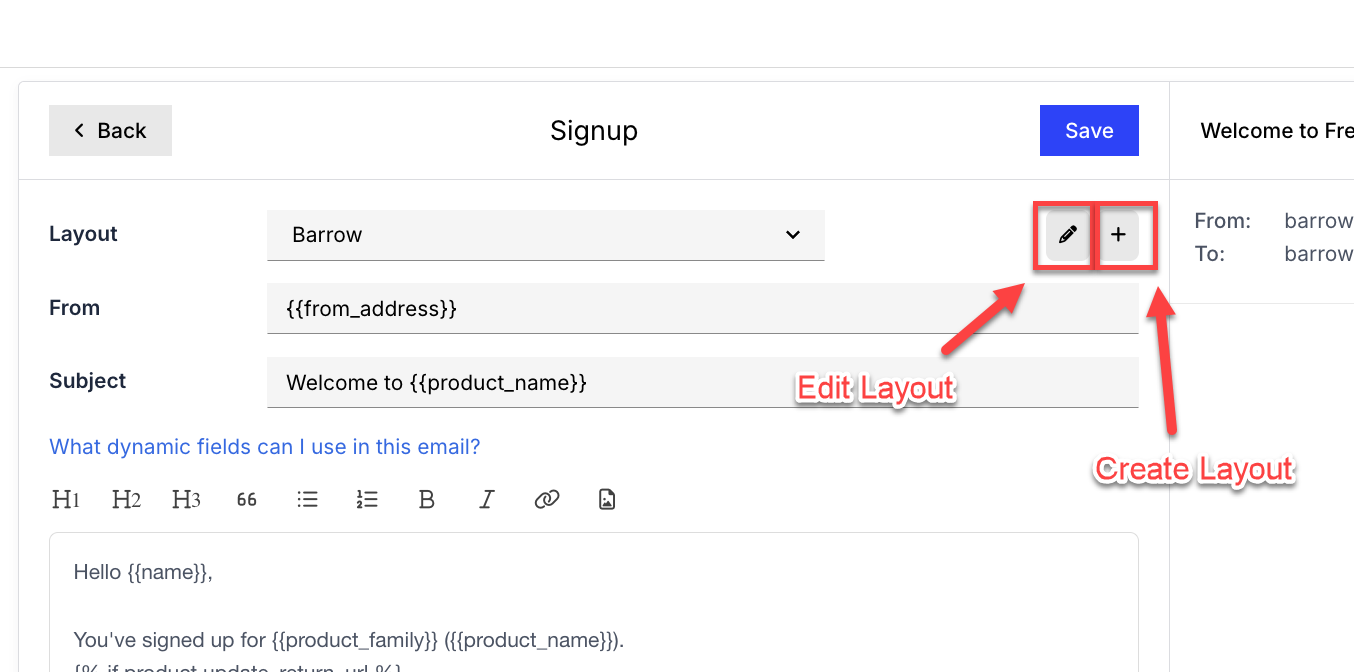
- Open any email in the editor, then click the + button next to the layout drop-down to start a new layout.
- Define your layout in the editor.
- Click Save. The layout is now available to assign to any template.
Important: A layout must contain the
{{ main_content }}tag. That tag marks where the template's own content is inserted, and Advanced Billing rejects any layout saved without it.
The layout previews live as you edit, in the right-hand pane, so you can see the effect of a change without saving. Previewing works once the layout has been saved for the first time.
To return to the template you came from, click the < Email link in the top left of the editor.
Set a default font
Fonts belong to the layout rather than to an individual email, so defining one in a layout changes the font for every template assigned to it. The example below sets the default font to Arial. Adjust it to your own preferences.
<!DOCTYPE html>
<html>
<head>
<style>
p {
    font-family: arial;
}
</style>
</head>
<body>
  <p>
    {{ main_content }}
  </p>
</body>
</html>
Assign a layout to a template
Select the layout from the layouts drop-down and click Save. The template then renders inside it. The drop-down's first option is None, which sends the template without a custom layout.
To change a layout later, select it from the drop-down and click the pencil icon. The pencil appears only when a layout is assigned.
Nearly every email Advanced Billing sends can be edited this way, including Sign-up, Customer Receipt, Card Expiration, End of Trial, Cancellation, Update Payment Request, Term Renewal, the ACH and direct debit notices, the prepaid subscription notices, dunning, the invoice and proforma invoice notices, Bank Account Verification (if your site uses Stripe Connect with ACH), and the Portal invitation. Which of these appear depends on the features your site uses.
Important: Upcoming Invoice is an exception to the usual layout. Instead of the standard top-level edit link, its editor is nested under its own send-target options (send to all Products or send to individual Products). It still supports a custom layout once you open it from there.
Meet the formatting requirements
Important: Maxio Support can't debug the HTML in your templates or layouts. Test your markup before applying it to a live site.
These requirements apply to layouts, not to template bodies. Layouts are validated as strict, well-formed XML rather than ordinary HTML, so markup a browser would happily accept can still be rejected. Template bodies aren't validated this way, which is why a bare <br> is fine in a template but breaks a layout.
Make the following changes to valid HTML before pasting it into a layout:
- Close image tags as
<img ... />. - Close line break tags as
<br />. - Remove CSS comments, or convert them to HTML comment syntax as
<!-- abc -->. - Include the
{{ main_content }}tag, so the template's content has somewhere to go.
If you see the alert HTML is invalid. Missing a closing tag? Error at line: 247 position: 5879, an unclosed tag is the usual cause. The line and position in the message point at where the parser gave up. A bare <br> is the most common culprit, so replace it with <br />.
Edit a template
The template holds the content of one specific email, and it's where you write the wording your subscribers read.
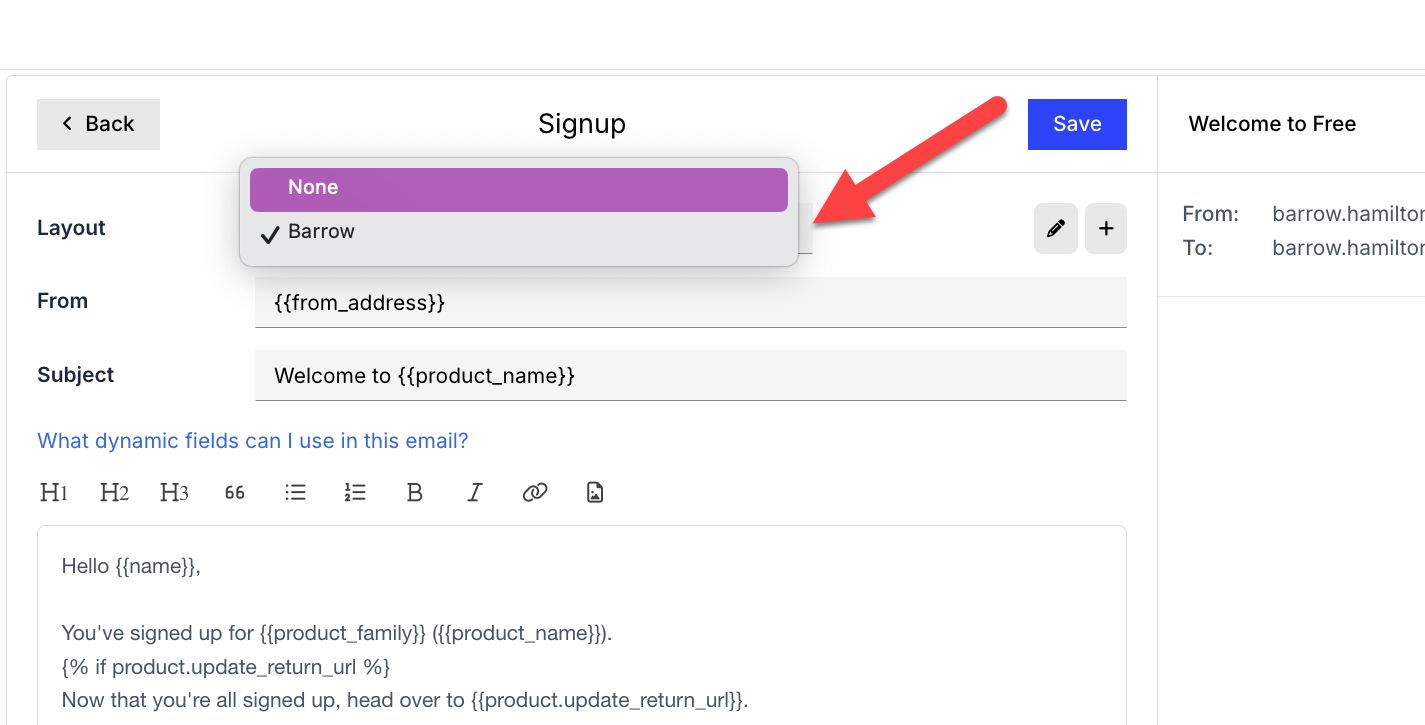
Editing a template works the same way as editing a layout, with Liquid variables available in the body. Pause for a second or two after typing and the preview pane on the right updates. For the full set of variables you can use, see the Customize Email Templates help article, which the editor also links to directly under the Subject field.
Changes don't affect emails being sent until you click Save.
Preview against test data
The editor renders your template against sample values, so you can set up a condition and see how it resolves before anything reaches a subscriber. To change those sample values, see the Preview Emails with Test Data help article.
Related information
To edit the content that sits inside a layout, see Customize Email Templates.
To see how a layout renders before sending it, see Preview Emails with Test Data.
To choose which emails your Site sends and when, see Configure Email Settings.
Still need help?
Reach out and our support team will take it from here.