
Build your own Billing Portal with the Advanced Billing API
Last updated on Aug 27, 2026
Building your own subscription management experience against the Advanced Billing API gives you full control over what your customers see and do. Use the API resource tables below to find the endpoint for each action, then follow the walkthrough to assemble them into a working dashboard.
Before you start
| Requirement | Detail |
|---|---|
| Feature | Advanced Billing API |
| You need | Developers, an existing frontend UI for subscription management, and a backend that recognizes a signed-in user |
| Code | Yes |
| Difficulty | Medium |
Core subscription management API resources
These are the API resources behind each subscription management action, grouped by the kind of change they make.
Basic subscription and Customer actions
| Resource | Description |
|---|---|
| Read Customer’s Subscriptions | GET /customers/:id/subscriptions.json |
| Read Customer Payment Profiles | GET /payment_profiles.json?customer_id=:id |
| Update Customer | PUT /customers/:id.json |
| Read Subscription | GET /subscriptions/:id.json |
| Read Subscription Invoices | GET /invoices.json?subscription_id=:id |
| List Subscription’s Components (All) | GET /components.json |
| List Subscription’s Components (Only ones subscribed to) | GET /components.json > if allocated_quantity > 0, show. if kind is metered_component and price_point_id is not null, show. |
| Next billing amount and next renewal date | GET /subscriptions/:id.json > parse current_billing_amount_in_cents and next_assessment_at |
Upgrade and downgrade actions
| Resource | Description |
|---|---|
| Read Products from Catalog | GET product_families/:product_family_id/products.json |
| Preview Prorated Product U/D | POST /migrations/preview.json |
| Execute Prorated Product U/D | POST /migrations.json |
| Schedule Upgrade/Downgrade for Next Renewal | PUT /subscriptions/:id.json |
| Read Subscription’s Components | GET /components.json |
| Preview Component U/D | POST /allocations/preview.json |
| Execute Component U/D | POST /allocations.json |
| Read Offers from Catalog | GET /offers.json |
| Preview Offer U/D | POST /migrations/preview.json |
| Execute Offer U/D | POST /migrations.json |
| Enforce upgrades only | In your UI, only allow changes if the total cost of the change is greater than the current cost. Additionally, if you do not want to display lower cost options at all, filter out what you display to the user, based on price. |
Cancel and pause actions
| Resource | Description |
|---|---|
| View Invoices | GET /invoices.json?subscription_id=:id |
| Cancel Subscription (immediate) | DELETE /subscriptions/:id.json |
| Reactivate Subscription | PUT /reactivate.json |
| Create Pending Cancellation (delayed) | POST /delayed_cancel.json |
| Remove Pending Cancellation | DELETE /delayed_cancel.json |
| Pause Subscription | POST /hold.json |
| Resume Paused Subscription | PUT /resume.json |
Payment method actions
| Resource | Description |
|---|---|
| Collect Payment Information | Docs: Maxio.js Guide: Collect Payment Methods in your App with Maxio.js |
| Read Customer’s Payment Profiles | GET /payment_profiles.json?customer_id=:id |
| Create Payment Profile for Customer | POST /payment_profiles.json |
| Set Default Payment Method on Subscription | POST /change_payment_profile.json |
Group and hierarchy actions
| Resource | Description |
|---|---|
| Cancel a Group (immediate) | POST /subscription_groups/:uid/cancel.json |
| Cancel a Group (delayed) | POST /subscription_groups/:uid/delayed_cancel.json |
| Read Consolidated Invoices for Group | GET /invoices.json?subscription_group_uid=:uid |
| Read Child Invoices | GET /invoices.json?subscription_id=:child_subscription_id |
| Remove Canceled Subscription from Group | DELETE /subscriptions/:id/group.json |
Create a subscription management dashboard
The dashboard lets your customers view their Subscription and Invoices, add or update payment methods, and act on the Subscription. The examples below are visual only, and no sample code accompanies them.
Display a subscription dashboard
Read the Subscription so you can display it in your UI.
-
Read the subscription
You’ll need the subscription id, and then perform GET /subscriptions/:id.json. -
Parse the data you want to display
For example, the subscription id sits atresponse.subscription.id, and the customer organization atresponse.subscription.customer.organization. -
Pass the data to your frontend, and display it
A finished screen might look like this.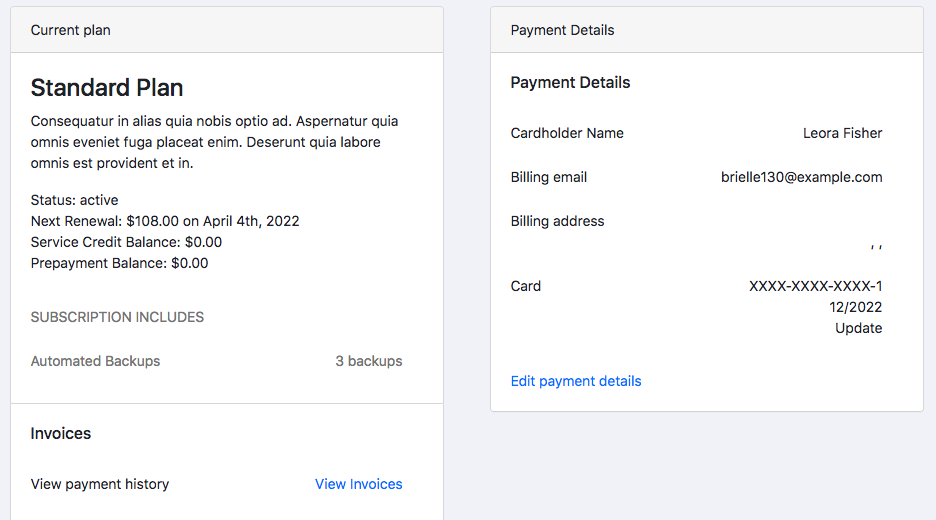
Display an invoices page
Let’s read the subscription’s invoices, so you can display them.
-
Read the subscription’s invoices
You’ll need the subscription id, and then perform GET /invoices.json?subscription_id=:id -
Parse the data you want to display
For example, the invoice uid sits atresponse.invoice.uid, the invoice number atresponse.invoice.number, and the invoice URL atresponse.invoice.public_url. -
Pass the data to your frontend, and display it
Here is a sample image that shows what an end result might look like in a basic table/list layout: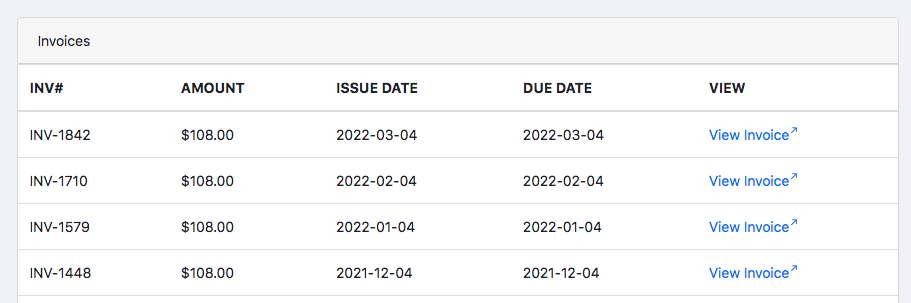
Let customers add and update payment information
On your subscription dashboard, you may provide a link to let users add/update their payment information. That link takes them to an edit-payment-information page. Use the guide called Collect Payment Methods in your App with Maxio.js.
Add component changes
Component changes let customers update their add-ons directly in your web application.
-
Display the components to change
Read the subscription’s components by performing GET /components.json. -
Parse the data you want to display
For example, the component name sits atresponse[0].component.name. -
Pass the data to your frontend, and display it
A finished component-change screen might look like this.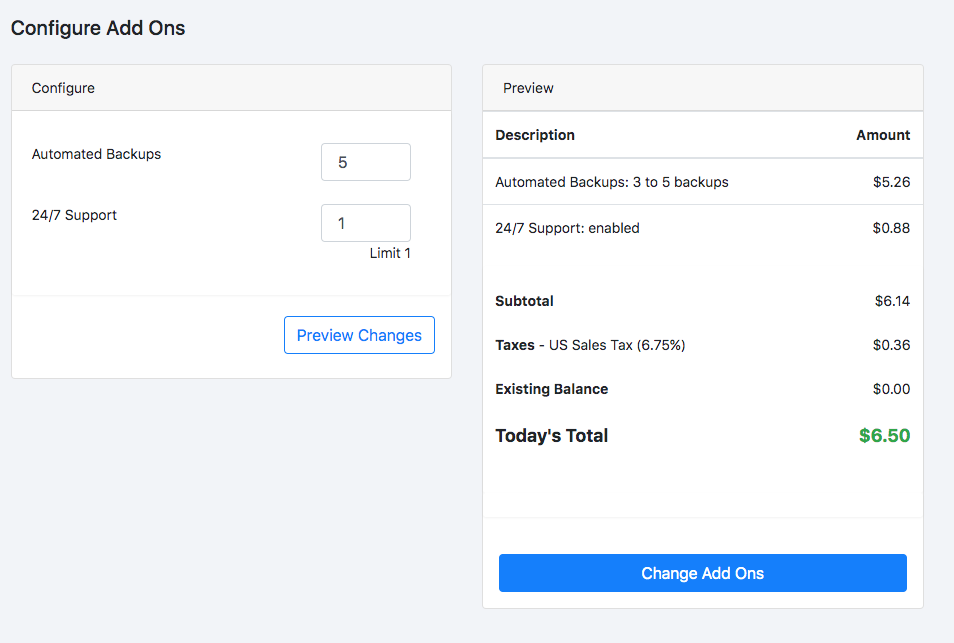
-
Add a preview changes section
Make a POST to /allocations/preview.json, parse the result, and display it. This shows the customer what the change costs. -
Submit the form with a “Change Add Ons” button
Make the API call with POST /allocations.json -
Test your subscription dashboard
Your subscription dashboard should now reflect the changes of the subscription.
Allow cancellations
Cancellations let customers end a Subscription from your web application.
-
Add a cancel action
It might look like this: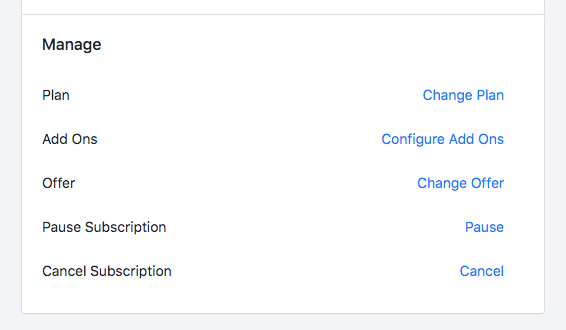
-
Add a page in your UI, with a preview, confirmation, and submit button
It might look like this. This is a good place to state the terms of cancellation and tell the customer what happens next.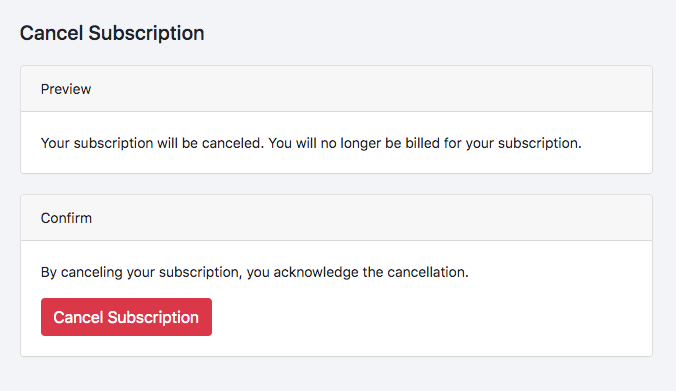
-
Upon submit, cancel the subscription
Choose which method you prefer:Method Description Endpoint Cancel Subscription (Immediate) The user can cancel their subscription, and the cancellation takes effect immediately. DELETE /subscriptions/:id.json Cancel Subscription (Delayed) The user can schedule their subscription to cancel at the end of the current billing period. POST /delayed_cancel.json -
Test your subscription dashboard
On your subscription dashboard, if you show the subscription state, it should now reflect the changes of the subscription. If there are certain actions that need to be shown/removed for a canceled subscription, or a subscription that is scheduled to cancel, do those in your UI.
Allow reactivations of a canceled subscription
Reactivations let customers restart a canceled Subscription from your web application.
-
Add a reactivation action, and only show it when a subscription is canceled
It might look like this: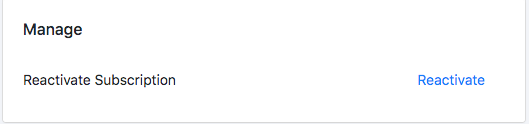
-
Add a page in your UI, with a preview, confirmation, and submit button
It might look like this. This is a good place to state the terms of reactivation, including how much the customer is charged, if anything.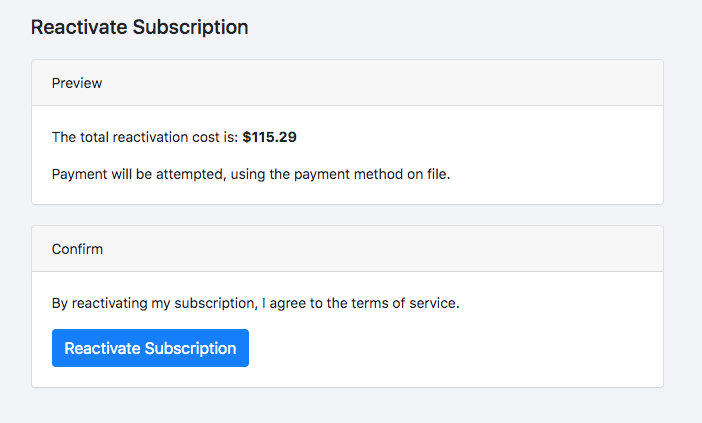
-
Upon submit, reactivate the subscription
Do this by performing a /subscriptions/:id/reactivate.json -
Test your subscription dashboard
On your subscription dashboard, if you show the subscription state, it should now reflect the changes of the subscription. If there are certain actions that need to be shown/removed for an active subscription, do those in your UI.
Optional - Allow Pausing
Let’s add pausing a subscription to your web application.
-
Add a pause action
It might look like this: -
Add a page in your UI, with a preview, confirmation, and submit button
It might look like this. This is a good place to state the terms of pausing and tell the customer what happens next.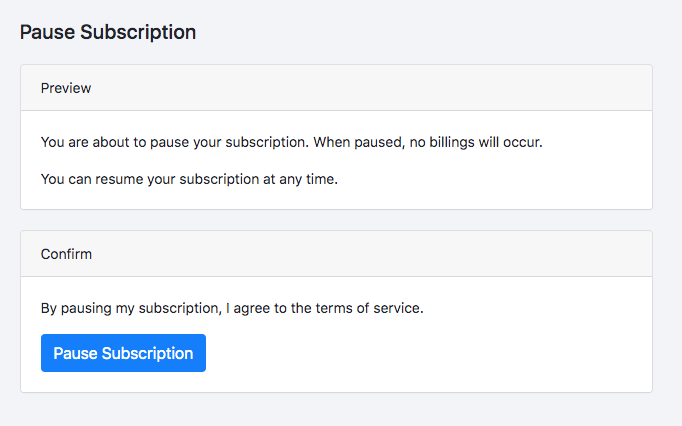
-
Upon submit, cancel the subscription
Do this with POST /subscriptions/:id/hold.json -
Test your subscription dashboard
On your subscription dashboard, if you show the subscription state, it should now reflect the changes of the subscription. If there are certain actions that need to be shown/removed for a paused subscription, do those in your UI.
Optional - Allow Resuming a Paused Subscription
Let’s add resuming to your web application.
-
Add a resume action, and only show it when a subscription is paused
It might look like this: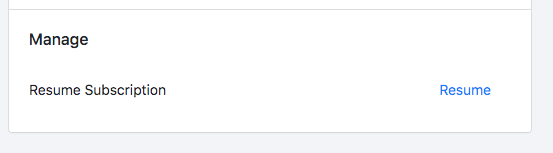
-
Add a page in your UI, with a preview, confirmation, and submit button
It might look like this. This is a good place to state the terms of resuming and tell the customer what happens next.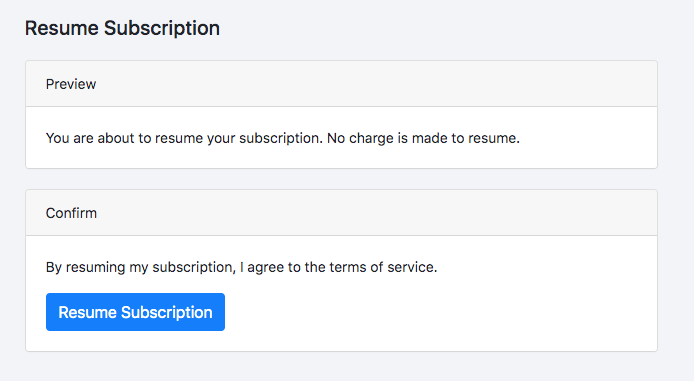
-
Upon submit, resume the subscription
Do this by performing /subscriptions/:id/resume.json -
Test your subscription dashboard
On your subscription dashboard, if you show the subscription state, it should now reflect the changes of the subscription. If there are certain actions that need to be shown/removed for an active Subscription, do those in your UI.
Related information
To collect and tokenize payment details inside your own application, see Collect Payment Methods in your App with Maxio.js.
To compare building against the API with the lower-effort alternatives, see Compare Subscription Management Methods.
Still need help?
Reach out and our support team will take it from here.