
Manage Salesforce Accounts and Contacts for Advanced Billing
Last updated on Aug 29, 2026
A Salesforce Account and Contact together hold the same information as an Advanced Billing Customer record. Depending on your sync settings, a change to either one can sync automatically to the other.
Create a Customer from an Account or Contact
Important: An Account needs at least one Contact before you can create a Customer or Subscription from Salesforce. If an Account has more than one Contact, create the Subscription at the Contact level so the resulting Customer record in Advanced Billing reflects the right Contact.
At the Account or Contact level in Salesforce, click New Subscription to open the Subscription Wizard. Creating a Subscription this way also creates the matching Customer in Advanced Billing.
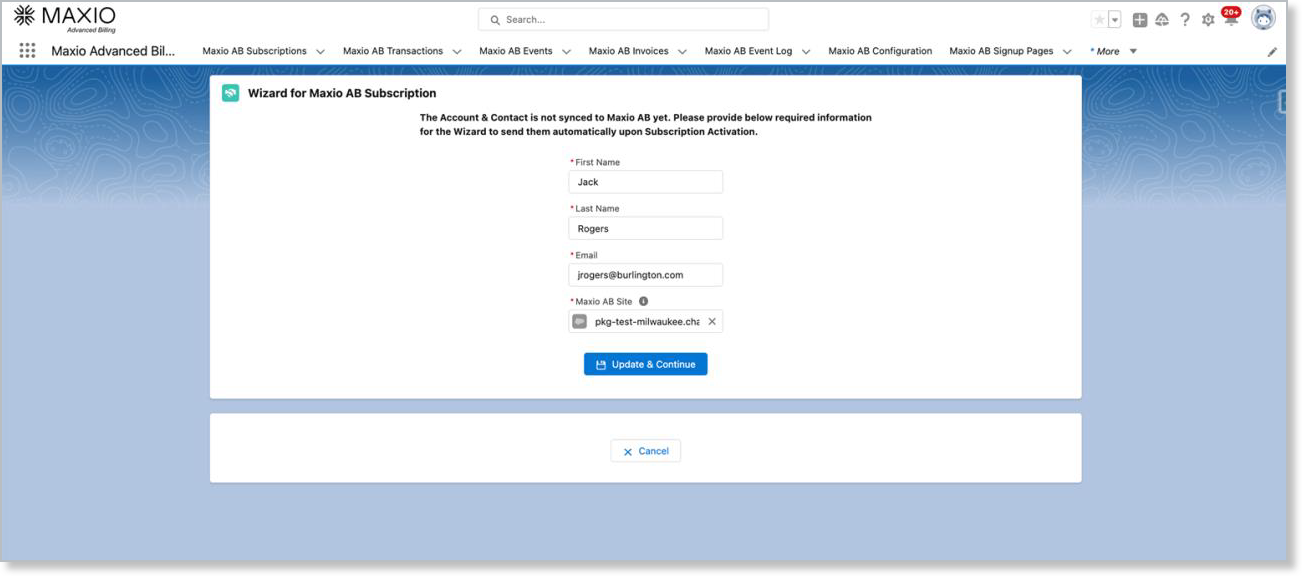
Sync Accounts, Contacts, and Customers automatically
Which direction a change syncs depends on where it happens:
- Advanced Billing to Salesforce - If your sync settings allow it, creating a Customer in Advanced Billing automatically creates a matching Account and Contact in Salesforce, on your configured batch schedule. Updating a Customer in Advanced Billing updates the Account the same way, also on that schedule.
- Salesforce to Advanced Billing - Updating an Account or Contact in Salesforce updates the matching Customer in Advanced Billing immediately, without waiting for the batch schedule.
Link a Contact to an existing Customer
Link Maxio AB Customer connects a Salesforce Contact to an Advanced Billing Customer, using whichever matching option your sync settings enable (Reference ID, Email Address, or Customer ID).
This action isn't on the Account page layout by default.
Link only one Contact per Account. Linking more than one can cause sync errors — see Account sync fails after multiple Contacts are linked if it happens.
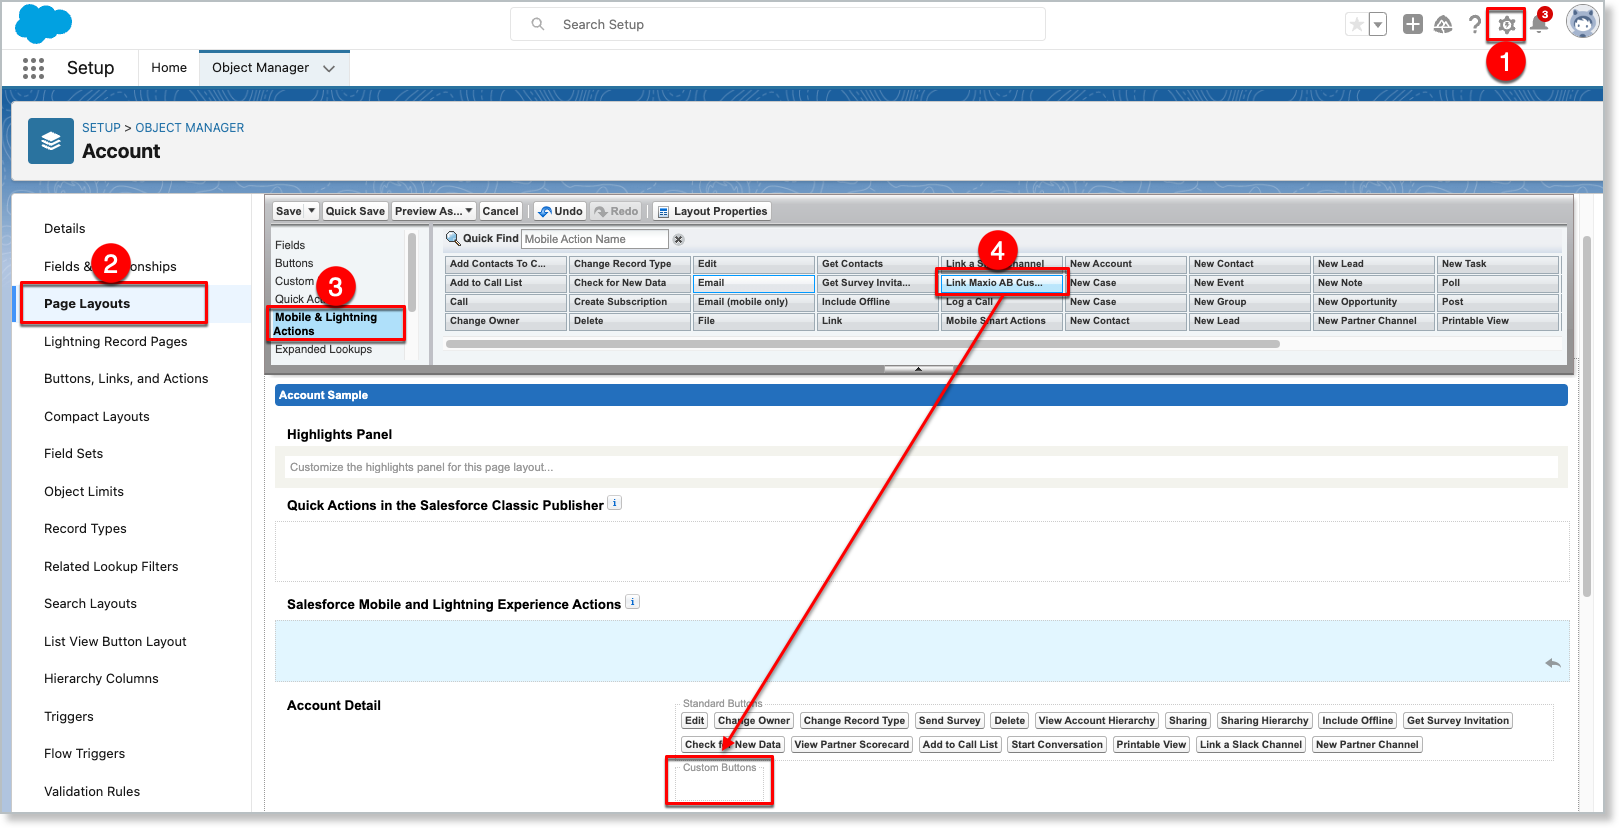
To add Link Maxio AB Customer to the Account layout
-
From the Account screen, click the Gear icon and select Edit Object.
-
Click Page Layouts, then select Account Layout.
-
From the palette list, select the Mobile & Lightning Actions category.
-
Drag the Link Maxio AB Customer action to the Account Detail > Custom Buttons group of the layout.
-
Click Save.
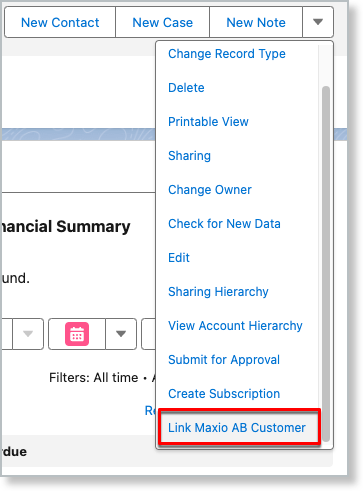
Once added, select Link Maxio AB Customer from the Account's action dropdown.
Control whether an Account syncs to Advanced Billing
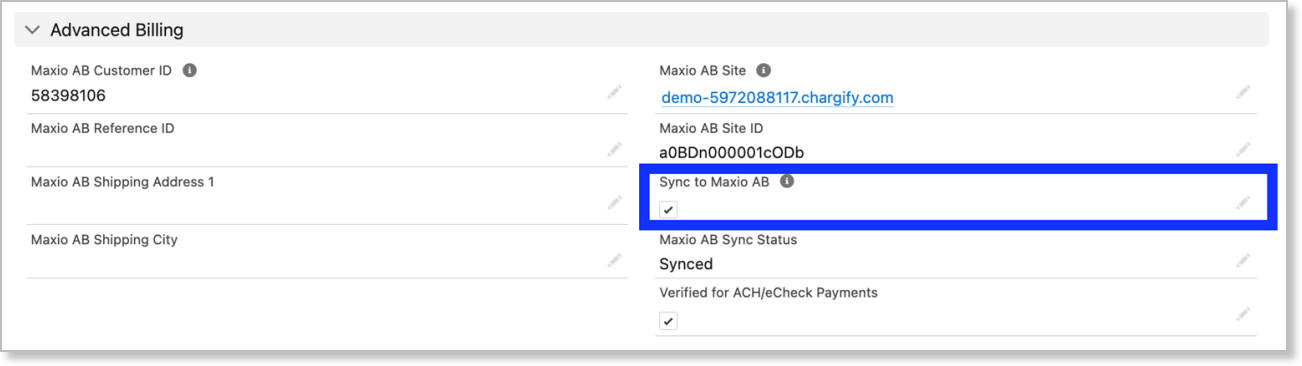
If your Scope setting is set to only sync Accounts marked "Sync to Maxio AB," check the Sync to Maxio AB checkbox on the Account to include it.
Migrate a Contact to a different Account
Migrate Maxio AB Contact moves an Account and Contact that have already synced to Advanced Billing over to a different, existing Contact under the same Account. Once migrated, both Salesforce and Advanced Billing update to reflect the new Contact.
This action isn't on the Contact page layout by default.
To add Migrate Maxio AB Contact to the Contact layout
-
From the Contact screen, click the Gear icon and select Edit Object.
-
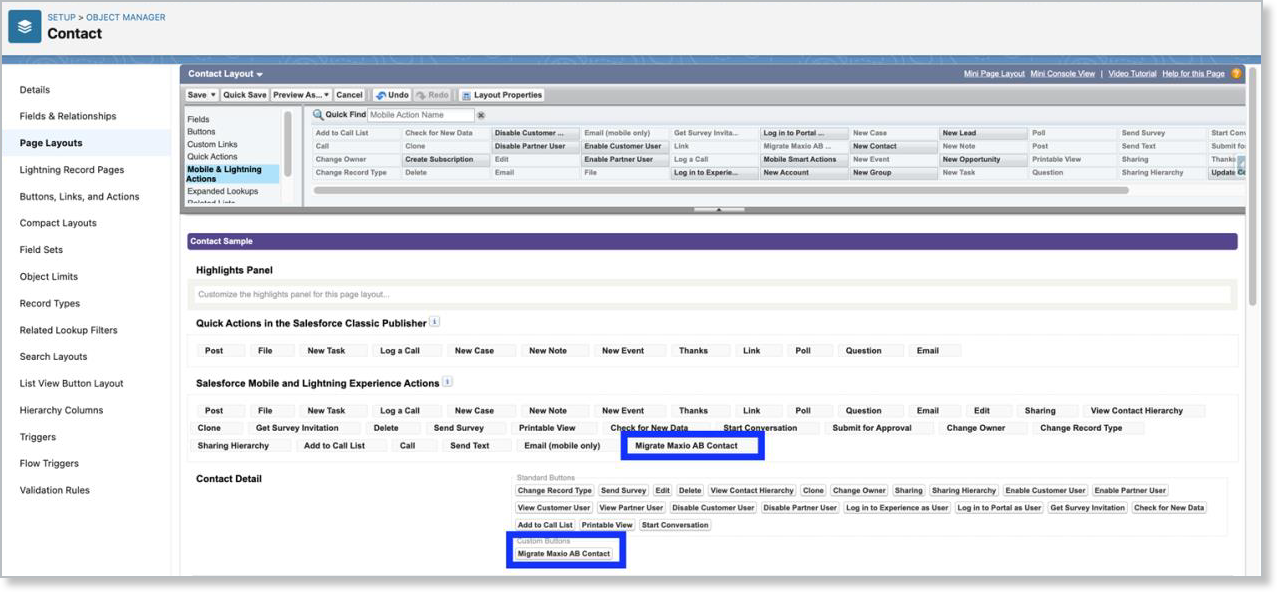
Click Page Layouts, then select Contact Layout.
-
From the palette list, select the Mobile & Lightning Actions category.
-
Drag the Migrate Maxio AB Contact action to the Contact Detail > Custom Buttons group of the layout.
-
Click Save.
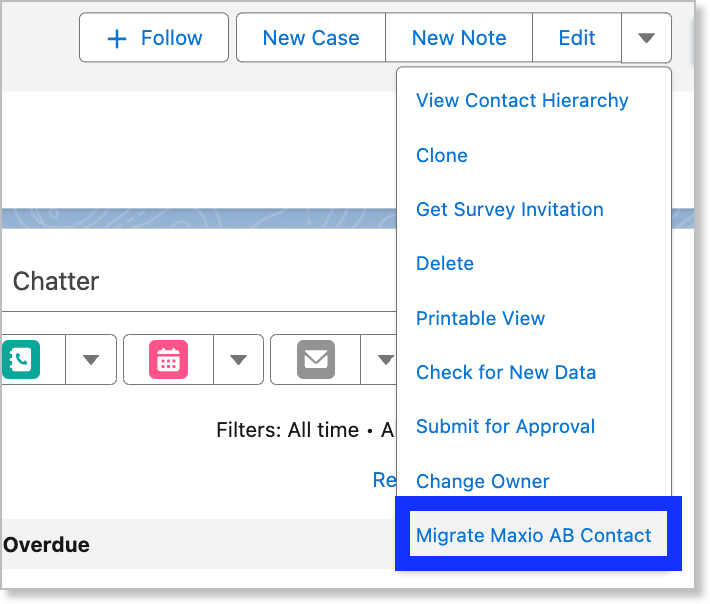
Once added, select Migrate Maxio AB Contact from the Contact's action dropdown.
Related information
To manage a Subscription once its Customer exists, see Manage Advanced Billing Subscriptions in Salesforce.
Still need help?
Reach out and our support team will take it from here.