
Configure Custom Fields
Last updated on Sep 19, 2026
Define a custom field by its name, the record type it attaches to, and a field type, then set the options that control where its data appears. For what custom fields are and when to use them, see Understand Custom Fields.
Create a custom field
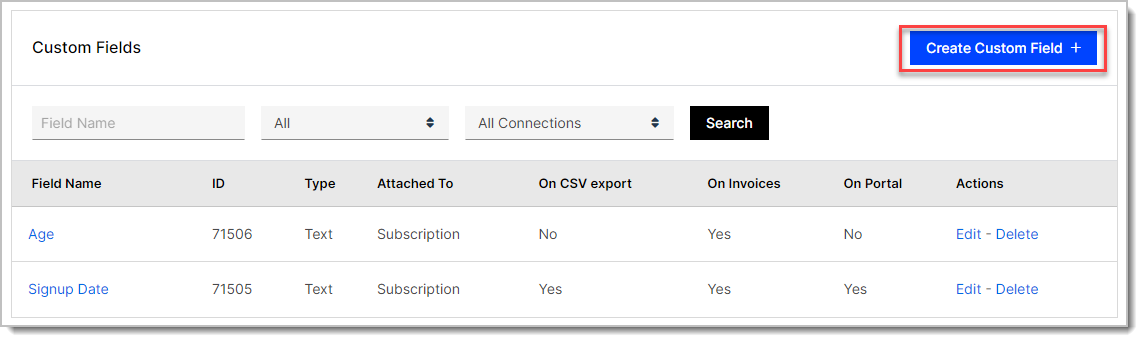
Custom fields are managed from a single list, where you can see every field on your site along with the record type it attaches to and which surfaces it appears on. Each site can have up to 100 Custom Fields per record type (50 on some test sites); creating one past that limit returns an error.
To create a custom field
- Navigate to Config > Custom Fields.
- Click Create Custom Field.
- Enter a Field Name, choose what the field is Attached To, and select a Field Type. See Configure field settings.
- For a Dropdown or Radio Button field, add the values a subscriber can choose. See Configure allowed values.
- Set the display options that control where the field's data appears. See Configure display options.
- Click Create Custom Field.
Configure field settings
These three settings define the field itself.
| Setting | Description |
|---|---|
| Field Name | (Required) The label that prompts the subscriber for input on the Public Signup Page. Maximum 255 characters. Each name must be unique per record type on your site, ignoring capitalization, so a Subscription field and a Customer field can share a name. |
| Attached To | Whether the field is associated with a Subscription or a Customer record. This is set when you create the field and cannot be changed afterward. |
| Field Type | Text, Dropdown, or Radio Button. Some sites also offer Balance Tracker. |
Configure display options
Each option below controls one surface where the field's data appears. All of them are set to No when you create a field, so a new field stays hidden until you turn on the surfaces you want.
Important: Display Field Data on Statements appears only on sites that do not use invoice-centric billing. If your site bills by Invoice, this option is not shown.
| Option | Description |
|---|---|
| Display Field Data on CSV Export | If Yes, the field is included in the Subscriptions CSV Export. |
| Display Field Data on Statements | If Yes, the field is displayed on your customers' Statements. |
| Display Field Data on Invoices | If Yes, the field is displayed on your customers' Invoices. |
| Display Field Data on Customer Portal | If Yes, the field is displayed in your customer's Billing Portal. |
Configure allowed values
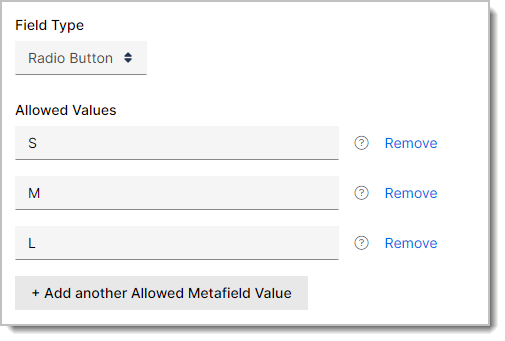
For Radio Button and Dropdown fields, you configure the values that the customer can select. Click + Add another Allowed Metafield Value to add each one. A single value can be up to 2048 characters, and the combined length of all of a field's values can't exceed 65,535 characters.
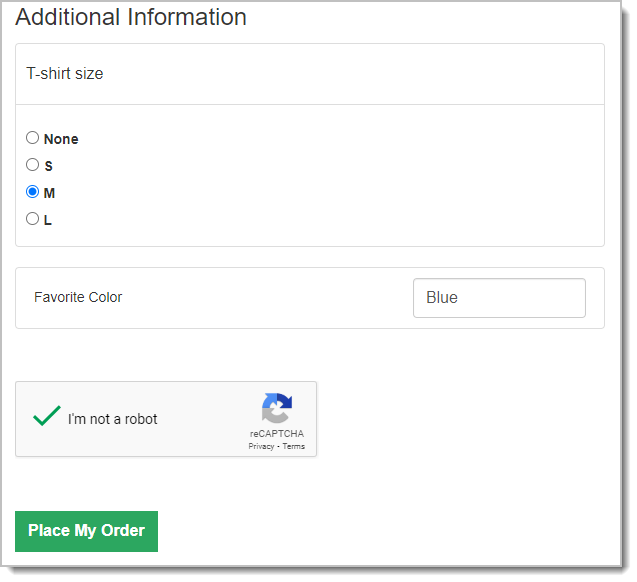
Maxio adds a None choice to every Dropdown and Radio Button field automatically, so a subscriber can leave the field unanswered. You do not add it yourself.
Example on a Public Signup Page
Once you have created a custom field attached to Subscription or Customer, you can choose to display it when editing your Public Signup Pages. The field then appears in an Additional Information section at the bottom of the signup page.
Related information
For answers to common questions about how custom fields behave, see Custom Fields FAQ.
Still need help?
Reach out and our support team will take it from here.