
Create Your Catalog
Last updated on Aug 29, 2026
Catalog Terminology
We’re transitioning the terminology used in the Maxio Product Catalog. If you’re using the new experience, you’ll see updated naming in the application—Products are now Plans, and Components are now Products.
Our documentation is still being updated, so you may see previous terminology (especially in screenshots); refer to these definitions for the most accurate interpretation.
Build your catalog either by hand in Advanced Billing or by importing it from a template. Either way, start from the model you chose in Design Your Catalog, work out which component types it needs, and add any currencies or metering the model depends on before you create the items themselves.
Summary - Create your catalog
- Feature
- Catalog
- You Need
- Complete Design Your Catalog; have your price-book/price-list; if using Metering, know your data structure
- Code
- No
- Difficulty
- ◉◎◎◎◎
Configure the basics
All catalog building starts with the same basic building blocks, so work through these first.
Determine component types
In your model from Design Your Catalog, you have a diagram. If your diagram contains Components, determine which component types to use.
| Component Type | Best for |
|---|---|
| Metered | Any usage-based items, billed in arrears |
| Prepaid-usage | Any usage-based items that are advanced, and billed upfront |
| Quantity-based | Any recurring items with a quantity of 0, 1, 2+ |
| Quantity-based One-time | Any non-recurring items with a quantity of 0, 1, 2+ |
| On-off | Any recurring items with a quantity of 0 or 1 |
Optional - Add multiple currencies
If you sell in more than one currency, add each one before you create your items.
To add a currency
- Go to Config > Settings > Multi-Currency.
- Click Add a Currency.
- Select the currency, and choose the conversion type.
- Click Save. Repeat for any additional currencies.
To understand how multi-currency behaves before enabling it, see the Understand Multi-Currency in Advanced Billing help article.
Optional - Configure metering
Important: Maxio Metering replaced Events-Based Billing (EBB). Some material still refers to EBB, and the functionality is unchanged.
If you use Metered Usage components, enable Metering first.
To enable Metering
- Go to Config > Settings > Metering. If you don't see the Metering menu option, Maxio Customer Support needs to enable it for you.
- Toggle it to On, and click Save Settings.
- Refresh the page. The left-hand menu now contains an Events section.
To create a stream
Go to Events > Streams > New Event Stream. Your stream creates a unique Events API endpoint, so your company can stream data into Advanced Billing. All of these fields are internal-facing only.
| Field | Description |
|---|---|
| Stream Name | Enter a name that describes your data stream. |
| API Handle | Auto-filled. |
| Description | (Optional) |
| Subscription Identifier | How your event data is mapped to a subscription. Most common is the Other option, so you can use an existing field already present in your data. The example below uses account_id to represent a field in the data. |
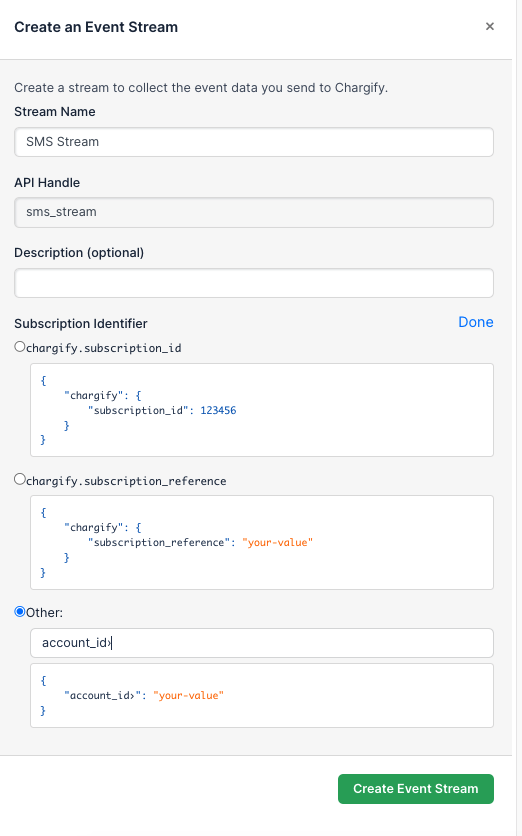
To understand how streams, meters and segments relate before you build one, see the Understand Streams, Meters, and Segments help article.
To create your JSON and stream a sample API call
Your new stream shows you an API call similar to the curl command below. In this step you populate your real data schema into Advanced Billing, so you must know your data structure.
- Structure your data like the JSON example.
- Structure the API call like the curl command, which now contains your data structure.
- Copy the curl command into your terminal and run it.
- Refresh your stream page. Your data structure is populated.
- (Optional) If you repeat this, the structure takes around 10 minutes to refresh within Advanced Billing.
{
  "body": "Hi there",
  "count": 1,
  "from": "+15017122661",
  "to": "+15558675310",
  "from_country": "US",
  "to_country": "US",
  "characters": 8,
  "account_id": "acct_123456"
}# Replace SUBDOMAIN, APIKEY, and STREAMHANDLE, then run this in your terminal.
# Afterwards, refresh the Streams page in Advanced Billing.
curl https://events.chargify.com/SUBDOMAIN/events/STREAMHANDLE \
-u APIKEY:x \
-H 'Content-Type: application/json' \
-d '{
"body": "Hi there",
"count": 1,
"from": "+15017122661",
"to": "+15558675310",
"from_country": "US",
"to_country": "US",
"characters": 8,
"account_id": "acct_123456"
}'To create a metric
- After you make the call above, refresh the page in Advanced Billing. The Metrics page appears.
- Click Create New Metric.
- When you're done, click Create Metrics.
The example below creates a metric called SMS Messages that uses an analysis type of sum on the target property of count in the data, summing up all the messages. It then adds segmenting attributes of from_country and to_country, so you can charge different rates based on the countries. You define those rates when you create the component itself.
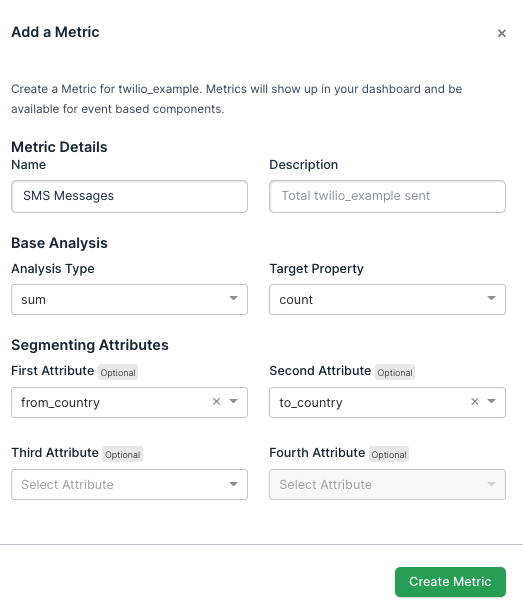
Metering is now configured. If you need more streams, repeat the stream steps. If you need more metrics in an existing stream, repeat the metric steps.
Optional - Prepare for subscription migration
If you plan a subscription migration, add API handles when you create your Products, Product Price Points, Components, and Component Price Points. If you build the catalog inside Advanced Billing, fill in the basic handle fields. If you import, add a handle in your import files.
Optional - Add a trademark to your item names
If you own a trademark or similar, you can denote it on your line item. Symbols work if you copy and paste them directly, as in the example below.
Line Item Name Here™®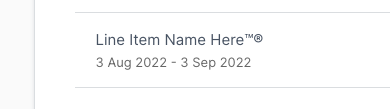
Import your catalog
If your implementation strategy is an import rather than building by hand, use the resources below.
1. Get your smart template
- Open the Catalog Smart Templates.
- Clone the Smart Templates into your Google account: click File > Make a copy.
Important: Fill out your template in Google Drive, not in Excel.
2. Fill in your catalog data
Complete each tab of the template with the items from your price book.
3. Advanced Billing performs the import
Advanced Billing's Onboarding Team runs the import for you.
4. You confirm the results
Check the imported catalog and fix any errors. Repeat steps 3 and 4 until the final catalog is ready.
Still need help?
Reach out and our support team will take it from here.