
Upgrade to Web Connector 2.2.0.71 (QBWC1012)
Last updated on Aug 24, 2026
QBWC1012: Authentication failed due to following error message. The request was aborted: Could not create SSL/TLS secure channel. See QWCLog for more details. Remember to turn logging on.
This is QuickBooks Web Connector's own message, not something Maxio logs — it means the Web Connector version on your computer can no longer negotiate a secure connection to sync with Maxio Core. Upgrading to Web Connector 2.2.0.71 resolves it. This article walks through that upgrade, along with the specific problems that can come up while you're doing it.
Important: If you're on QuickBooks 2014 or older, upgrade to a newer version of QuickBooks Desktop, or to QuickBooks Online, before installing this version of Web Connector. If you're interested in moving from QuickBooks Desktop to QuickBooks Online, see Converting from QuickBooks Desktop to QuickBooks Online, and contact support@maxio.com if you want to move forward with a conversion.
Install Web Connector 2.2.0.71
Uninstall a manually-installed previous version
This step is only necessary if you installed your previous Web Connector version (2.1.x.x or 2.2.0.x) manually. If your Web Connector was installed automatically, skip ahead to installing the new version.
You can remove the old version either of these ways:
- Delete the QBWebConnector installation folder directly, from whichever of these paths exists on your machine:
C:\Program Files\Common Files\Intuit\QuickBooks\QBWebConnectororC:\Program Files (x86)\Common Files\Intuit\QuickBooks\QBWebConnector. - On Windows 7, 8, or 10, use the search function to look for "Uninstall," select your previous Web Connector version in the "Uninstall Programs" window, and right-click it to uninstall.
Install the new version
Before installing, make sure QuickBooks is completely closed with no background processes running, or the installer won't be able to start. Open Windows Task Manager (Ctrl+Alt+Delete) and end any task labeled "QuickBooks" — check both the Processes and the Details tabs, since a background process can be hiding in either one.
To install Web Connector 2.2.0.71
- Go to Intuit's QuickBooks Web Connector page, download the installer, then unzip the downloaded file to access it.
- Right-click the installer .exe file and select "Run as Administrator."
According to Intuit, the installer is about 80.8 MB (84,742,144 bytes) on disk, and it also installs .NET Framework 4.5.1 if your computer doesn't already have it. This is QuickBooks Web Connector's own installer behavior, not something Maxio controls.
The Install Wizard won't complete
Sometimes the install wizard is interrupted partway through, or a pop-up tells you that you need to close QuickBooks to continue. If you click through anyway, the wizard shows:
The wizard was interrupted before QBWebConnector could be completely installed. Your system has not been modified. To complete installation at another time, please run setup again.
This almost always means QuickBooks still has a background process running, even if every visible window is closed.
End QuickBooks processes before reinstalling
Open Windows Task Manager and look for any process labeled "QuickBooks" running in the background, checking both the Processes and Details tabs. Right-click each one and select End Task, then run the installer again.
Sync fails with "Application requested to abort"
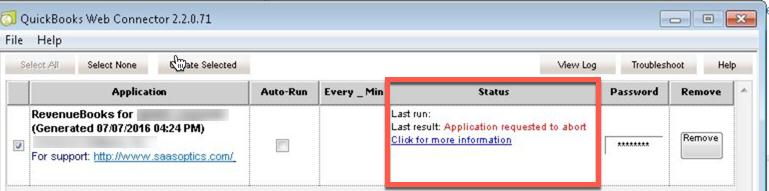
Once the new Web Connector is installed, a sync can fail with a status of Application requested to abort.
Reinstall the Web Connector as Administrator
Reinstall the Web Connector, making sure to right-click the installer and select "Run as Administrator" rather than double-clicking it.
Sync fails with "Object reference not set to an instance of an object"
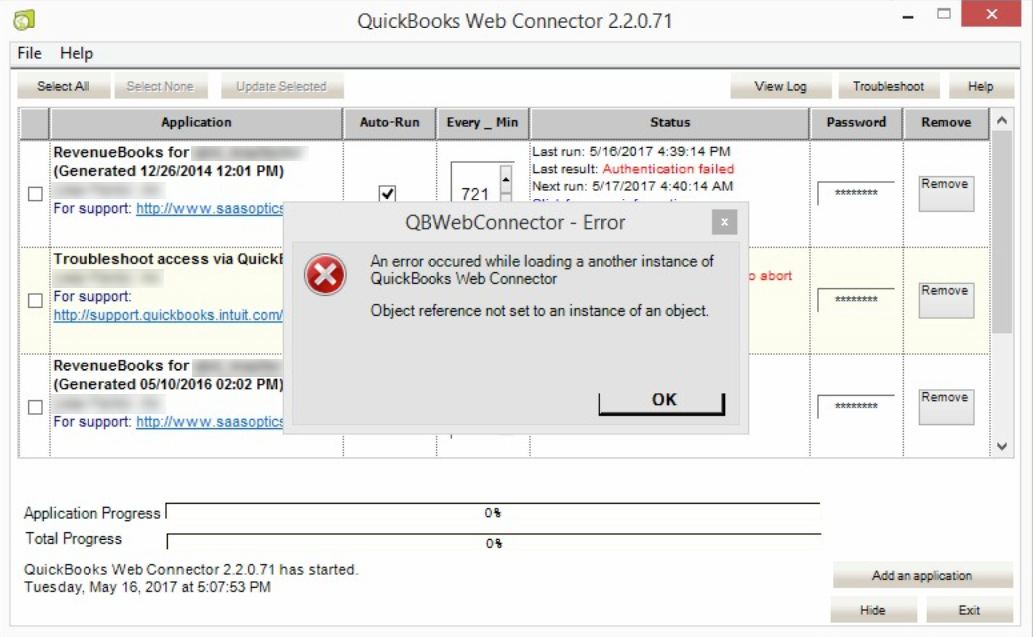
Sync can also fail with a QBWebConnector error dialog reading:
An error occured while loading a another instance of QuickBooks Web Connector. Object reference not set to an instance of an object.
Connect to only one QuickBooks company file at a time
If you have multiple QuickBooks files, make sure the correct one is open and selected for update, and that no other QuickBooks files are open as background processes. For your initial sync, only attempt to connect to one company file at a time. If you use Auto-Run — a Web Connector setting, not something Maxio's QWC file controls — temporarily disable it before the initial reconnection.
Your password doesn't work with the new connector
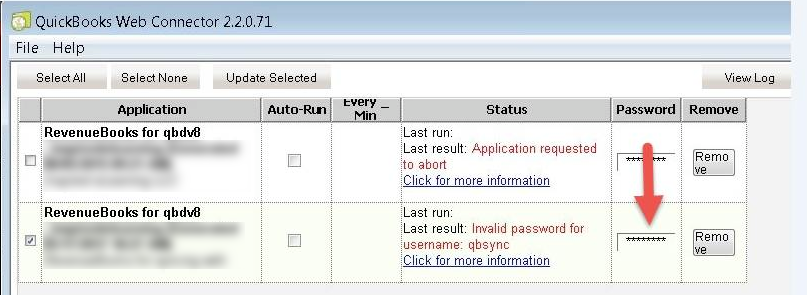
If it's been a long time since your last sync, the password previously saved in the Web Connector may no longer work once you've upgraded, and the Status column shows Invalid password for username: qbsync.
Reset the QBSYNC user's password in Maxio Core
The password entered into the Web Connector authenticates against a special Maxio Core user named QBSYNC, and that password is set from inside Maxio Core, not from QuickBooks or the Web Connector.
To reset the QBSYNC password
- In Maxio Core, go to Admin > Users.
- Find the username QBSYNC and select Change Password.
- Enter a strong password, and keep a record of it — you'll also need to enter this same password into the Web Connector.
Enter that same password into the Password column for the RevenueBooks entry in the Web Connector, then run the sync again.
The RevenueBooks application is missing, or you get QBWC1048 or QBWC1051
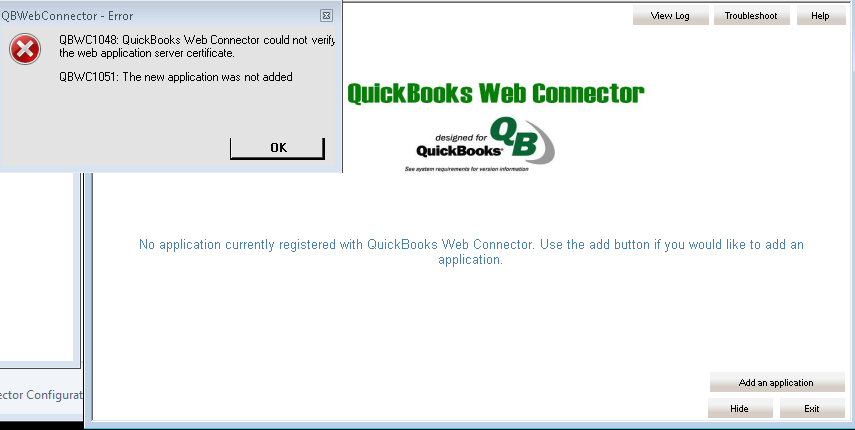
If the RevenueBooks application no longer appears in your Web Connector, or you see:
QBWC1048: QuickBooks Web Connector could not verify the web application server certificate. QBWC1051: The new application was not added
Download a new QWC file from Maxio Core
A new QWC file re-registers the RevenueBooks application with the Web Connector.
To download a new QWC file
- In Maxio Core, go to the QuickBooks section.
- Select the wrench icon in the top right corner.
- Select Download QWC File.
You'll need a unique QWC file for each computer you use to sync with Maxio Core.
Other common connection problems
A few other issues come up often when connecting with the new Web Connector version:
- Make sure QuickBooks is open, and that you're logged in as an Admin user, when you connect to Maxio Core for the first time with the new Web Connector.
- If you've recently moved or replaced your QuickBooks company file, make sure the Web Connector can find and access it. For example, if you moved your QuickBooks file to a hosted machine, the Web Connector needs to run on that same hosted machine, with a new QWC file.
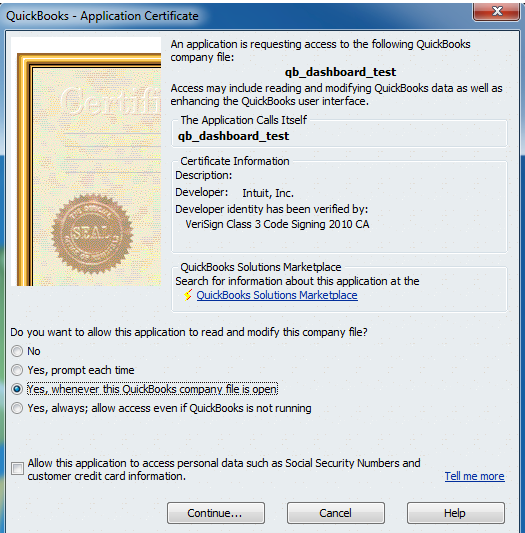
- When the Application Certificate dialog appears, select one of the "Yes" options. Selecting "No" causes an authorization error.
The Application Certificate dialog looks like this:
If you encounter an error not covered here, contact support@maxio.com and attach a screenshot of the error you're seeing and a copy of your Web Connector log file.
Related information
For the full walkthrough of connecting QuickBooks Desktop to Maxio Core, including downloading your first QWC file and completing your initial sync, see Setup QuickBooks Desktop.
For the full list of Web Connector status and error messages beyond this specific upgrade, see QuickBooks Web Connector Errors.
For more detail on resetting the QBSYNC password outside of this upgrade, see Invalid Password for Username qbsync.
Still need help?
Reach out and our support team will take it from here.