
Manage Subscriptions in the Billing Portal
Last updated on Sep 15, 2026
Manage common subscriber actions in the Billing Portal, including updating account details, changing plans, canceling Subscriptions, applying coupons, and updating payment methods. These Billing Portal options help subscribers manage Subscription, Customer, and payment information without merchant assistance. For the same actions taken by you rather than the subscriber, from inside Advanced Billing, see Manage Subscriptions.
When subscribers must confirm subscription access
Subscribers are asked to confirm whether they'd like to manage their Subscriptions in the Billing Portal when any of the following conditions are met:
- Billing Portal is configured to require email verification
- The Customer does not accept the invitation email
- The Customer requests a login link, either by going to the Billing Portal and requesting one or using the management URL to land on a page that says:
"It looks like you haven't accepted an invitation yet! Click the link below to request a Login Link."
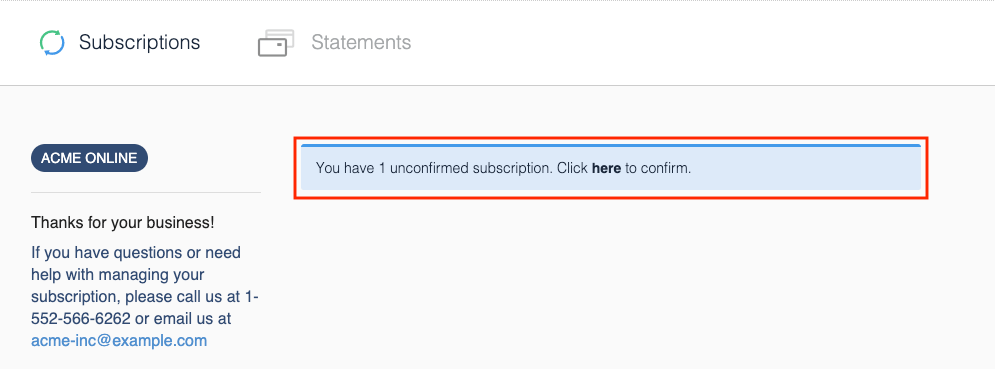
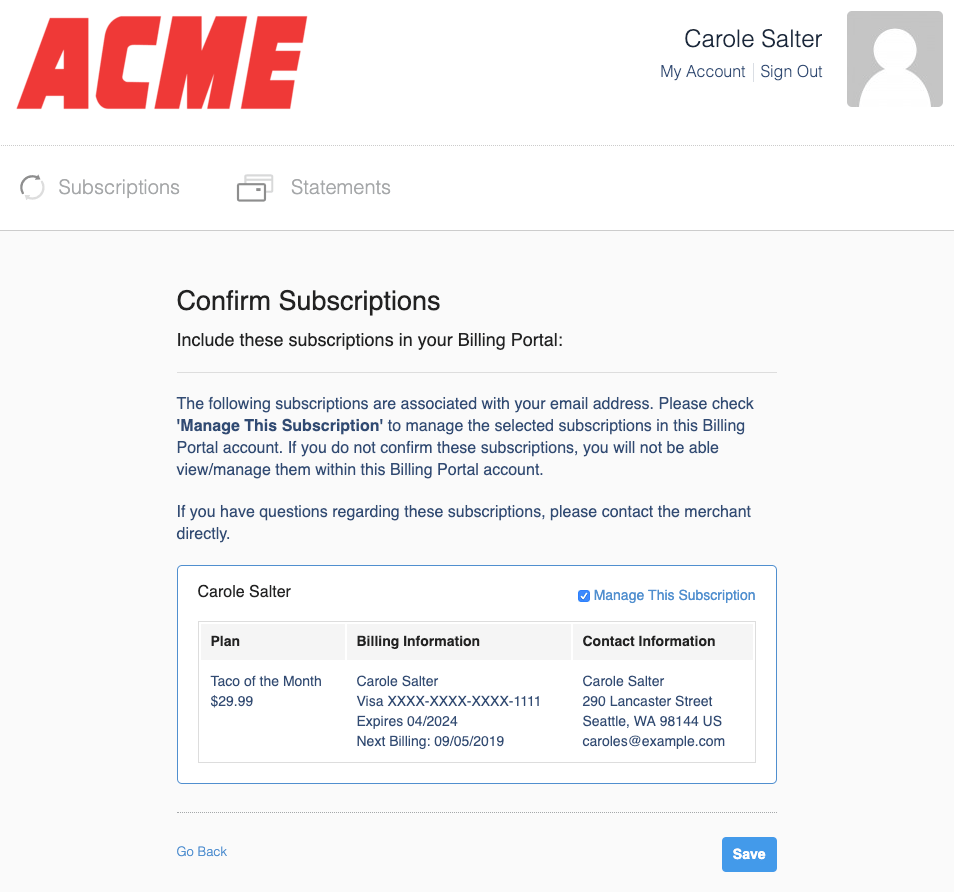
When a subscriber logs in during this workflow, they can confirm which Subscriptions they'd like to manage.
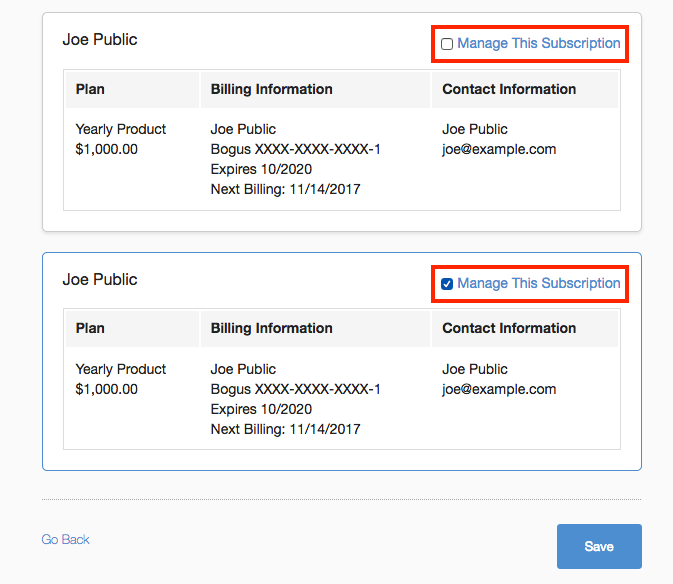
A subscriber can select which Plans or services they'd like to manage through the Billing Portal. Only the Plans or services they select appear in the Billing Portal. Not confirming management of the Subscription doesn't affect the purchase of the Plan or service.
Update your account details
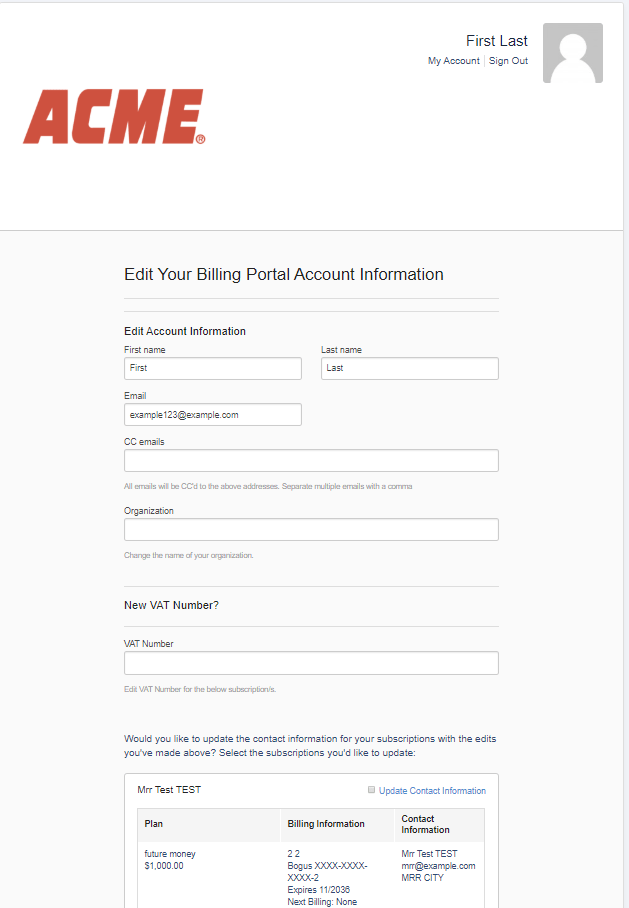
Subscribers can update their email address, organization name, and contact details within the Billing Portal by selecting My Account. To update this information in both Advanced Billing and the portal, select the Update Contact Information checkbox; otherwise, their Advanced Billing Subscription isn't updated. All associated Subscriptions update immediately when any information changes.
For merchants based in the EU, Customers can enter a VAT number that may qualify them as tax-exempt.
If a field is left blank, it updates to blank for the Subscriptions selected with the checkbox.
Update a payment method
Your subscriber can update the payment method on file via the Billing Portal. Selecting Update Payment Method displays the following:
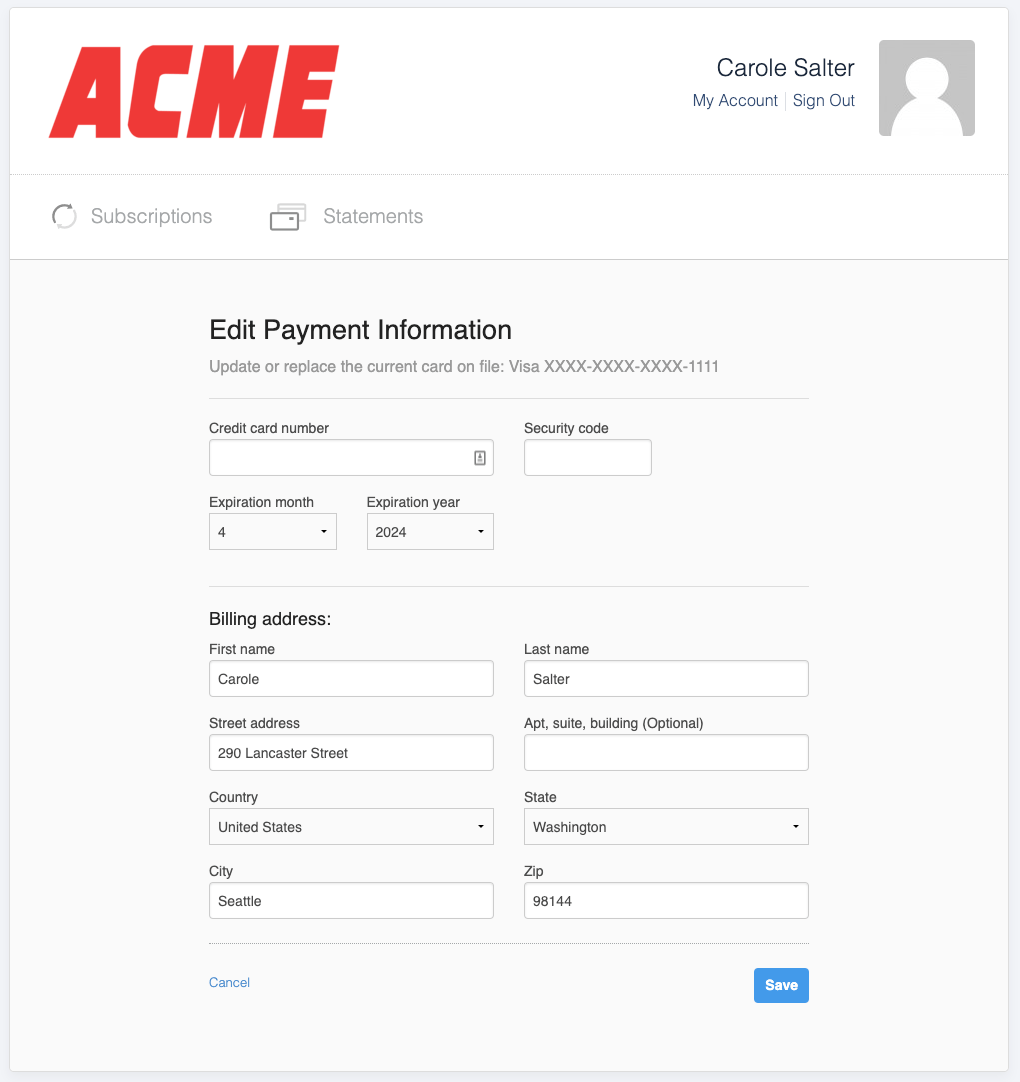
When subscribers update the payment method for a specific Subscription in the Billing Portal, they can view the active payment methods already associated with their account, select an existing one to use, or follow the prompts to add a new one.
To update a payment method
- Log in to the Billing Portal.
- Select the Subscription to update.
- Select the option to update or change the payment method.
- Review the active payment methods associated with the account.
- Select an existing payment method, or add a new one.
- Save the update.
Only Authorize.Net and Stripe allow a subscriber to update their address or credit card separately. All other gateways require subscribers to update the billing address associated with the card when updating the card information.
Update via a digital wallet
If your site uses the Maxio Payments gateway with Apple Pay or Google Pay enabled, your subscriber can choose either wallet from the payment method options in the Billing Portal instead of typing in a card.
Apple Pay only appears as an option in Apple-supported environments, such as Safari on iOS or macOS. Google Pay has no such browser restriction.
Selecting Apple Pay or Google Pay opens the wallet's own secure authorization window; once your subscriber approves the payment there, the Billing Portal captures the returned card details automatically, without your subscriber typing a card number. Your subscriber then selects Save to finish, the same as with any other payment method.
See Enable Apple Pay for how to turn on Apple Pay and route it to the Maxio Payments gateway. Google Pay is turned on the same way: contact Maxio Support to request that Google Pay be enabled for your site, then set Maxio Payments as the gateway for Google Pay payments on the Edit Payment Routing page.
Change a plan
It's only possible to change Plans within the current subscriber's Product Family. Any other Plans outside the current Product Family aren't available for selection; the Plan change needs to be completed outside the Billing Portal instead.
Your subscriber has the option to move services using the Change Plan button within the Plan Details section. Once selected, they're presented with the following options:
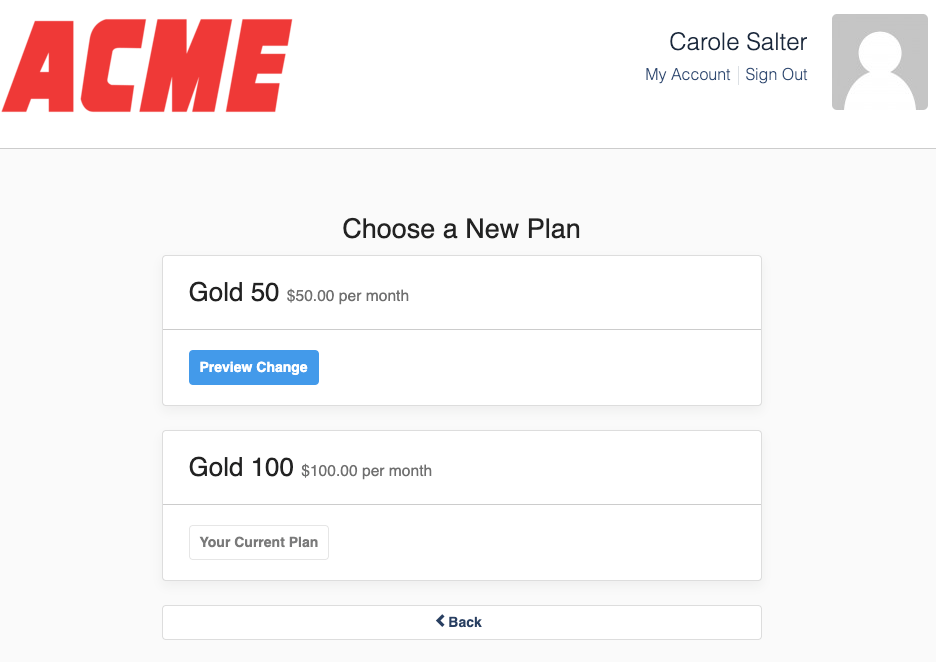
Once your subscriber chooses their desired new plan, they see a preview of the plan change details.
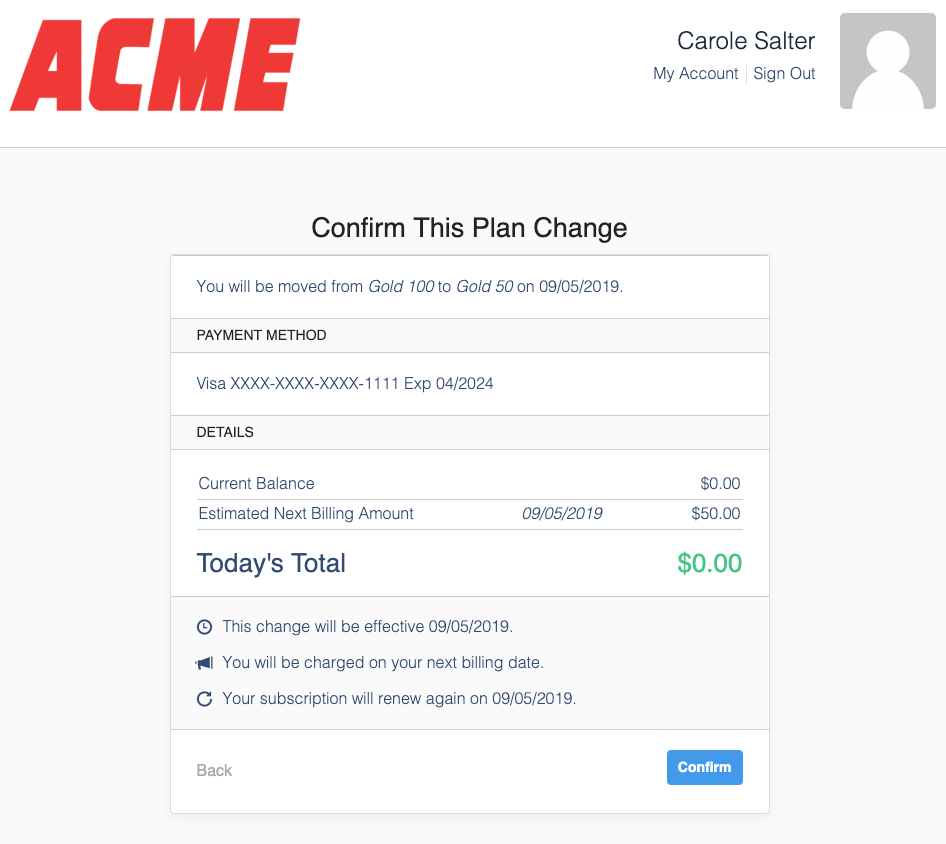
This lets the subscriber confirm the following:
- Payment method
- Prorated credit
- Amount due
- Subscription renewal date
Whether the subscriber is charged and when their Plan change occurs depends on the default settings for Plan changes in the Billing Portal. See Related information for the different options.
Cancel a plan
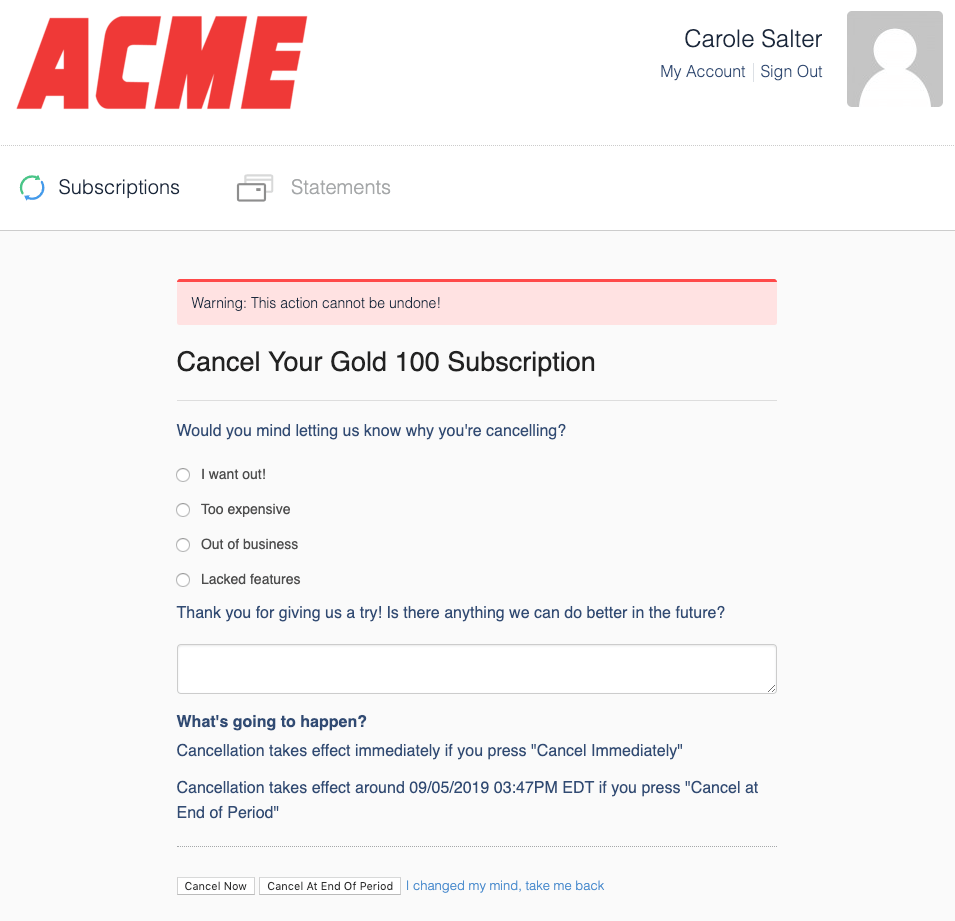
Your subscriber can cancel their account from the Plan Details section of the Billing Portal. Once they select the option to cancel their plan, they're presented with the choice to cancel immediately or at the end of the period. There's no undo after this step, since it exists to confirm the act of canceling.
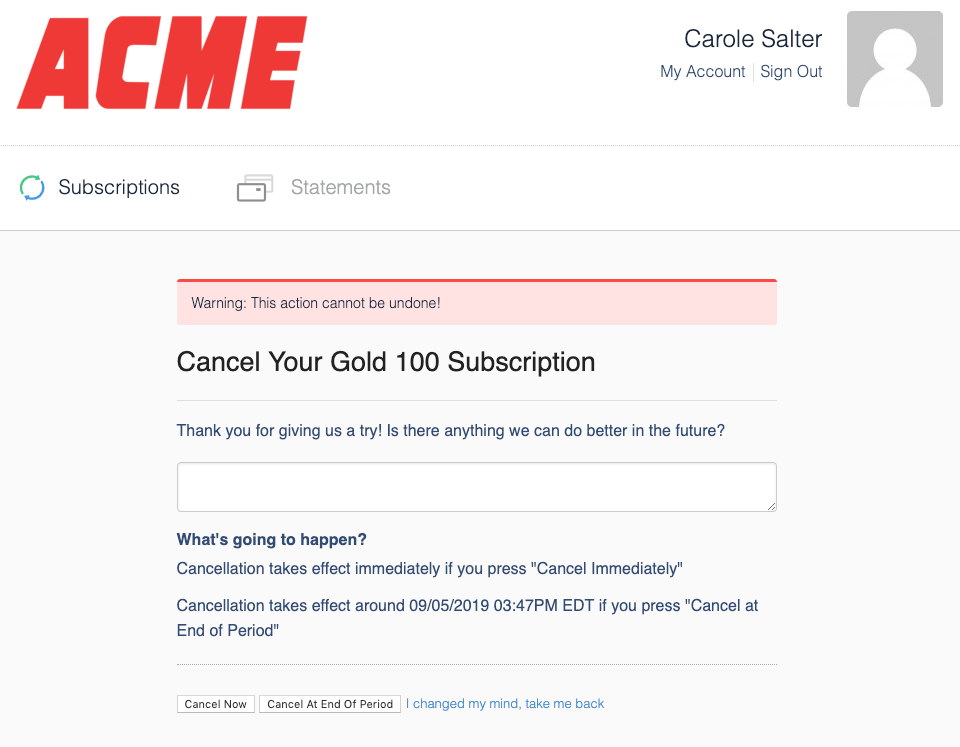
If you enable churn reason codes from your Billing Portal settings in Advanced Billing, the subscriber can also see a list of reasons why they're canceling their plan.
Put a subscription on hold
In the Billing Portal, you can give a subscriber the option to put their Subscription on hold so it doesn't renew.
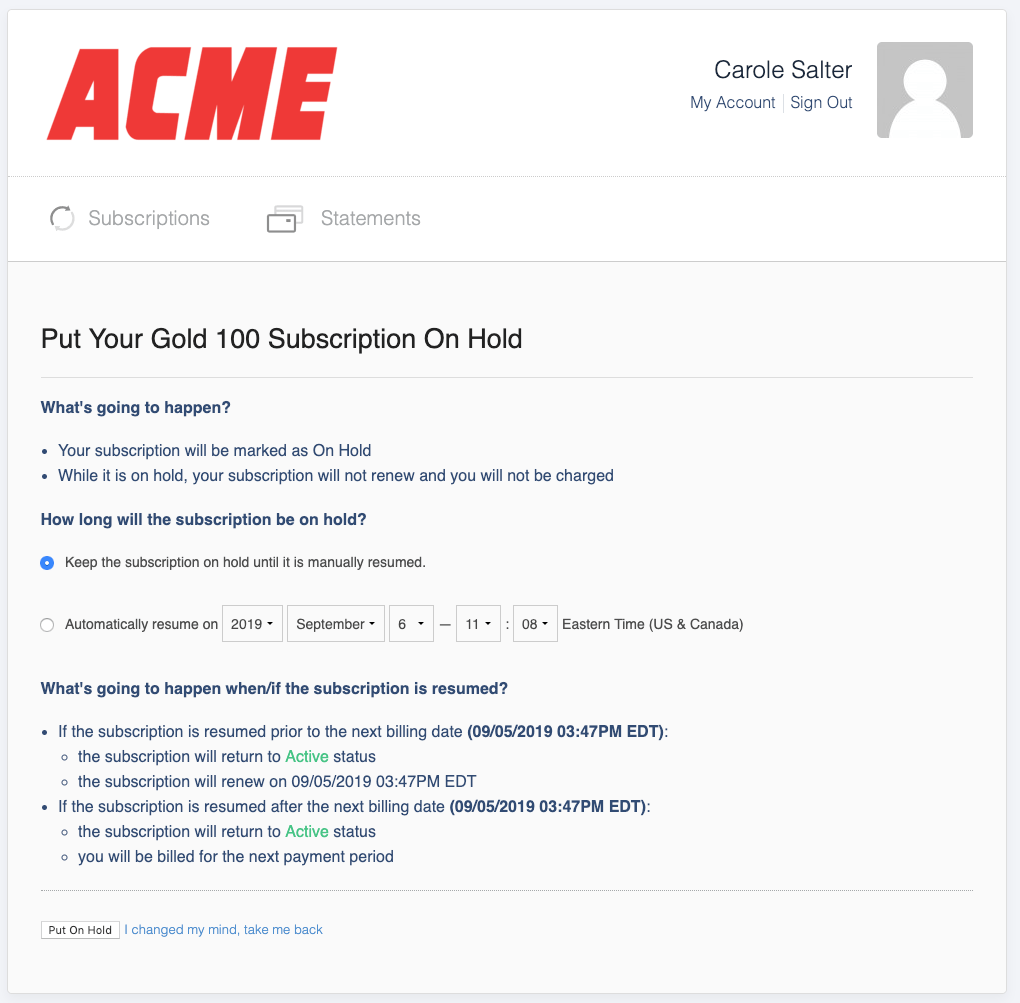
The option to select a date to automatically resume only appears if you've enabled Allow Resuming Subscriptions in the Billing Portal settings.
Resume an on-hold subscription
In the Billing Portal, you can give a subscriber the option to resume their on-hold Subscription so it starts renewing again.
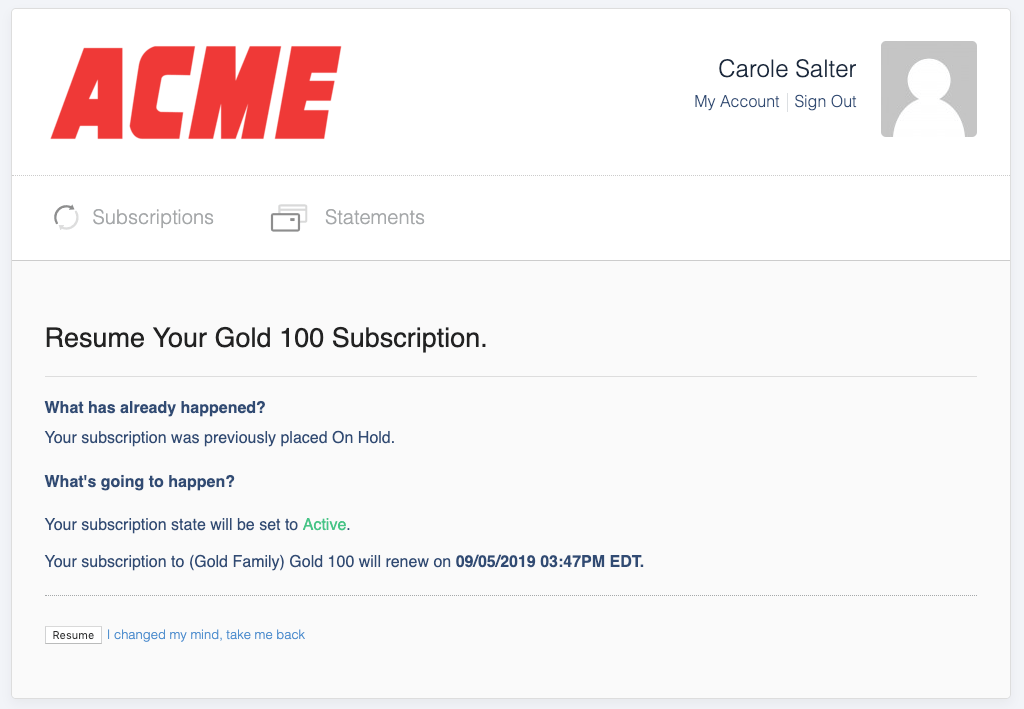
If the Subscription's normal next renewal date has already passed, resuming behaves like a reactivation: it resets the billing date to the current date, charges for a full billing period, and changes the status to active.
Apply coupons
In the Billing Portal, you can give a subscriber the option to apply Coupons to their Subscriptions.
Configure Billing Portal settings to allow applying coupons
To let Customers add Coupons via the Billing Portal, enable Allow Applying Coupons in the Billing Portal settings.
Subscribers see an option to Apply Coupon in the main Subscription panel.
Add Coupon
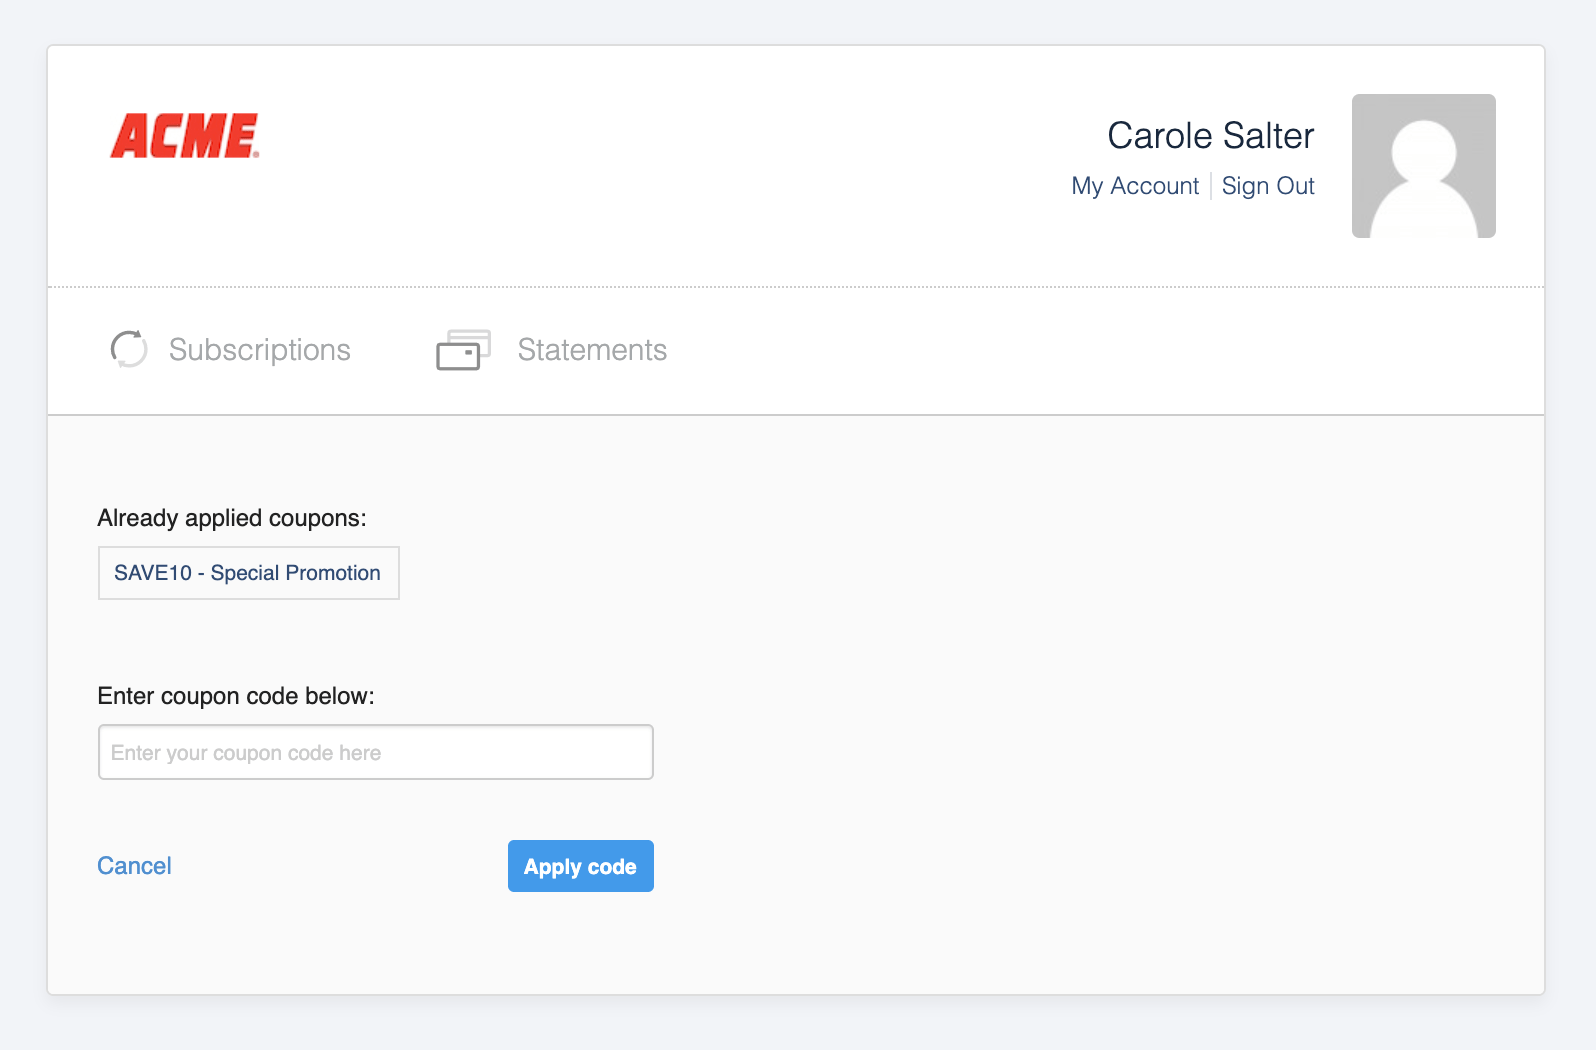
Customers can enter a Coupon code to apply to their Subscription. The Billing Portal only allows one Coupon code at a time, though Customers can also see previously applied Coupons here.
See the subscription summary after adding a coupon
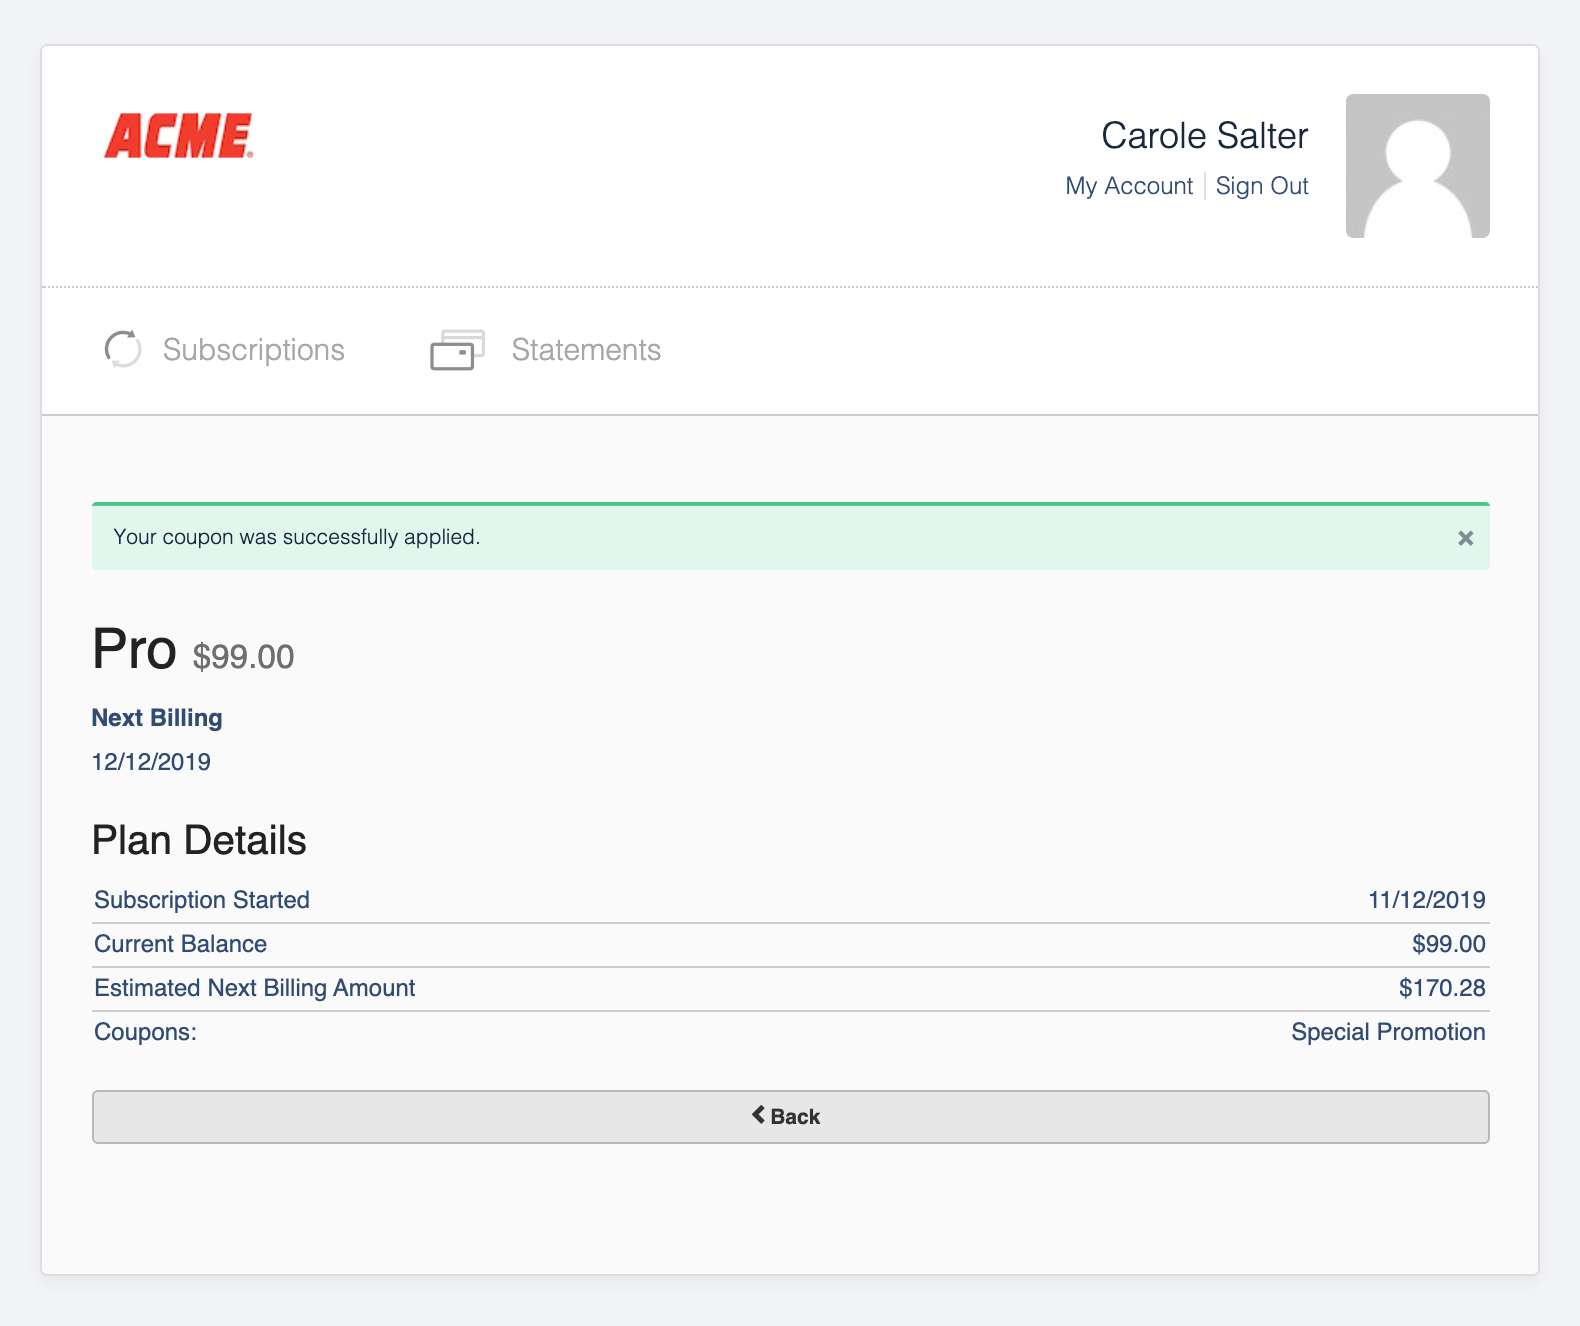
After applying a Coupon, the Customer sees a summary of their Subscription.
Display referral codes
You can allow referral codes to display in the Billing Portal for your Customers.
Configure Billing Portal settings to display referral codes
To display referral codes in the Billing Portal, enable Display Referral Codes in the Billing Portal settings.
View a subscription's referral code
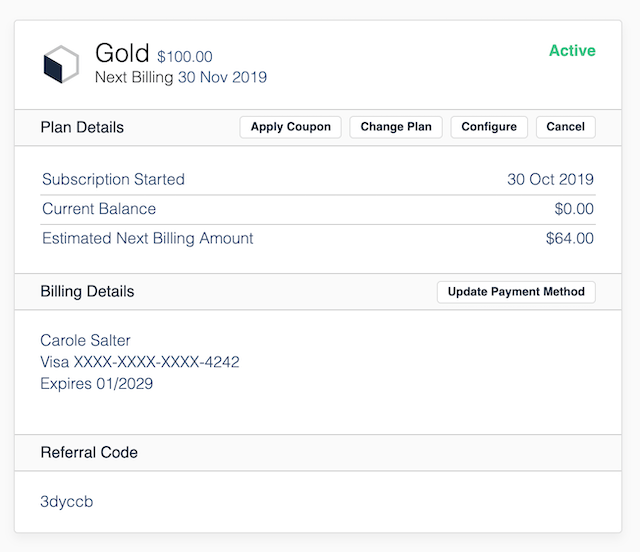
Referral codes are visible to Customers at the bottom of the Subscription displayed in the main pane.
View and edit custom fields
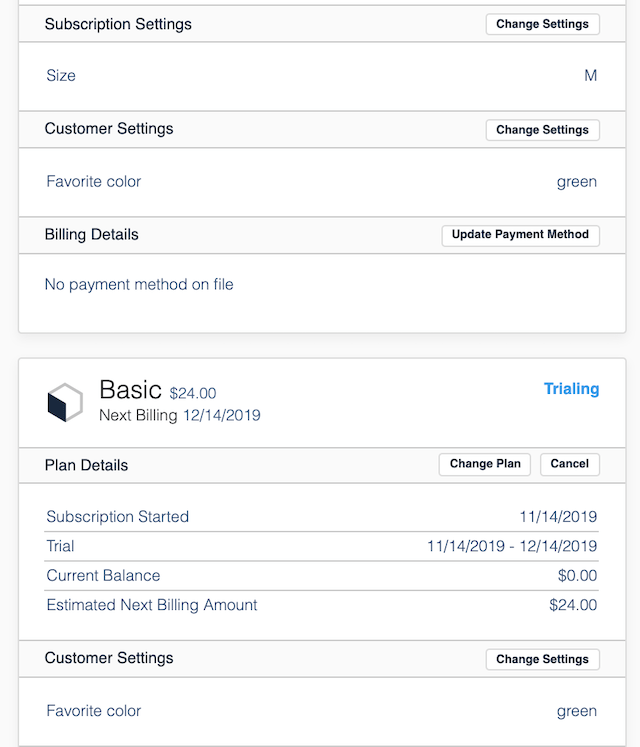
If a custom field is enabled to display on the Billing Portal, it's displayed under the Subscription Settings section, or Customer Settings if the field relates to a Customer. The Customer Settings section still displays under the overall Subscription pane.
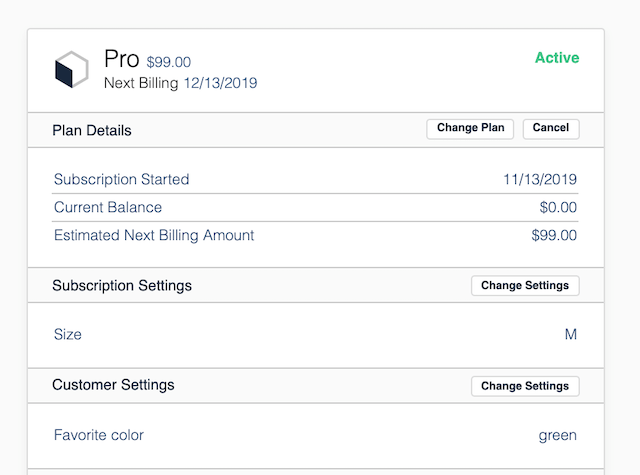
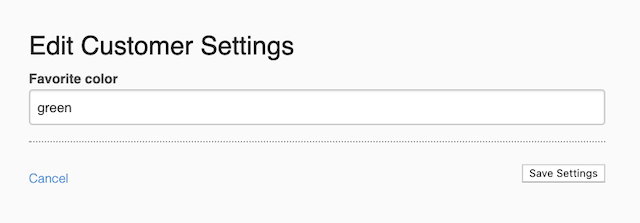
The subscriber is also given the option to edit the contents of the custom fields, by selecting Change Settings. If you don't want the subscriber to edit the contents of a custom field, disable the option for it to display on the Billing Portal, per the same article linked above.
Subscribers may only view and edit custom fields that contain previously entered data. Other custom fields associated with a site aren't displayed.
The subscriber can edit the contents of the custom field and select Save Changes.
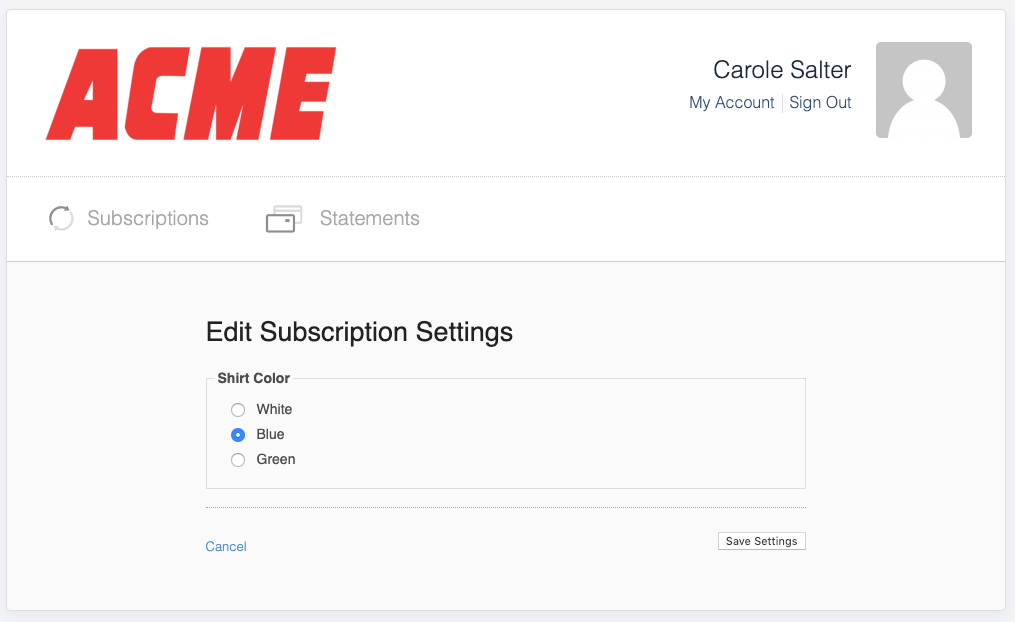
This example shows a Subscription from the same site, with multiple custom fields containing data.
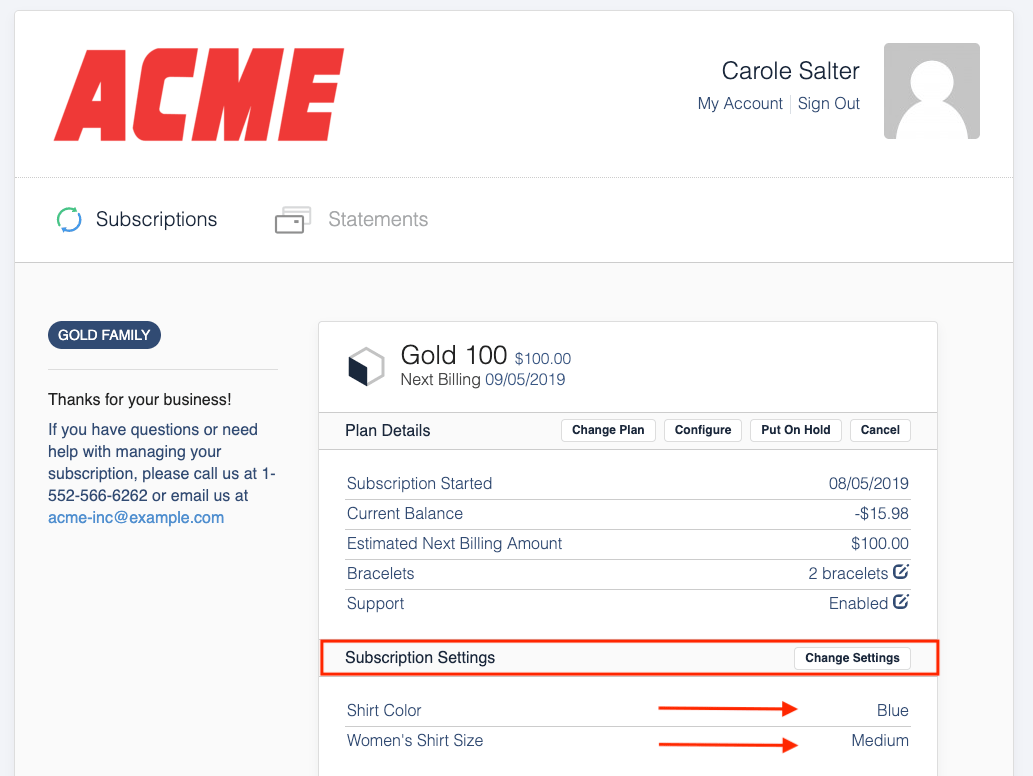
Multiple custom fields are presented in the Billing Portal. The subscriber can edit them because they contain previously entered data for each custom field.
Edit Customer custom fields
If a Customer updates a custom field that's a Customer field, the change is visible across all Subscriptions listed in that Customer's portal that belong to their Customer account.
Related information
See Configuring Billing Portal Options for the full list of Billing Portal settings, including Plan change defaults, Allow Applying Coupons, and Display Referral Codes.
See Understand the Billing Portal for an overview of what the Billing Portal does and who it's for.
See Explore Billing Portal Topics for the full set of Billing Portal setup, access, and support articles.
Still need help?
Reach out and our support team will take it from here.