
Configure Taxes
Last updated on Aug 27, 2026
Advanced Billing offers three ways to charge tax, and they differ in how precisely they calculate and how much setup they need. Use this guide to pick the method that fits how your company handles tax, configure the origin and destination addresses every method depends on, then complete the setup specific to the method you chose.
At a glance
- Feature
- Taxes:
- Custom Taxes
- Managed Sales Tax
- Bring-your-own Avalara
- You Need
- Your company's valid business address used for taxing purposes
- The custom tax rules your company needs, for Custom Taxes
- Your Avalara Account ID and License Key, for the Avalara Integration
- Code
- None
- Difficulty
- ◉◎◎◎◎
Choose a tax method
Pick one method before configuring anything. Switching later is possible, but enabling Managed Sales Tax disables any custom taxes you already set up.
Tax methods and when to use each
| Method | Reasons to use |
|---|---|
| Custom Taxes | For simple sales tax. Taxes down to the state or region level. |
| Managed Sales Tax | The most common choice. No code and a quick launch, taxing down to a specific jurisdiction such as state plus county. Powered by Advanced Billing's own integration to Avalara. |
| Avalara Integration | For companies that want to connect their own Avalara account. Requires an existing Avalara account. |
1. Configure your tax addresses
Every method needs to know where you are and where your customer is, because tax depends on both. Set both addresses once, and they apply whichever method you go on to configure.
Add the tax origin address
The tax origin address is where your business is located.
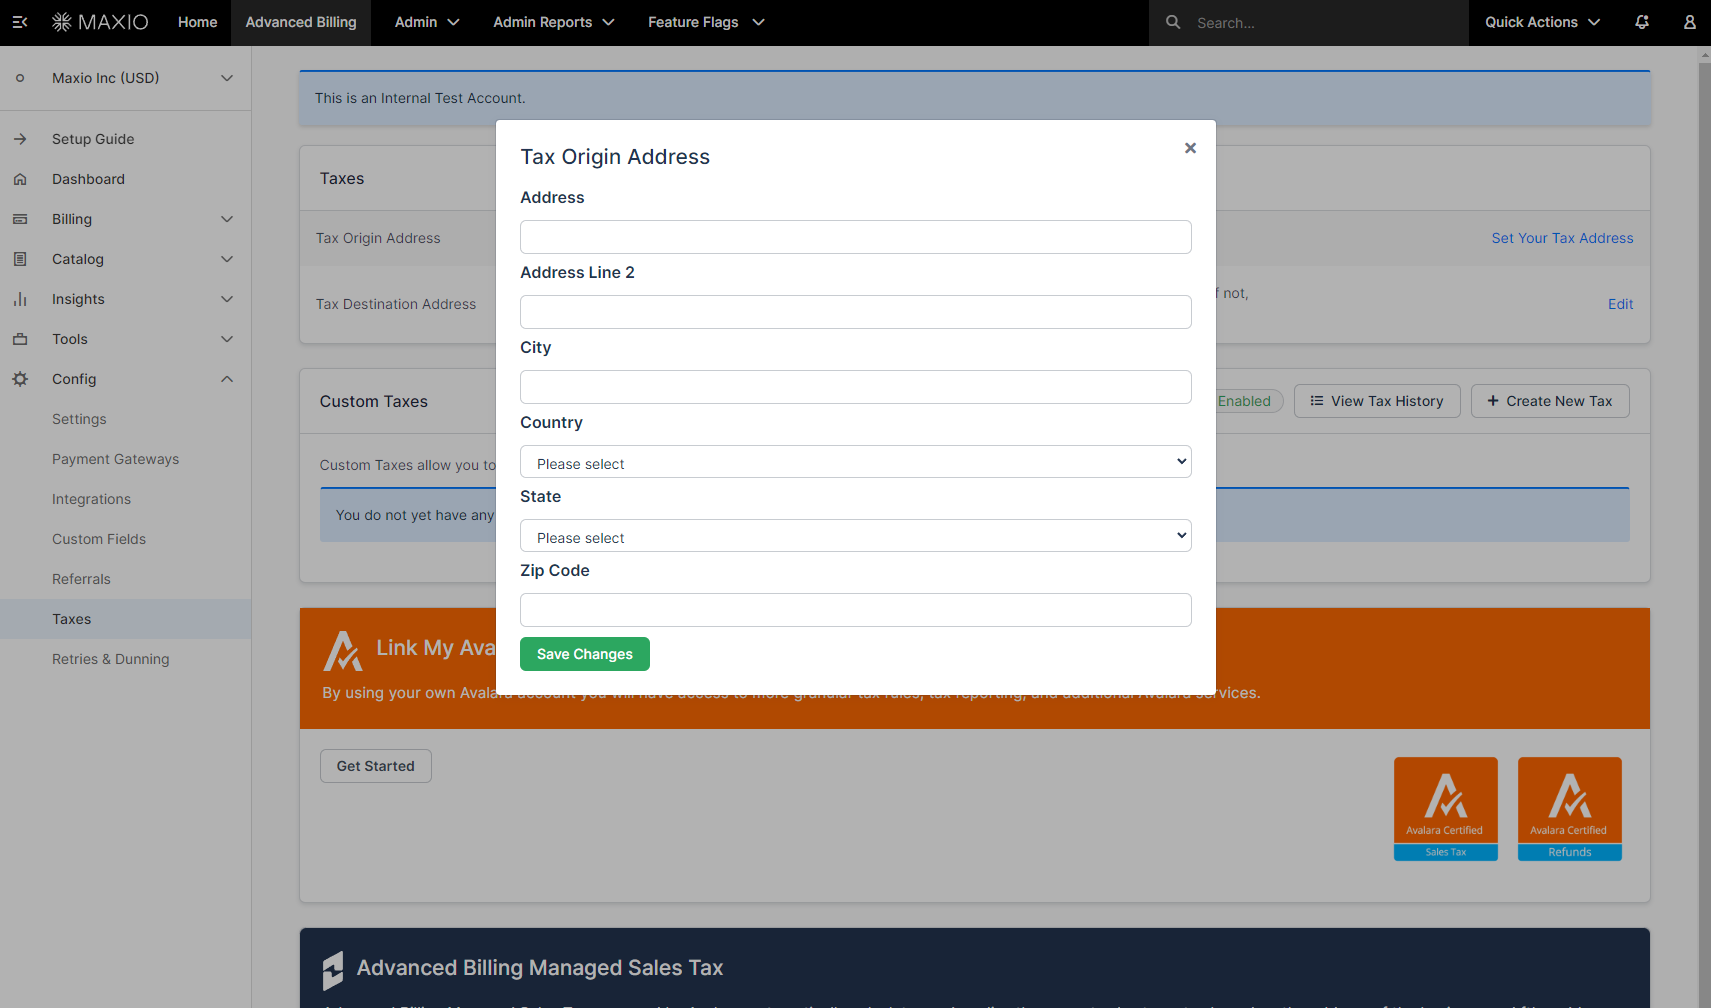
| Field | Description |
|---|---|
| Address | (Required) Line 1 of your company's tax origin address. |
| Address Line 2 | Line 2 of your company's tax origin address. |
| City | (Required) City of your company's tax origin address. |
| Country | (Required) Country of your company's tax origin address. |
| State | (Required) State of your company's tax origin address. If your country has no states, this populates as no state. |
| Zip Code | (Required) Zip code of your company's tax origin address. |
Set the tax destination address
The tax destination address is the customer address Advanced Billing taxes against. Choose which of the customer's addresses decides it.
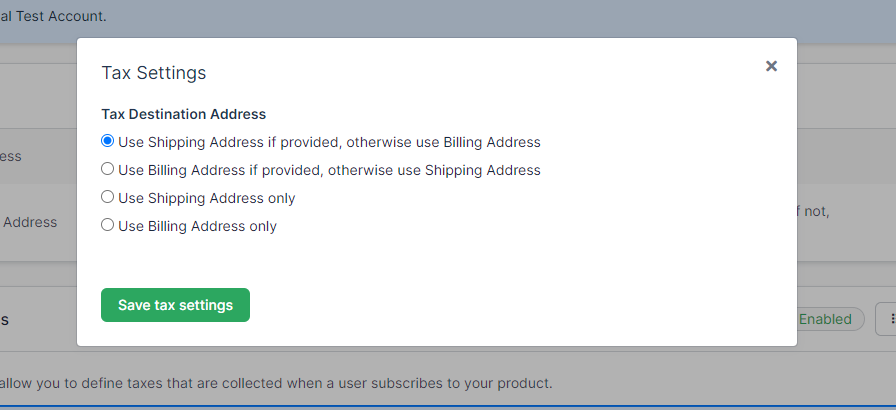
| Option | Description |
|---|---|
| Use Shipping Address if provided, otherwise use Billing Address | Calculates tax from the customer's shipping address, falling back to their billing address. |
| Use Billing Address if provided, otherwise use Shipping Address | Calculates tax from the customer's billing address, falling back to their shipping address. |
| Use Shipping Address only | Calculates tax from the customer's shipping address. |
| Use Billing Address only | Calculates tax from the customer's billing address. |
2. Configure your chosen method
With both addresses in place, complete the setup for the one method you picked. Follow only the section that matches it.
Set up custom taxes
Custom taxes are rules you write yourself, each pairing a country and state with a rate.
On the Taxes settings page, click + Create New Tax.
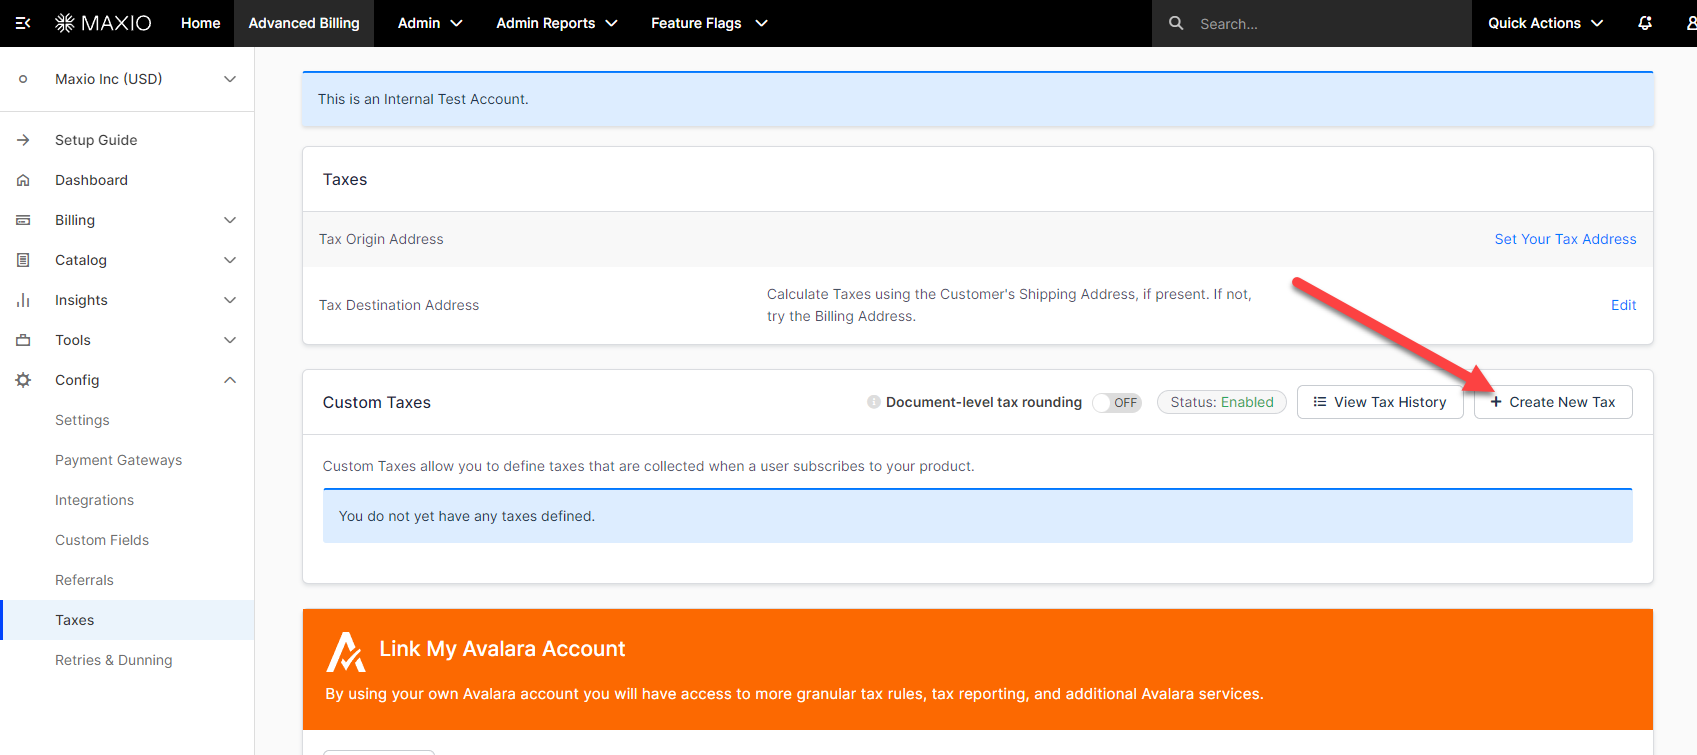
Then complete the form.
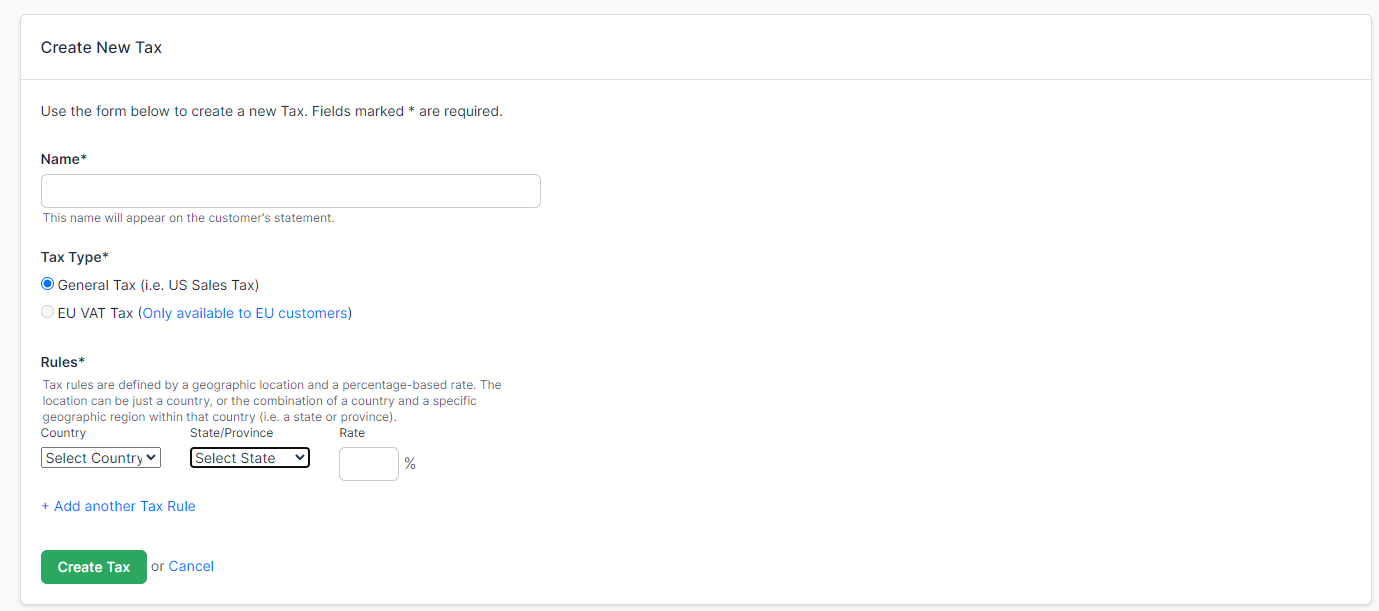
| Field | Description |
|---|---|
| Name | (Required) Name of the custom tax. This displays on the invoice where applicable. |
| Tax Type | (Required) Which kind of tax this is.
|
| Country | (Required) The country the tax rule applies to. |
| State | (Required) The state the tax rule applies to. If the country has no states, this populates as no state. |
| Rate | (Required) The percentage amount of the tax, between 1 and 100. |
| + Add another Tax Rule | Adds another rule to the tax. Fill out the Country, State, and Rate fields again for each rule. |
Set up managed sales tax
Managed Sales Tax hands calculation to Avalara through Advanced Billing's own integration, so you don't supply rates yourself. Instead you tell Advanced Billing which regions you're liable in.
WARNING: Enabling Managed Sales Tax disables any existing custom taxes. If you already configured custom taxes, check the tax included in price option on your price points afterward to reconfigure existing product and component taxes.
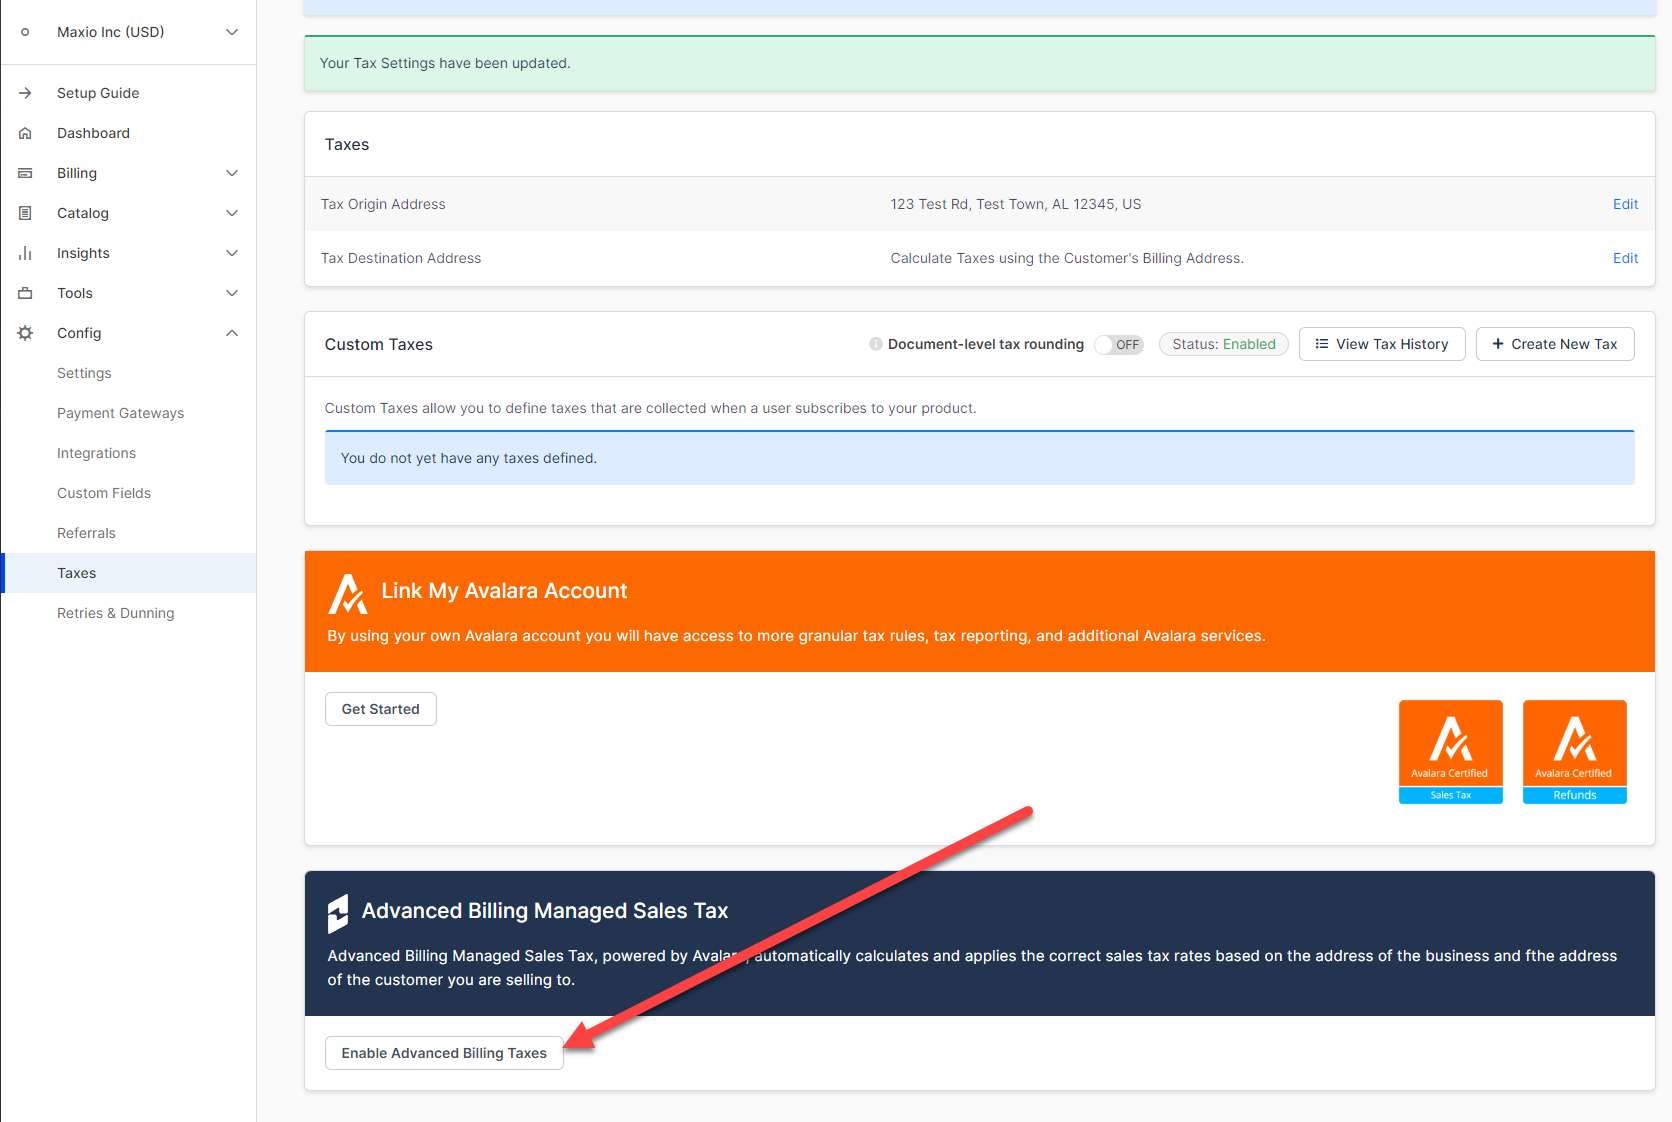
On the Taxes page, click Enable Advanced Billing Taxes.
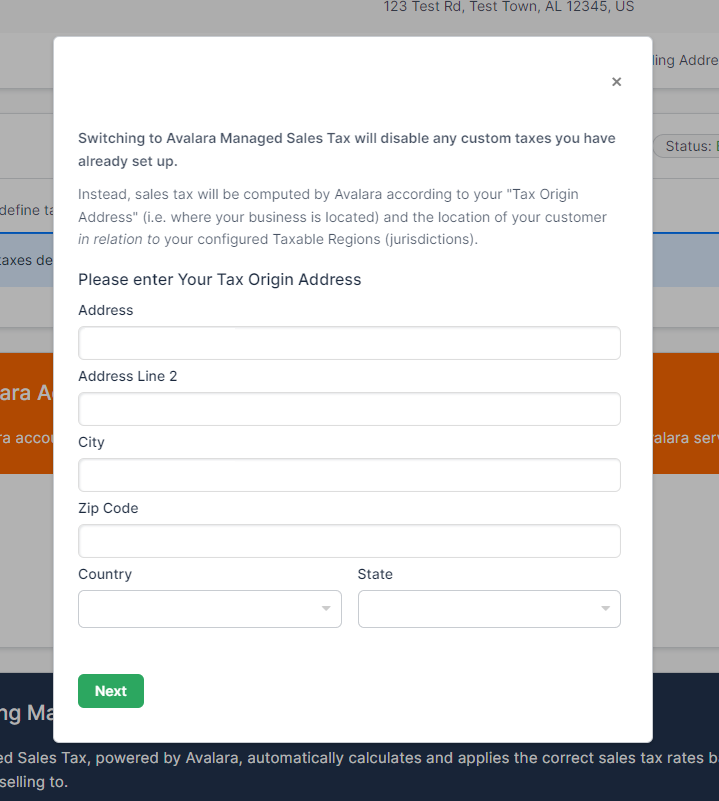
Confirm your tax origin address when prompted. This is the same address described in step 1, and Managed Sales Tax requires a full, valid one.
Finally, set your taxable regions.
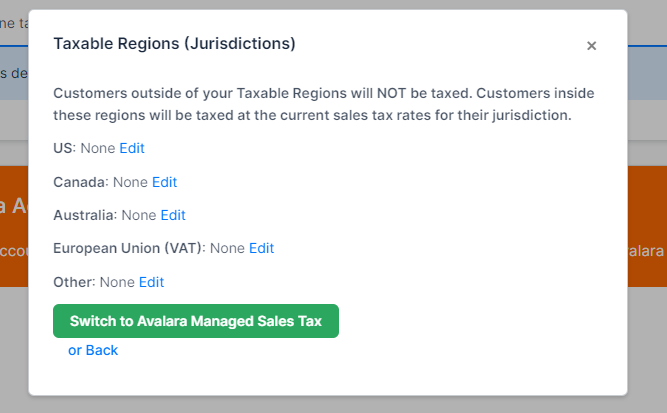
Important: Customers outside your taxable regions are not taxed at all. Taxable regions are the jurisdictions you declare yourself liable in, so anything you leave unset produces untaxed invoices rather than an error.
Set up the Avalara integration
This method connects your own Avalara account rather than using Advanced Billing's.
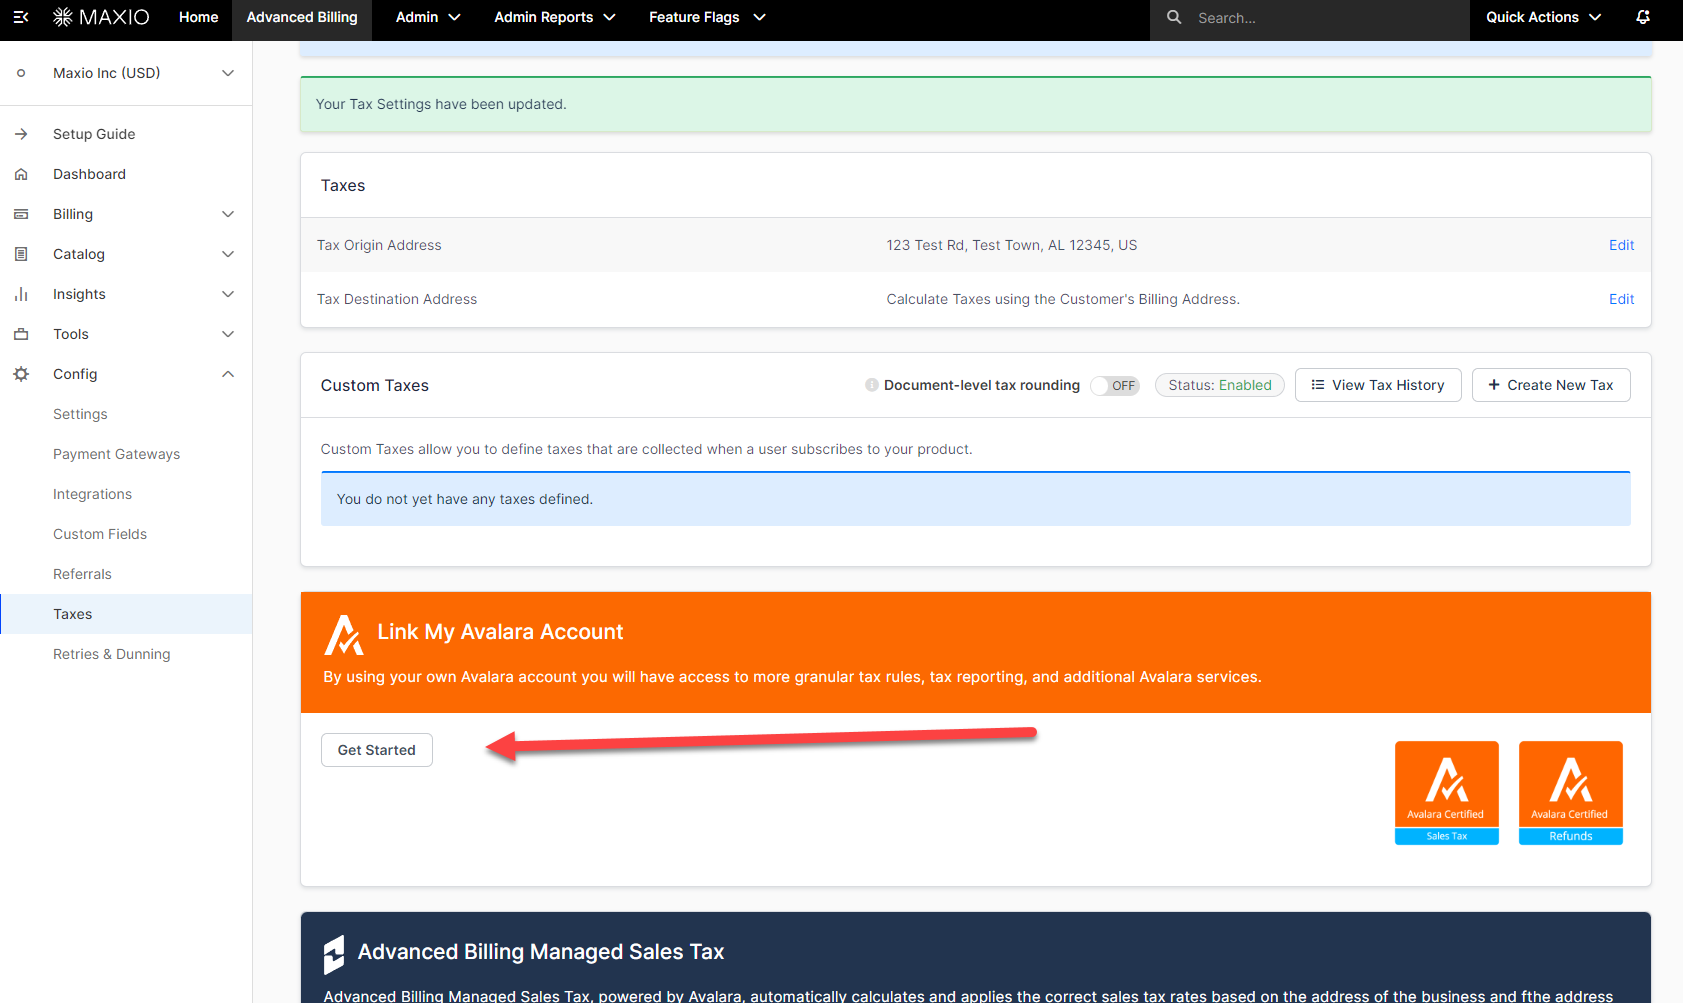
On the Taxes page, click Get Started in the Link My Avalara Account panel.
Then supply your Avalara credentials.
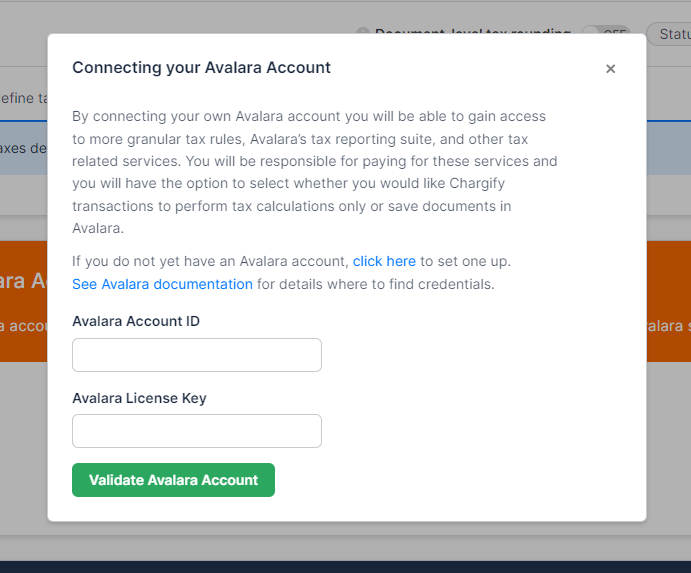
| Field | Description |
|---|---|
| Avalara Account ID | (Required) The account ID for your Avalara account. |
| Avalara License Key | (Required) The license key for your Avalara account. |
Related information
To show a tax breakdown, such as an EU VAT or UK VAT breakdown, on the invoices these taxes appear on, see the Configure Invoices help article.
Still need help?
Reach out and our support team will take it from here.