
Enable Site Live Mode
Last updated on Sep 19, 2026
A site stays in test mode until you deliberately switch it to live. Live mode is what lets you accept real credit cards and take paying subscriptions, so Advanced Billing checks that the site is actually ready before allowing the switch. Going live requires a paid Advanced Billing subscription, and the Setup Guide walks you through the rest.
What has to be true before you can go live
Advanced Billing blocks the switch until all of the following hold:
- A real payment gateway is configured, or you've chosen invoice-only billing.
- The site has no live subscriptions. Clear your test data first.
- A dunning strategy is selected, so failed payments have a defined path.
- Every webhook endpoint uses HTTPS. An insecure endpoint blocks the switch.
Using the Setup Guide
Select Setup Guide from the main navigation bar in your site. It's divided into the sections below.
Step 1 - Build your product catalog
This section walks you through setting up products and components.
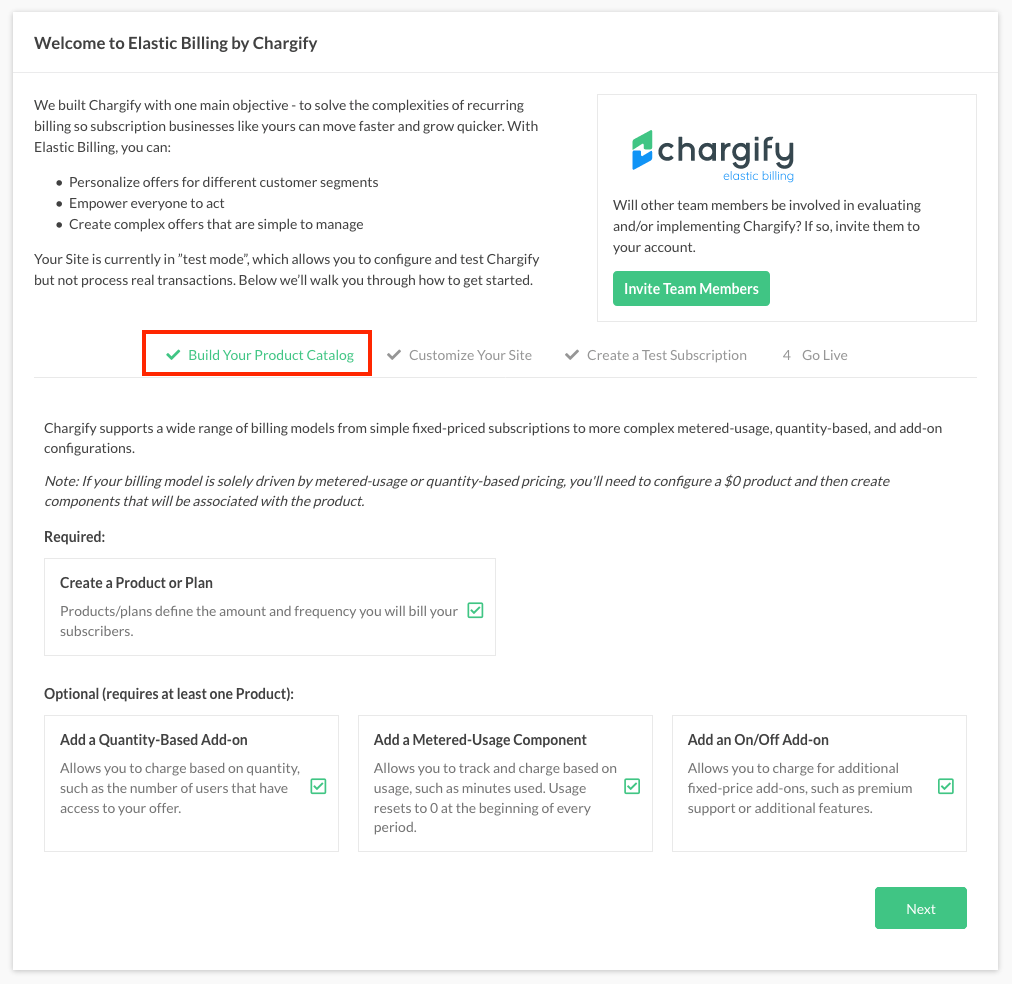
This section covers the core product functions: setting up products and components. Work through it so you understand what each attribute does before the site goes live.
Step 2 - Customize your site
This section covers dunning, taxes, coupons, and system emails, among others.
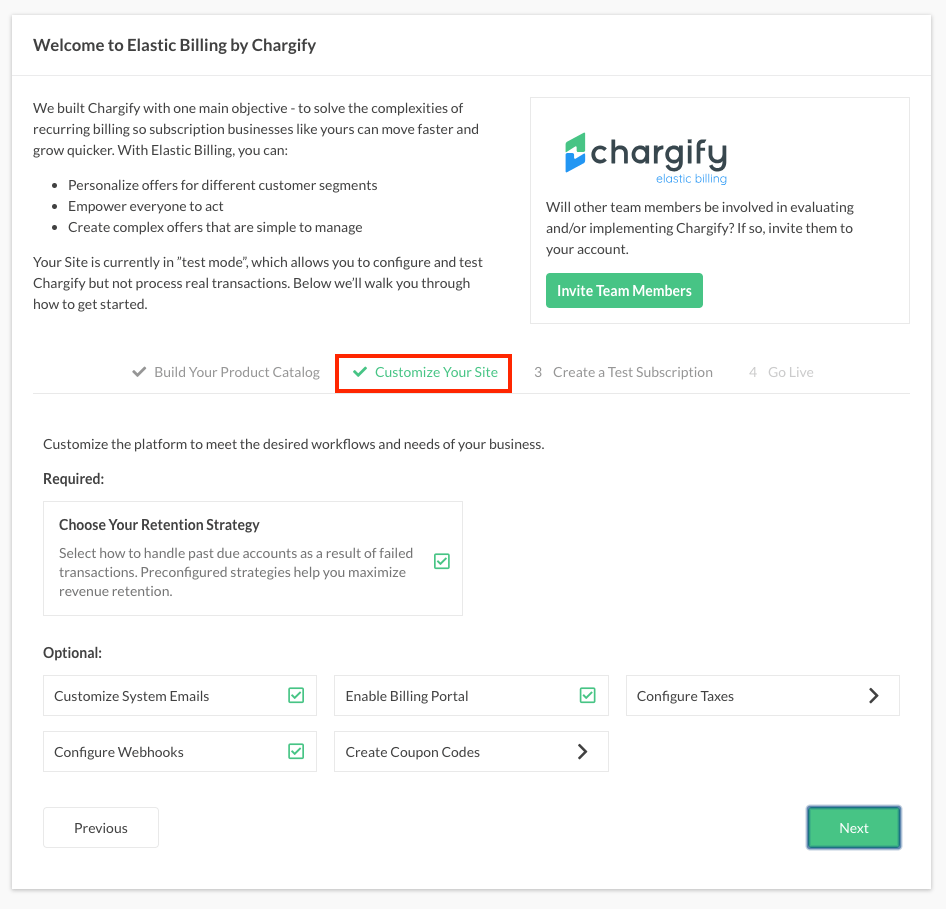
This section covers dunning, taxes, coupons, and system emails, among others. Examine the settings for each to understand how they interact before you rely on them.
Step 3 - Create a test subscription
This section is where you create subscriptions to rehearse the whole lifecycle before going live.
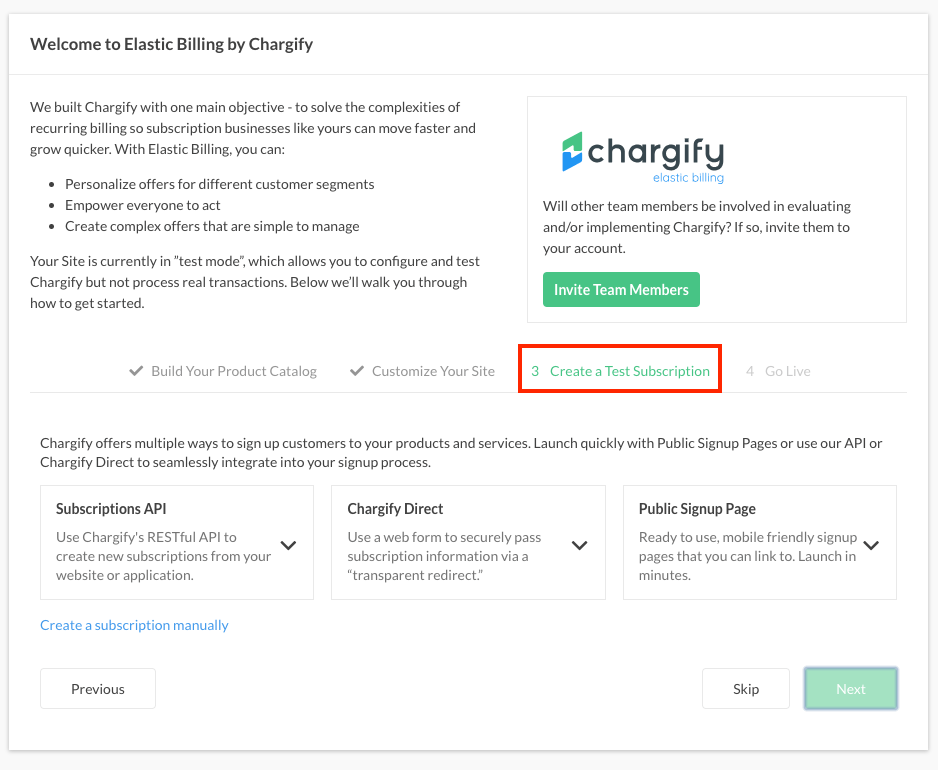
Create plenty of subscriptions while testing, so you see the whole Subscription lifecycle. You can clear them out before going live, so they never reach your financials.
Decide how you intend to sign up most of your subscribers: through a Public Signup Page, through the API, or manually.
Step 4 - Clear test data
This section removes your test data before real customers reach the site.
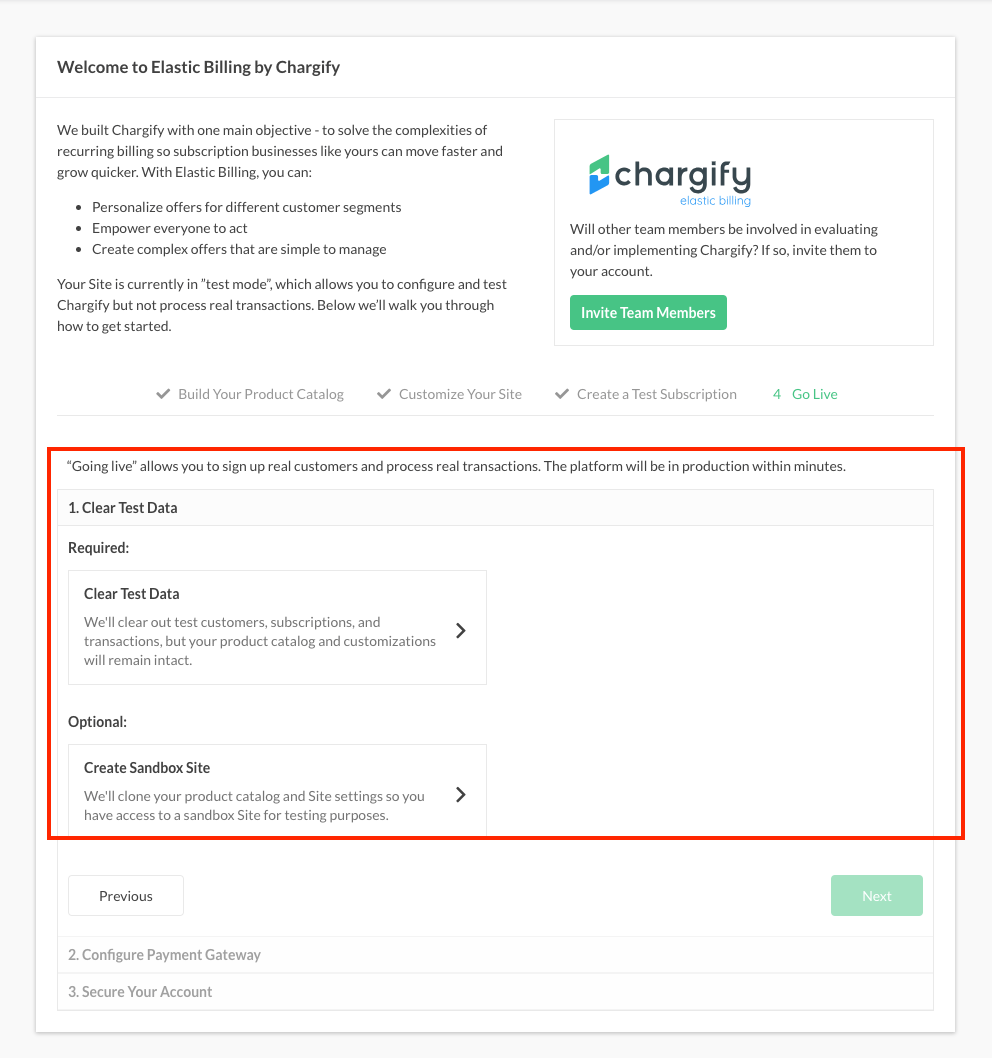
See the Clear Test Site Data help article. Clearing site data removes test customers, subscriptions, transactions, and credit cards. It leaves your product catalog, settings, and taxes in place.
Consider creating a sandbox of your site as well, so you have somewhere to try coupon additions, subscriber email revisions, and product migrations once the site is live. See the Create and Use Sandbox Sites help article.
Step 5 - Configure your payment gateway
This section is where you connect a live payment gateway, or enable invoice-only billing instead.
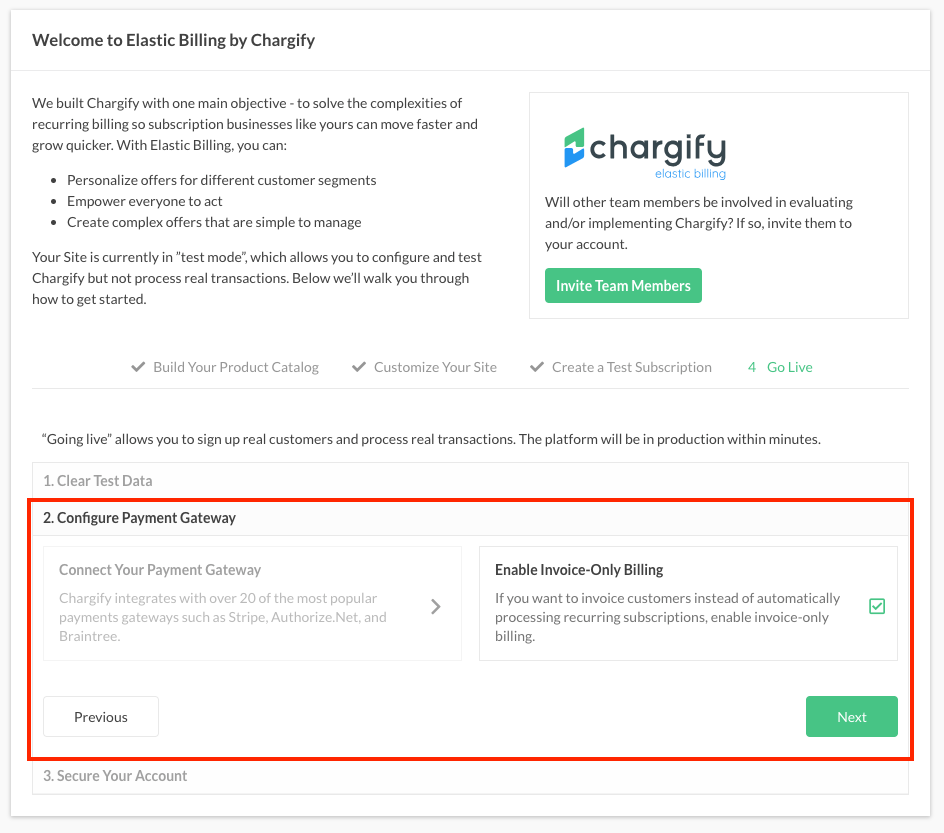
To enable live mode, do one of the following:
- Configure a live payment gateway.
- Enable invoice-only billing.
WARNING: A live site connected to a gateway that is still in test mode can't process credit cards. Switch your gateway to live mode too.
Step 6 - Secure your account
This section covers securing your webhooks and your account password before you go live.
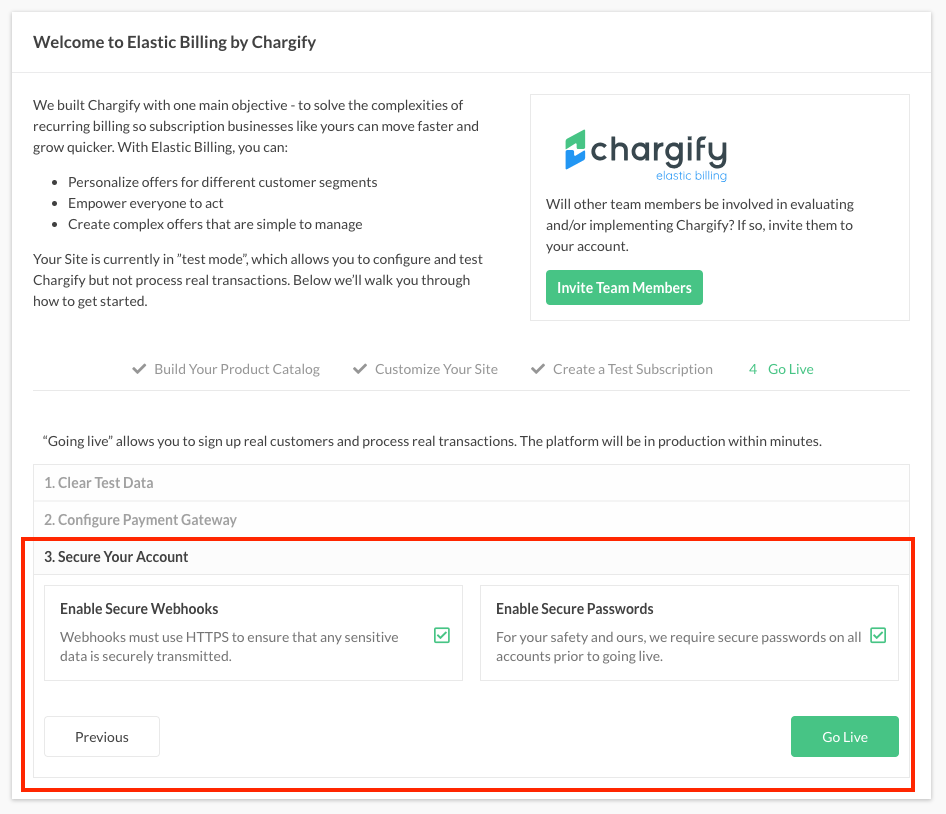
Enable secure webhooks to protect your subscribers' privacy. Every webhook endpoint must use HTTPS before the site can go live. Maxio also requires a secure password on your account.
Your site is live
Once every step above is complete, your site shows that it's live.
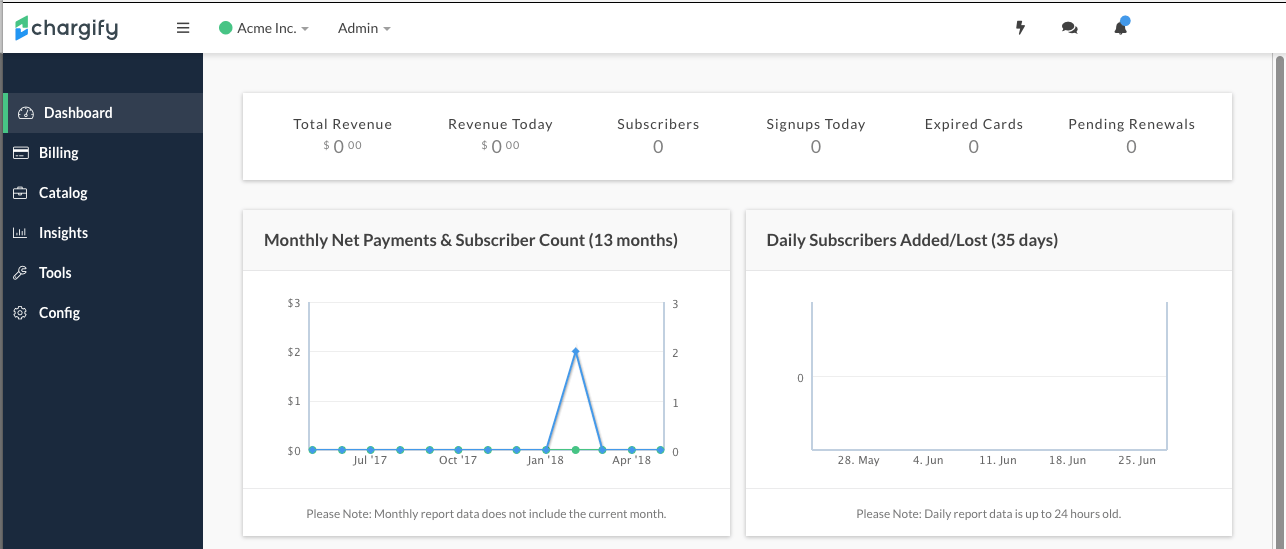
A green dot next to your site's name confirms the switch. It means every required step is complete and the site is live.
Related information
Before you go live, work through the Test Your Site Before Going Live checklist.
Still need help?
Reach out and our support team will take it from here.