
Edit Site Details
Last updated on Sep 19, 2026
The Edit Site Details form is where you set a site's name, subdomain, currency, date and time formats, time zone, reply email, and business address, and where you switch a site between test and live mode.
The edit site details form
Every one of those values sits on a single form, so a change to any of them is one save.
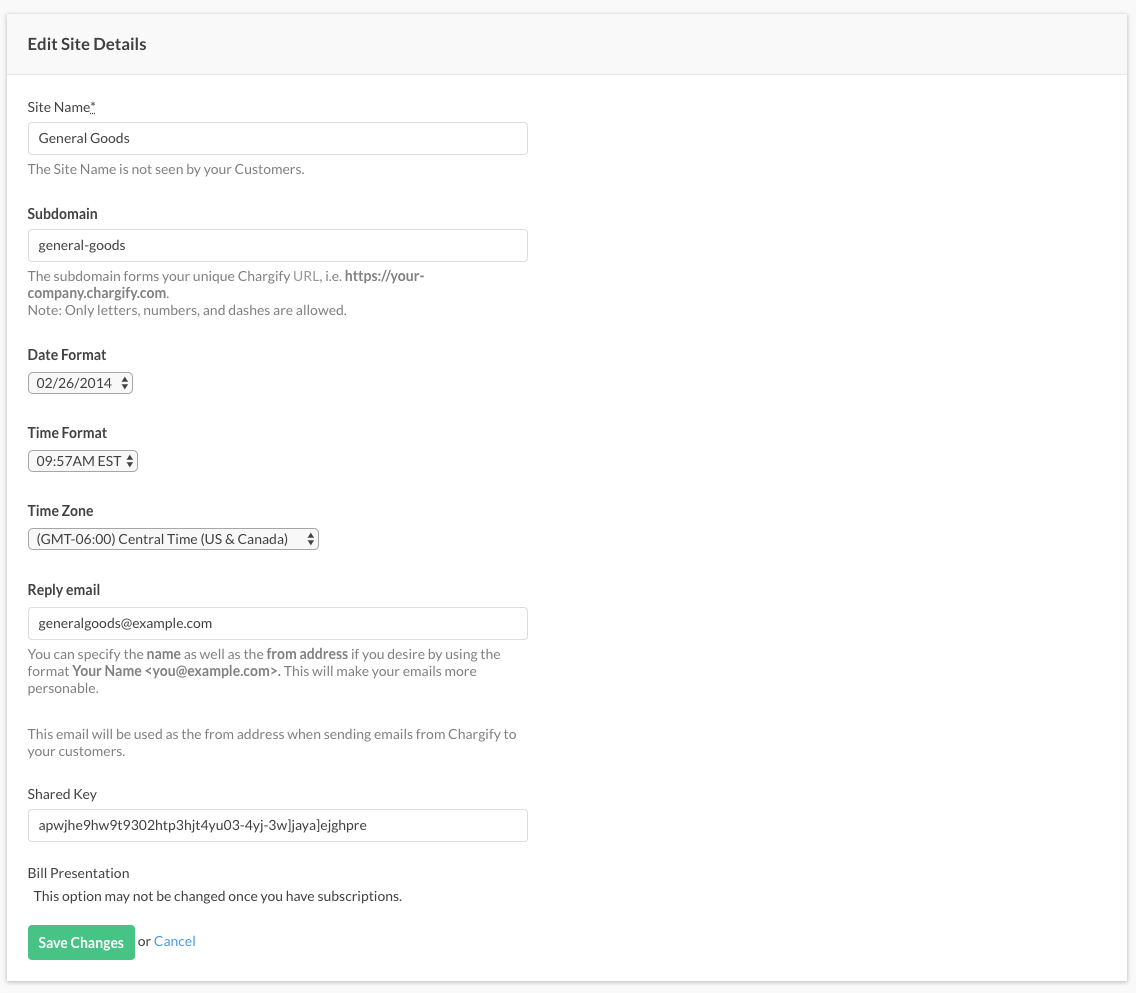
Set your site name
The site name is not seen by your customers. Use it to tell your sites apart, for example by including the currency:
- Acme Inc (GB)
- Acme Inc (SEK)
- Acme Inc (AU)
- Acme Inc (USD)
Set your subdomain
The subdomain forms your unique Advanced Billing URL, such as https://your-company.chargify.com. Only letters, numbers, and dashes are allowed, and the subdomain can't end in a dash. A subdomain that isn't unique is rejected, and you're prompted for another.
Understand the currency setting
Once you've collected any revenue, the currency for this site can't be changed. Defining any additional currency also locks it, even with zero revenue, until you remove every additional currency you've added.
Choose your date format
Choose the date format for your invoices, statements and communications.
Choose your time format
Choose the time format for your invoices, statements and communications.
Set your time zone
Select the time zone for which your site operates.
Set your reply email
This address is the from address on emails Advanced Billing sends your customers. To specify a display name as well, format it as Example Billing <billing@example.com>.
Find your shared key
For how the shared key builds an unguessable URL, see the Generate Self-Service Page URLs help article.
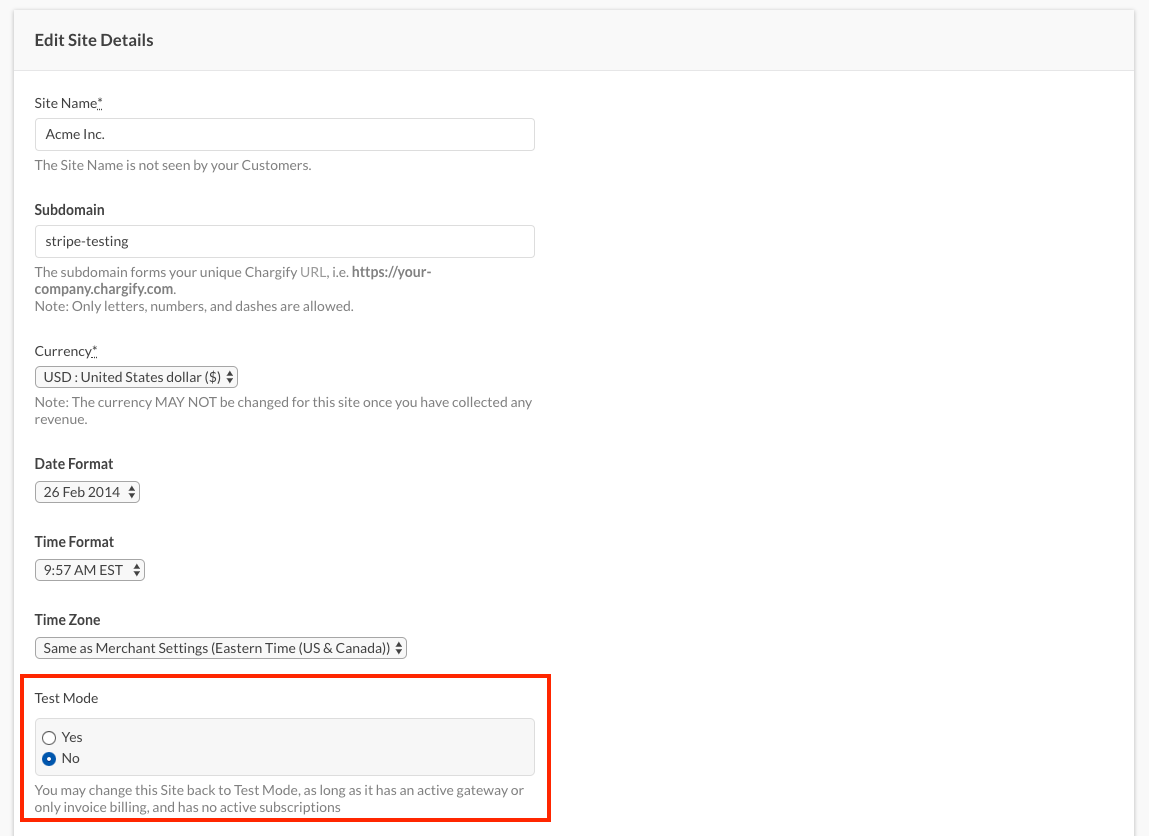
Enable test mode
To enable Test Mode, first cancel every Subscription on the live site that hasn't reached end of life: active, trialing, past due, and awaiting-signup Subscriptions all block the switch. The option to switch doesn't appear while any remain.
These options don't appear on a site already in Test Mode. You can't switch from test to live this way; use the Setup Guide instead.
Confirm your site is in Test Mode: the dot next to the Go Live status bubble should be grey, not green.


Set your site-level business address
A business name, address, or phone number entered here is used on emails sent to your customers and, on Relationship Invoicing sites, on generated invoices. These values take precedence over the ones in the merchant panel.
For Statement Based Billing sites you can only provide Company Name.
Relationship Invoicing sites can also carry an address and phone number, which appear on generated invoices.
Important: Filling in any address field commits the whole address block. Every field is then used on newly generated invoices, including the ones you left blank.
Related information
For the full list of settings a site controls beyond what's on this form, see the Understand Site Settings help article.
For how the currency setting behaves once revenue exists, see the Configure Site Currency help article.
For the full process of switching a site from test to live, see the Enable Site Live Mode help article.
Still need help?
Reach out and our support team will take it from here.